Lab 1A: Change Data Capture - CometD
Overview
In this module we will set up Change Data Capture in Salesforce so we can start capturing events that occur within the Account object.
Change Data Capture (CDC) allows you to receive near real time changes of Salesforce records, and synchronize corresponding records in an external data store. CDC publishes change events, which represent changes to Salesforce records. These changes include creation of a new record, updates to an existing record, deletion of a record, and undeletion of a record.
Step 1: Setup CDC in Salesforce
In your Salesforce Org please navigate to the Setup. Once logged in you will find the Setup Icon on the right top.
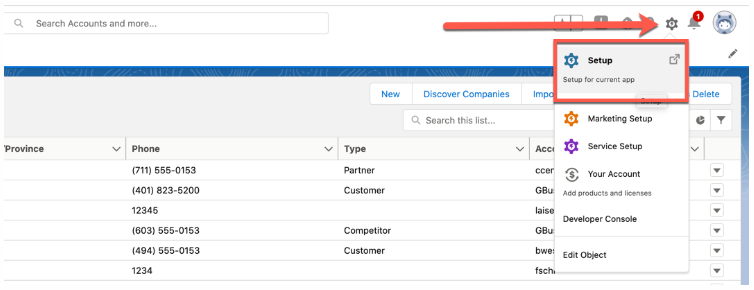
Within the Setup, use the Quick Find and search for Change Data Capture.
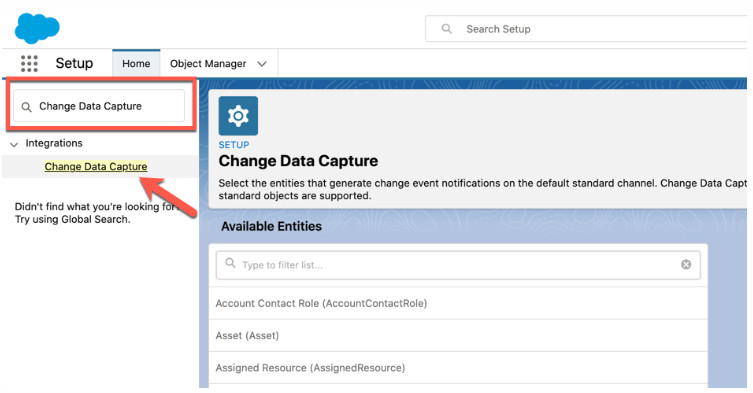
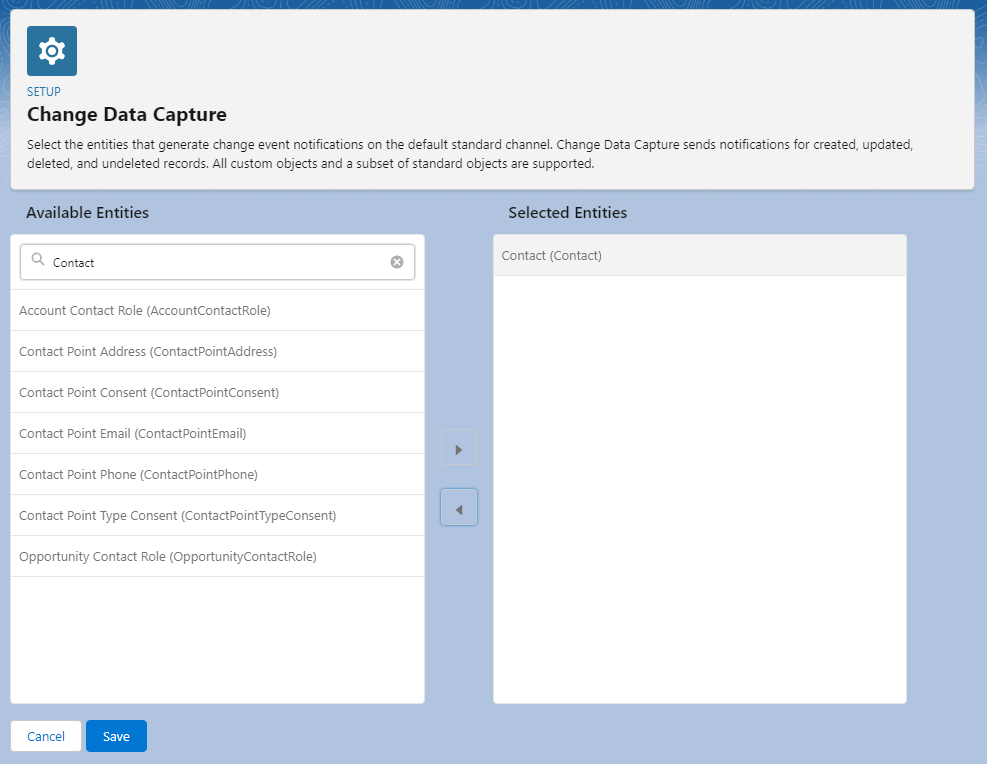
Within the Change Data Capture Setup you will find the respective Objects/Entities in the left box.
Search for the Contact object and use the arrow button to move these to the Selected Entities in the right box and click Save.
Great! Lets move to the next step.
Step 2: Creating the Project
Anypoint Studio
Anypoint Studio is MuleSoft’s Eclipse-based integration development environment for designing and testing Mule applications.
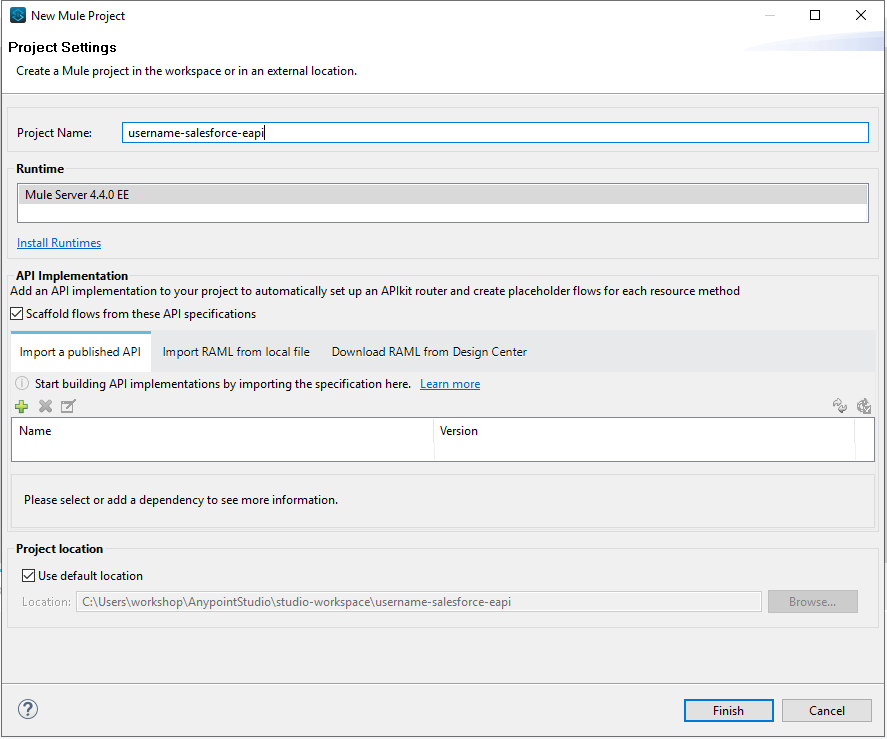
Now let’s go build out our Mule Project! First we need to create a new Mule Project via File → New → Mule Project
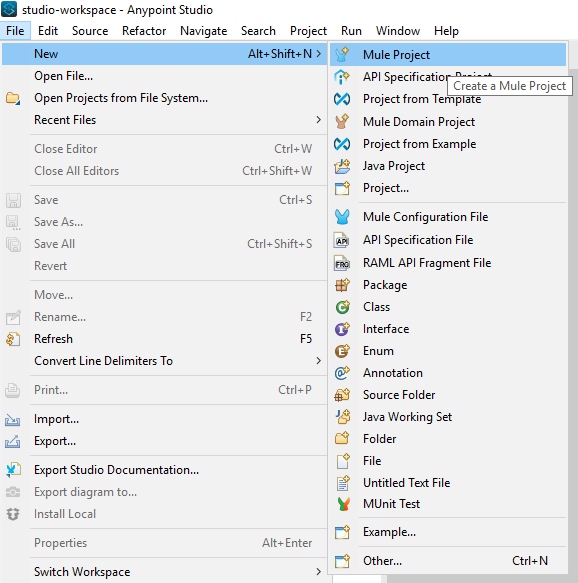
Please enter your Projects name with your personal name such as <username>-salesforce-eapi and click Finish.
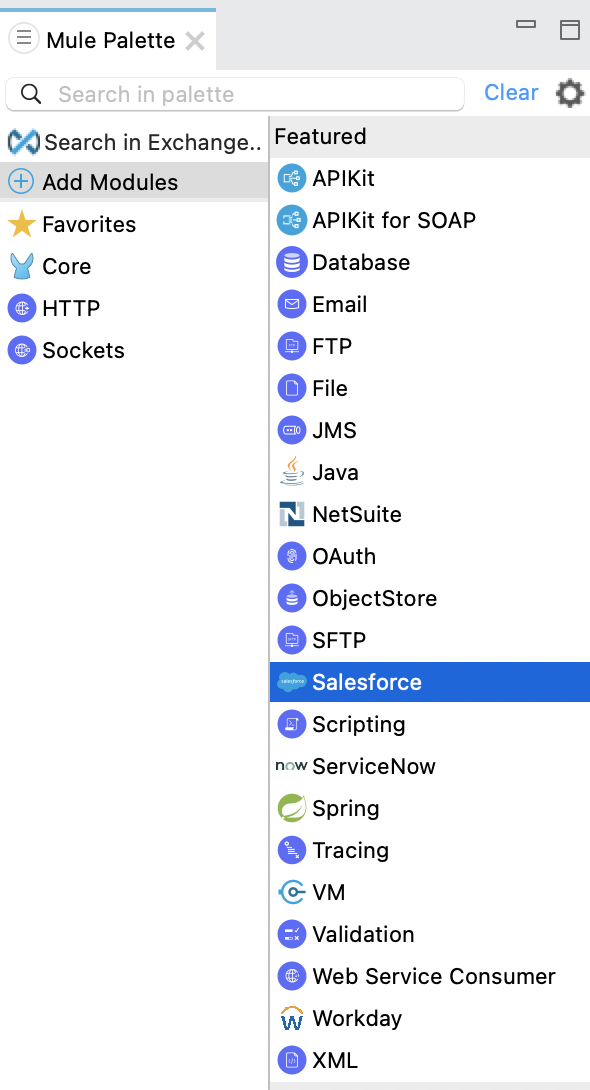
Next what we want to do is add our Salesforce Connector into our Mule Palette. Click Add Moduleh in Mule Palette, find the Salesforce Connector and drag it to the left to add the connector to the project.
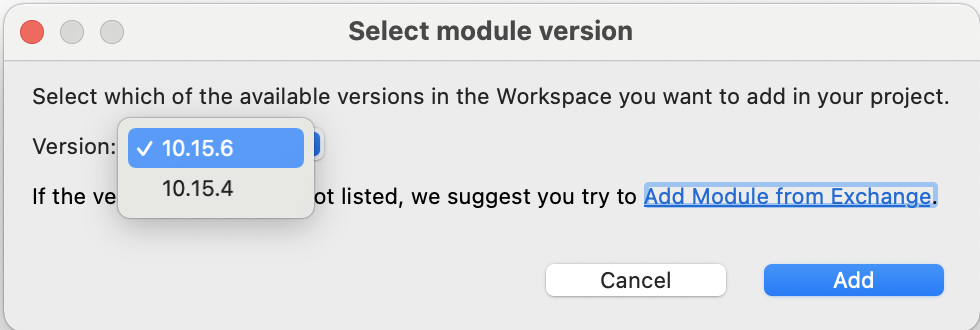
A pop up window should appear asking you to select the module verions. Select the latest version by clicking the drop down and then click Add.
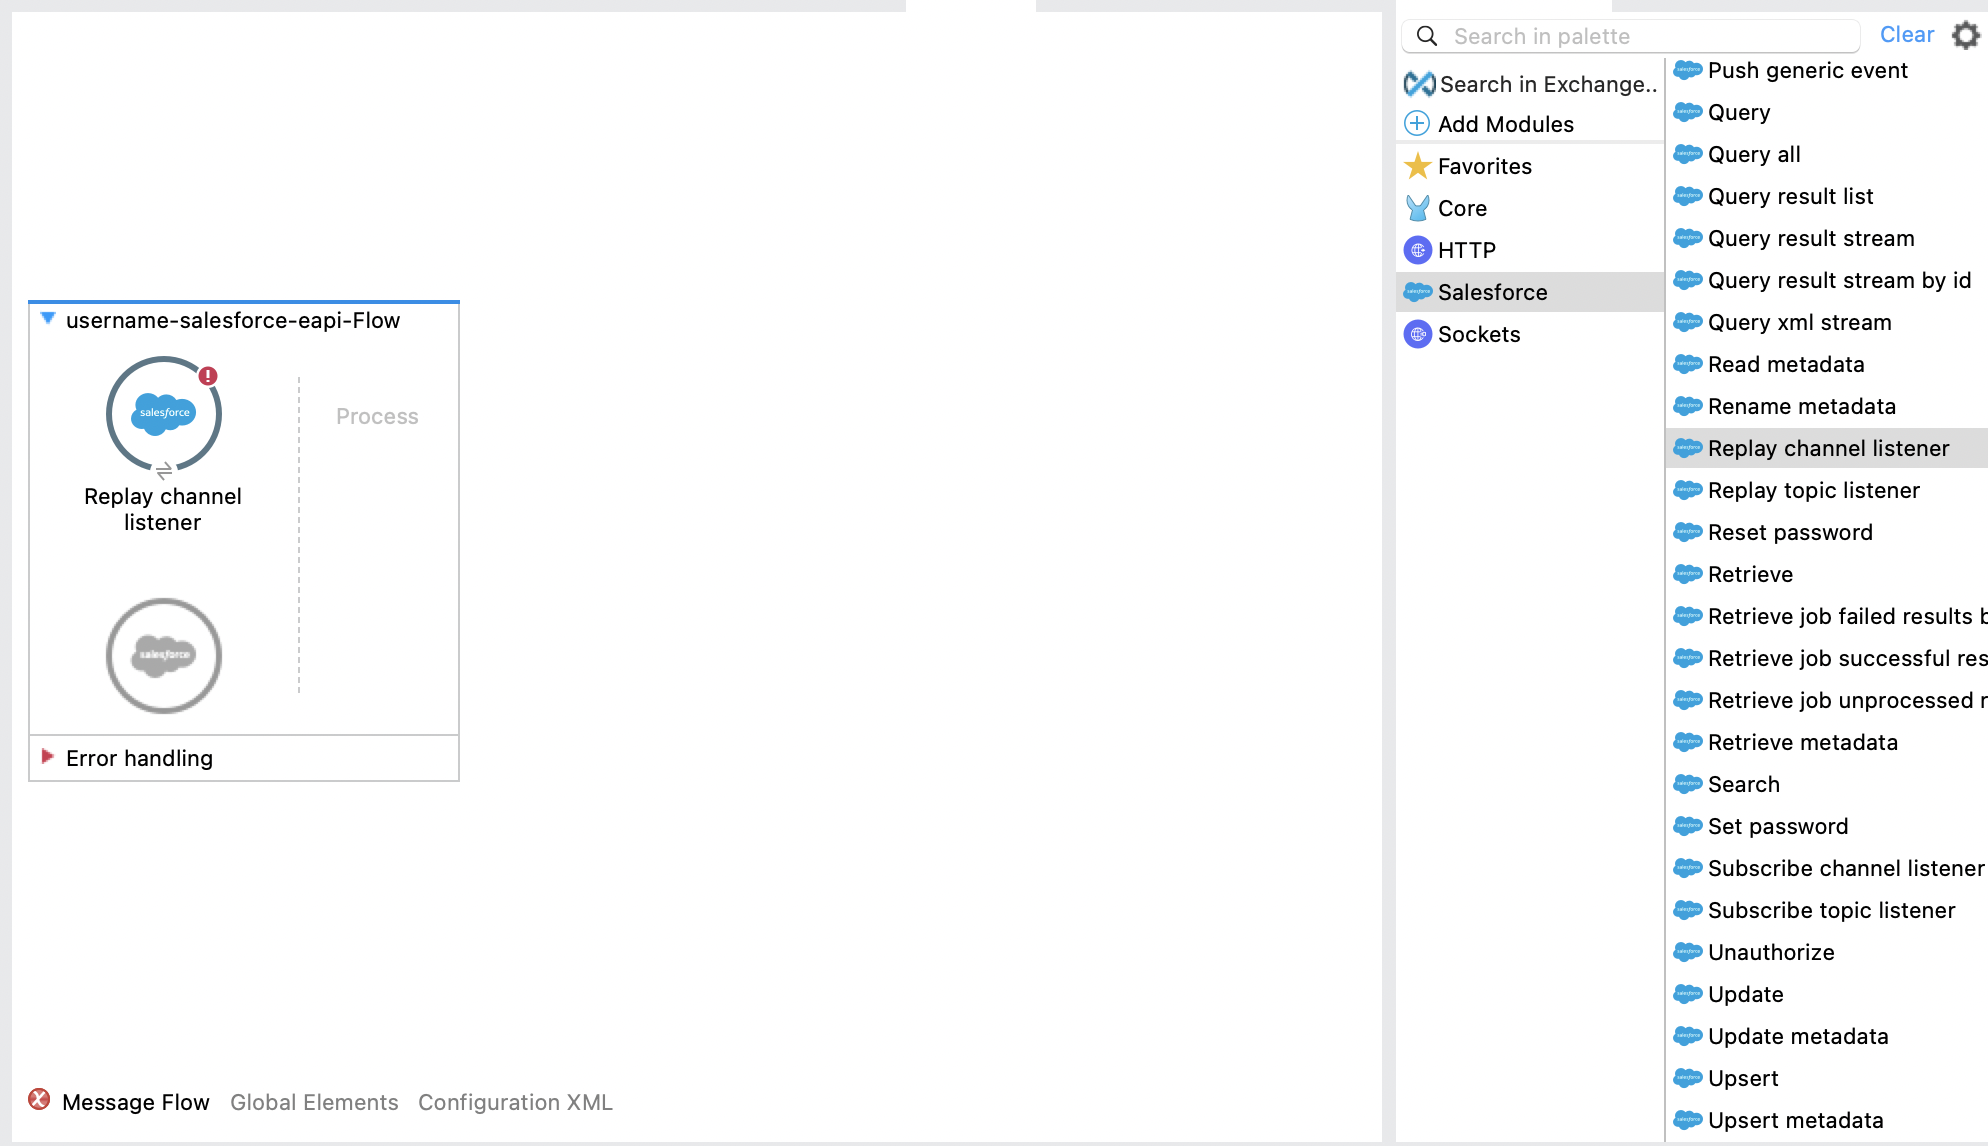
Next find the Replay Channel Listener connector and drag and drop it on to the canvas.
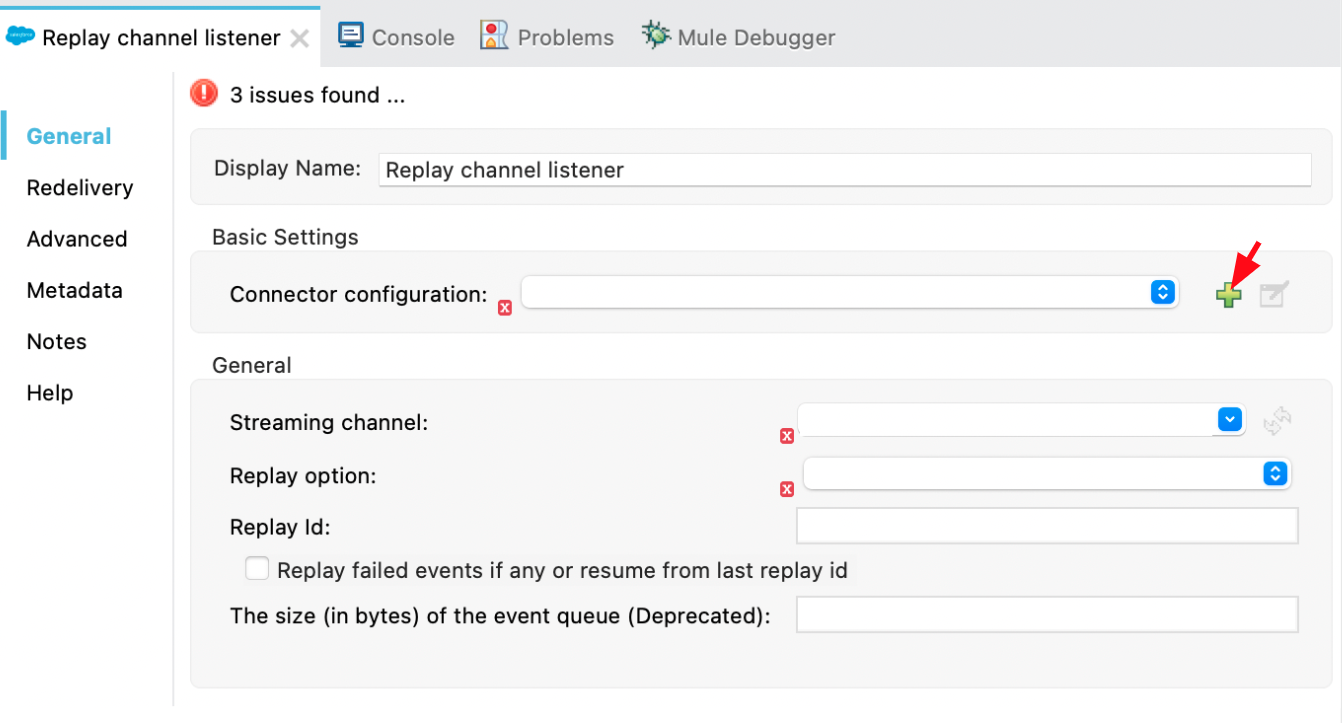
In the next step we will need to add our Salesforce Connector Configuration. Click once on the Replay Channel Listener element and you will see the configuration bar at the bottom of Anypoint Studio. Hit the green + button in order to create a new Configuration and enter your Salesforce Username and Password.
If you need a security token please refer to Step 2 in Mod 0
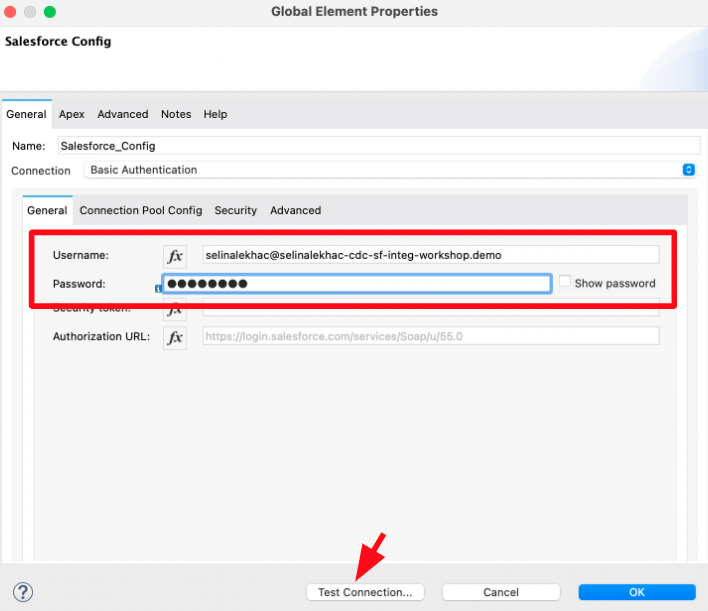
Test your connection by clicking Test Connection button and then click OK once successful and OK once more.
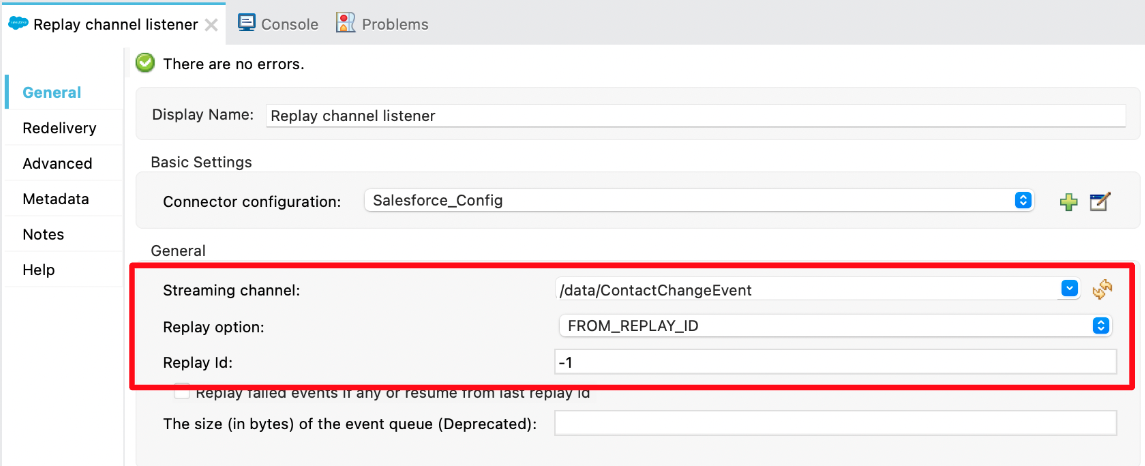
Now that the Connector Configuration is added, Anypoint Studio will crawl Salesforce for available Streaming Channel names. Please use the drop down box in order to select the Contact Change Event or type in /data/ContactChangeEvent. For replay options please select the FROM_REPLAY_ID from the drop down and for Replay Id: field type in -1.
Next let’s add a logger from the Mule Palette to our flow. Click Favourites in the Mule Palette and then drag and drop the Logger into the Process section of our flow.
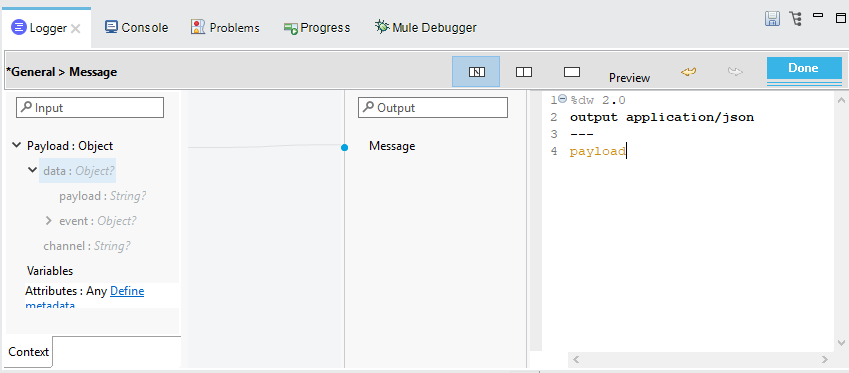
Click the Logger once, followed by the little fx and then the 6 dots on the right hand side. We will be configuring what payload is being logged.
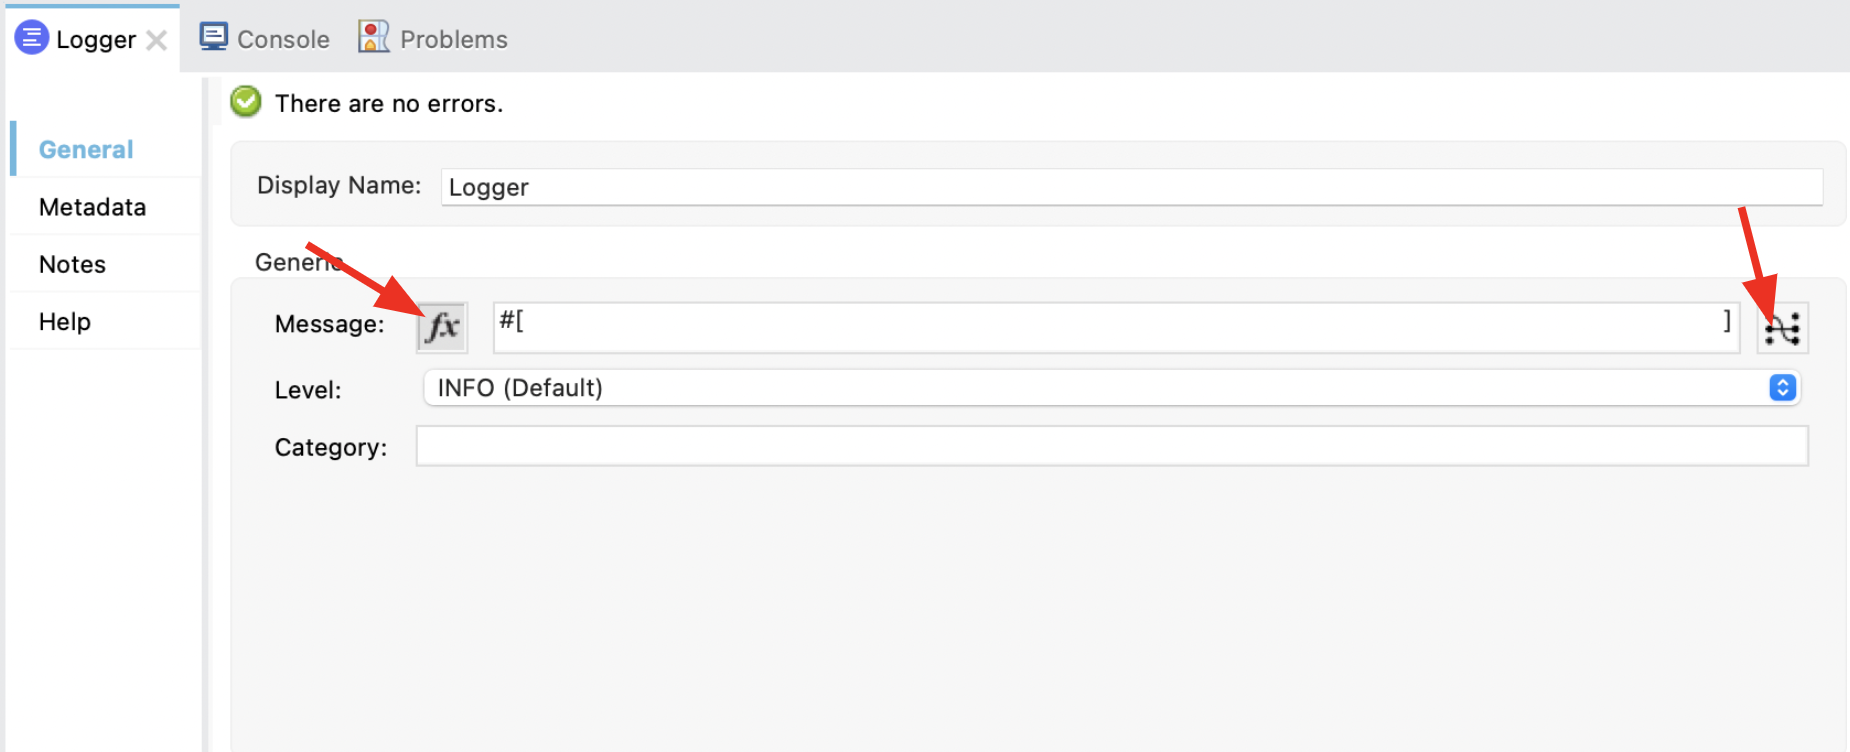
In the editor on the right hand side type in the following :
%dw 2.0
output application/json
---
payload
Changing the output to json will help the logged messages be more readable. We are also able to view the payload structure on the left hand side to correctly navigate to the changed data.
To complete the second lab we will now Save our project. Click the floppy disk icon on the top left to save your project.
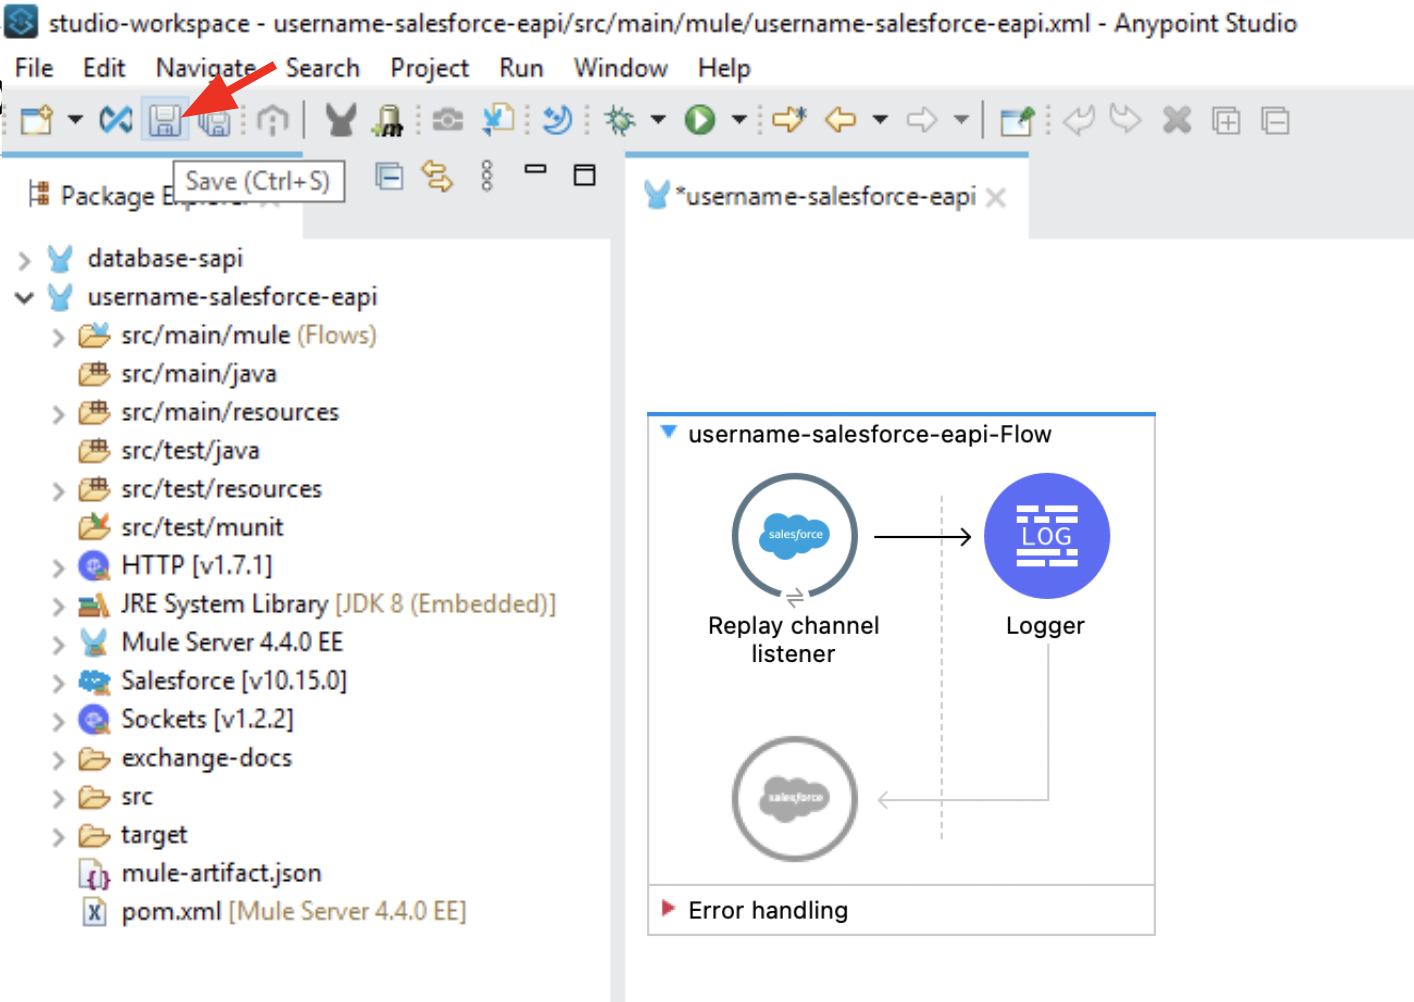
Well Done! Now on to the last step where we learn how to deploy and test.
Step 3: Deploy and Test
Running and Testing the Application Locally
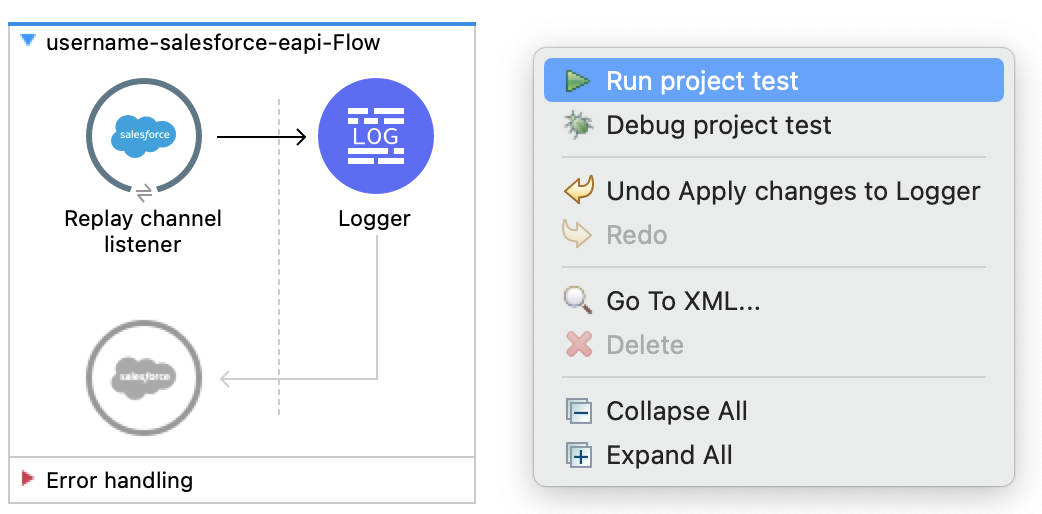
Let’s locally kick start our application! To do this simply right click somewhere in the white space of your working canvas and select the first option Run Project Test.
The Anypoint Studio Console will now show up, once the Application is started successfully you should see the following in the console with status DEPLOYED.
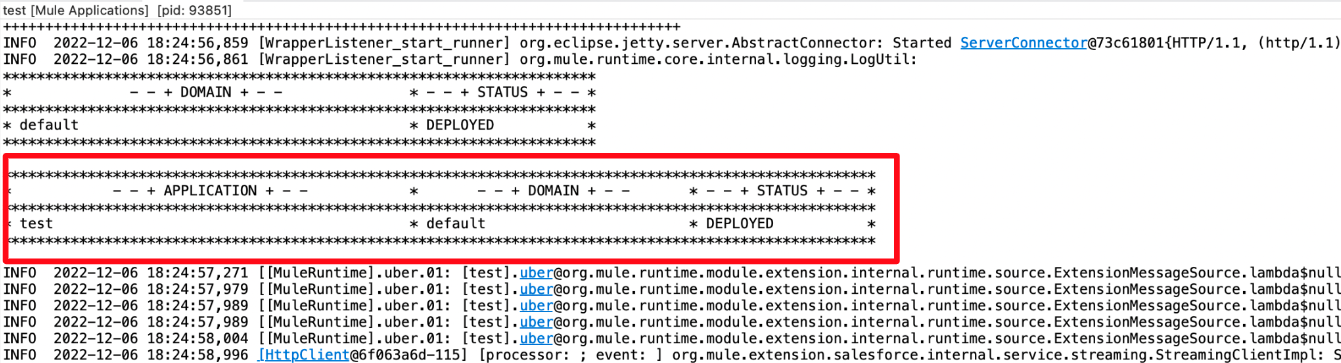
Now that our app has successfully deployed let’s test out our flow. In order to see events in our Console, let’s move to Salesforce and make a change on an existing Contact.
In Salesforce navigate to the Contact object.
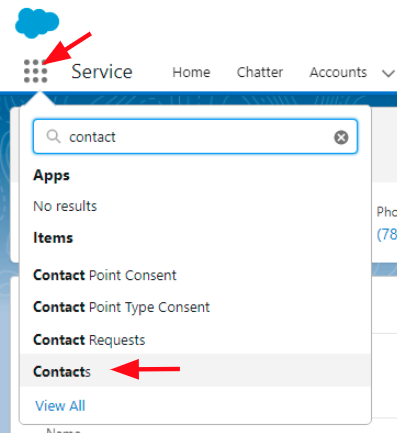
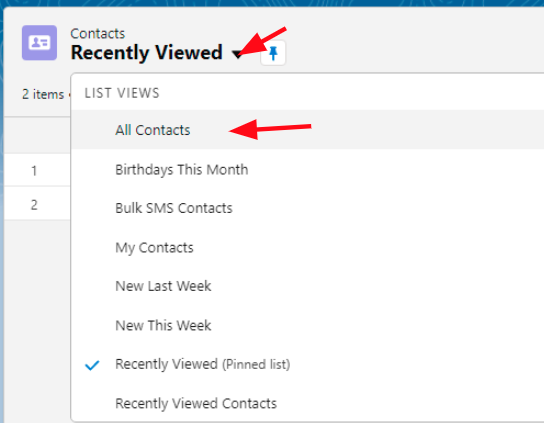
Within the Contacts, switch the view to All Contacts in order to see example Contacts that come with your Developer Org.
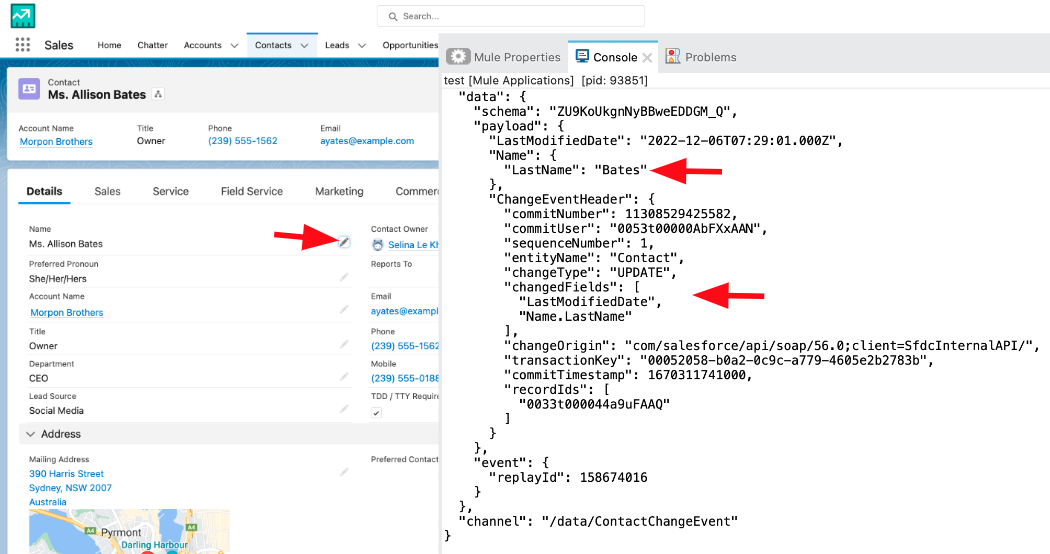
Open one random Contact and apply a change to any field. For instance adjust the Contacts Name and hit Save.
We recommend to have your Salesforce Org and Anypoint studio Side by side, so you can see the logging in real time with Anypoint Studio
Congratulations!!! You have successfully connected to Change Data Capture and are now able to view all the events that occur to Salesforce Objects.