Lab 1: Updating master data with Salesforce Bulk API
Overview
As you integrate Salesforce with other systems you will come across use cases such as:
-
Initial loads of data, for instance during migrations or to prepare the Salesforce objects for a new release
-
Regular updates of parametric or master data such as currency conversion tables or product attributes and prices.
-
Export, and deletion of a selection of data for the purpose of archiving
In this lab we will have a look at how Mulesoft leverages Salesforce’s Bulk API to handle changes with large amounts of data.
Our goal is to create or update ("upsert") the customers in Salesforce based on the contents of a CSV file.
Step 1: Download the CSV file
Download the CSV file with the customers here: Sample Accounts
Customers will map to Salesforce’s Account object.
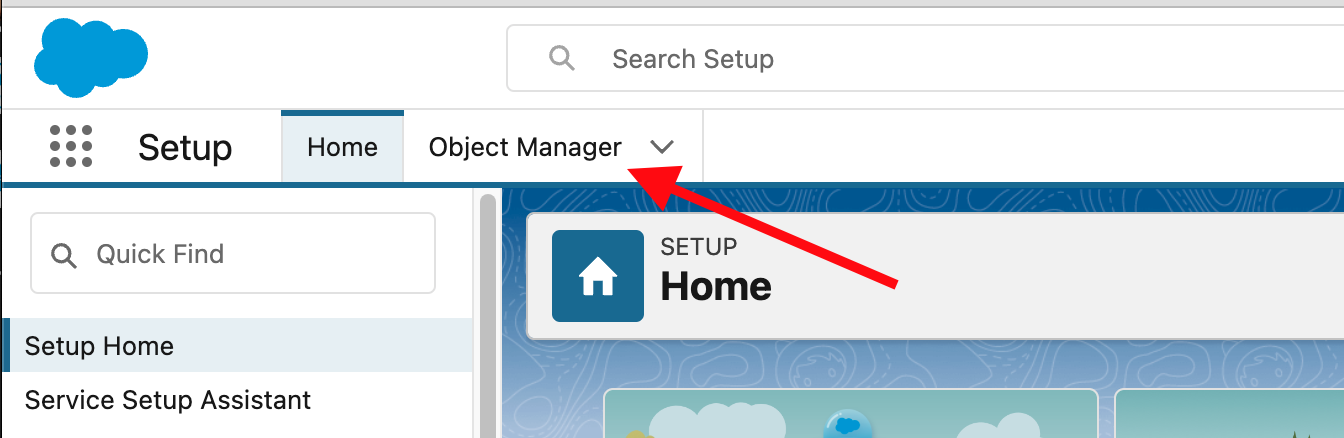
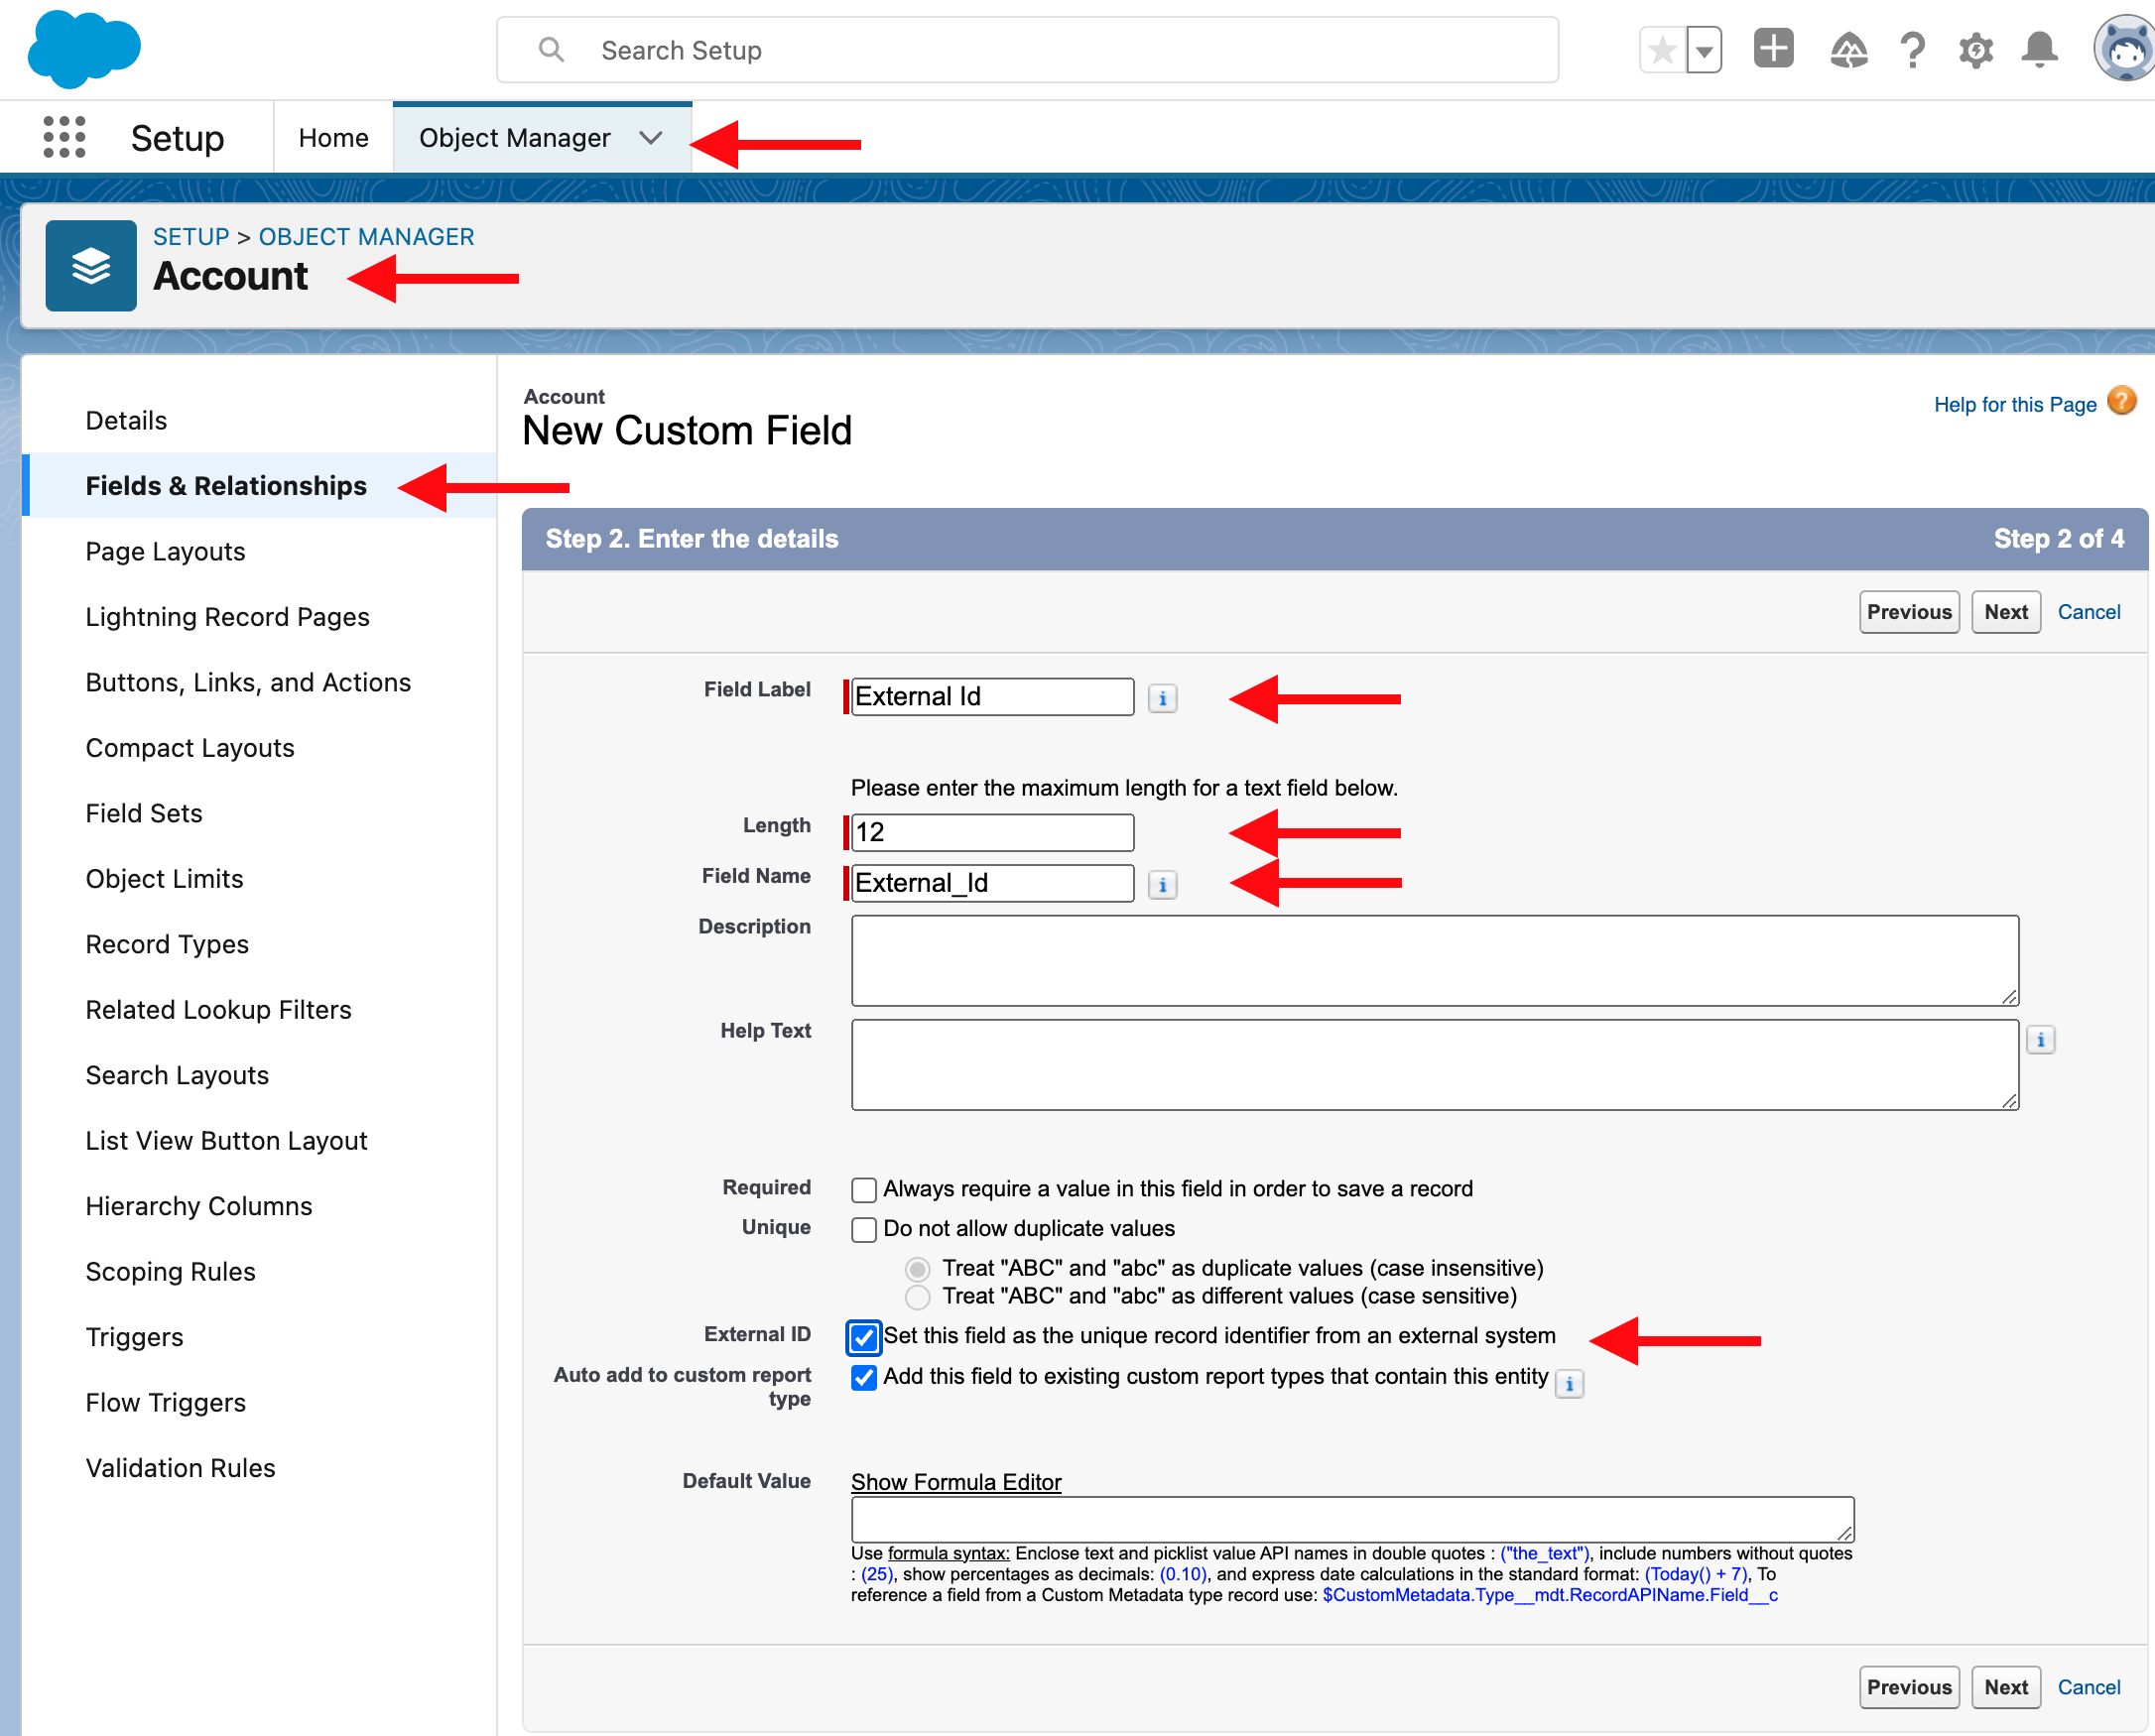
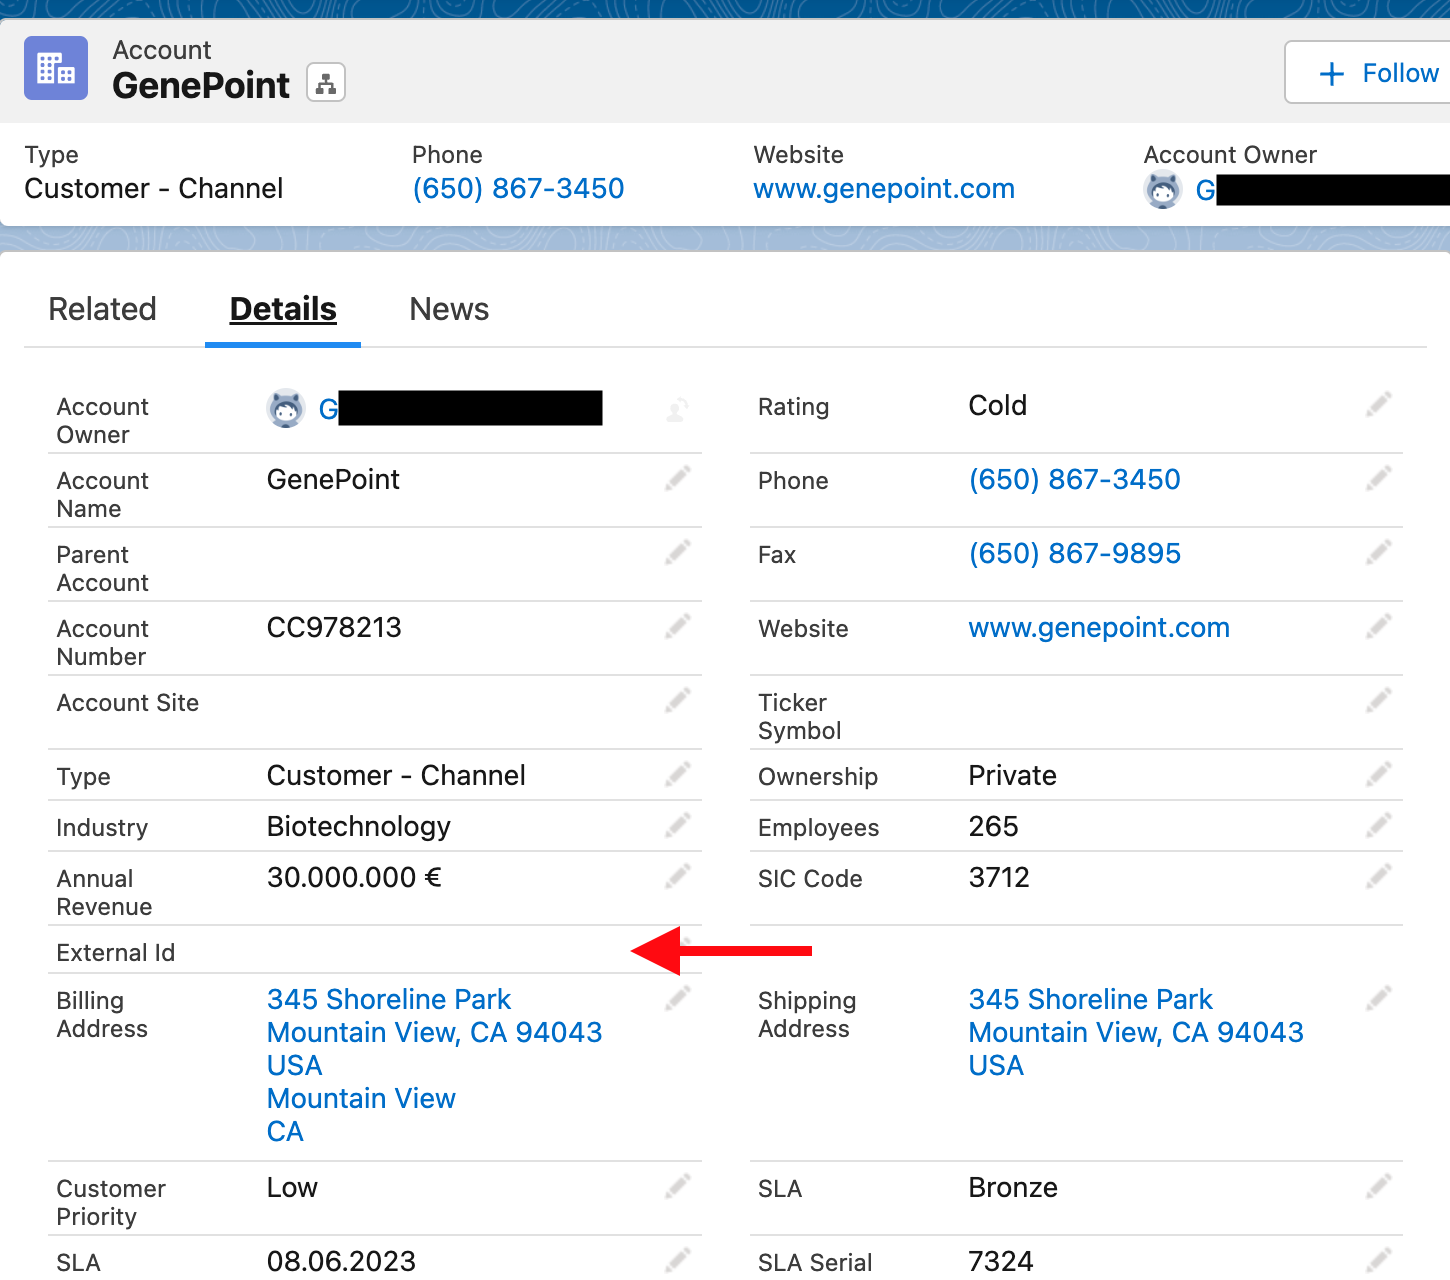
Step 2: Add the External Id to Accounts
Salesforce APIs support the UPSERT operation, which basically creates a new record if the key is not present in the object, or updates the record if the key was found.
UPSERT requries an external Id, which we will create in these steps.

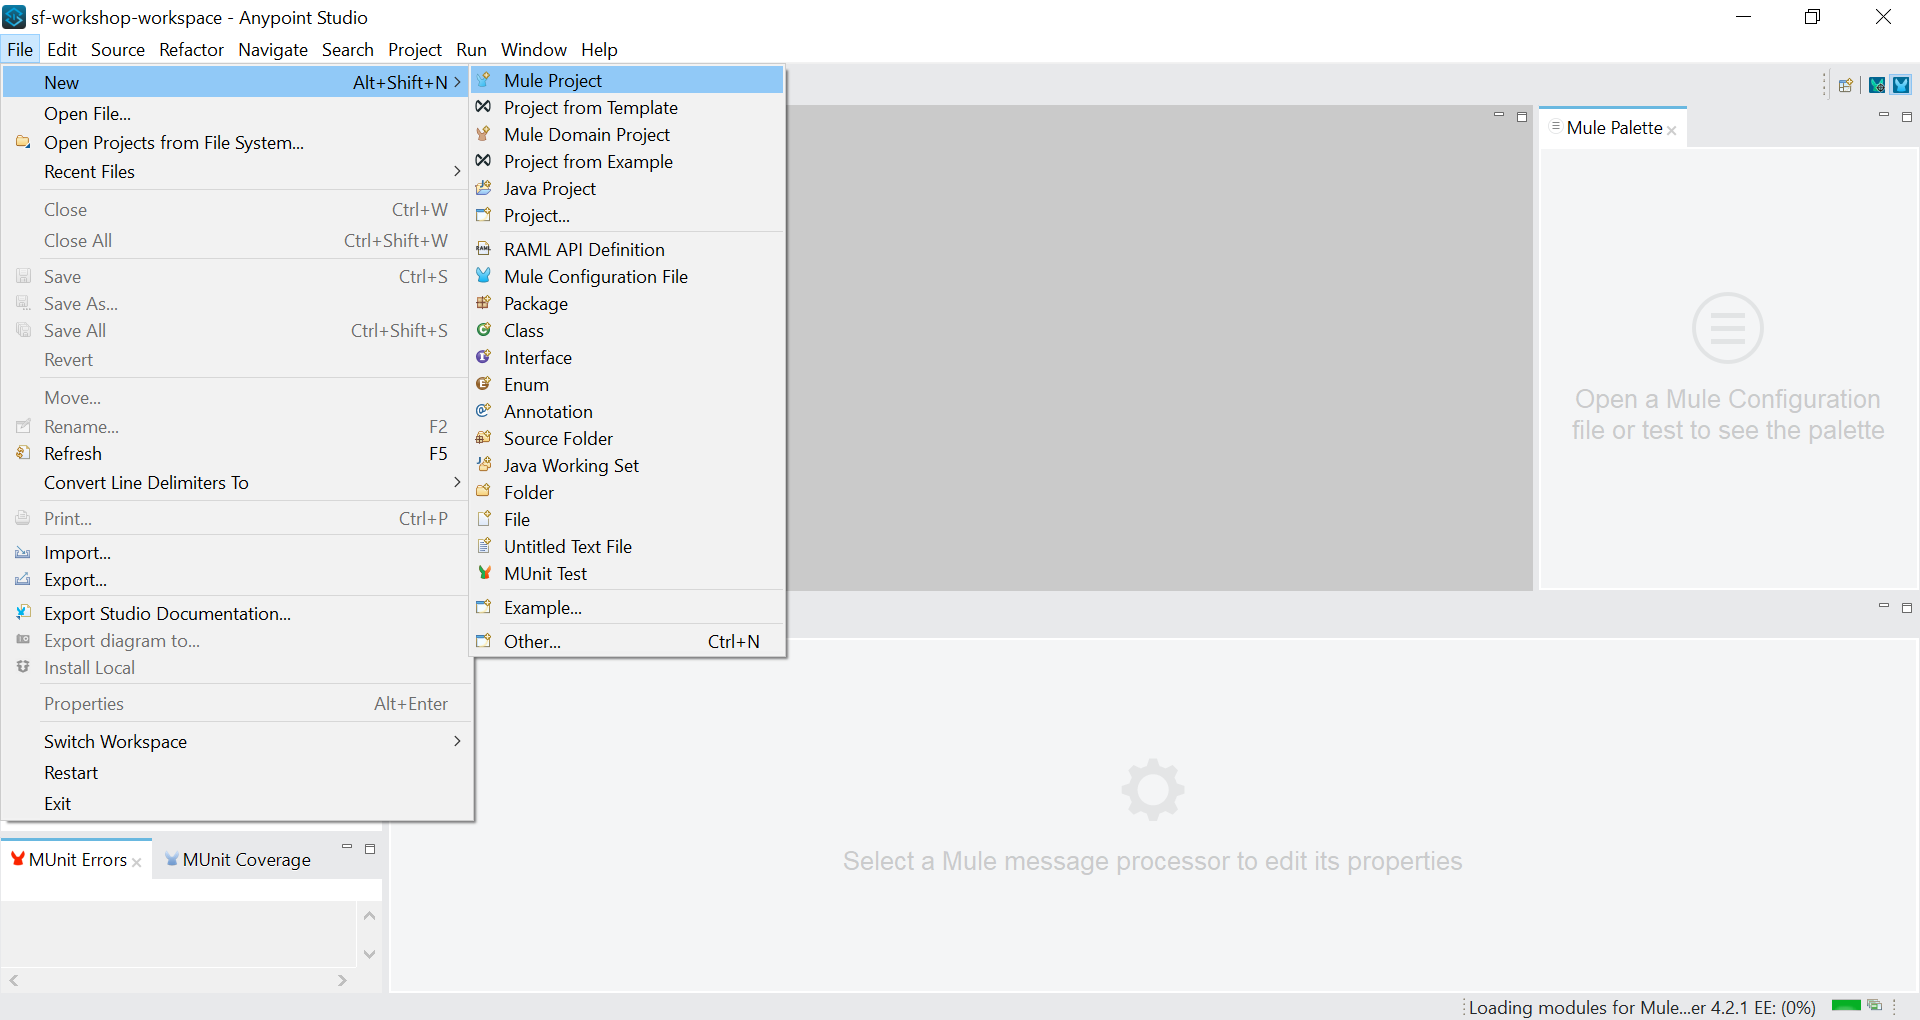
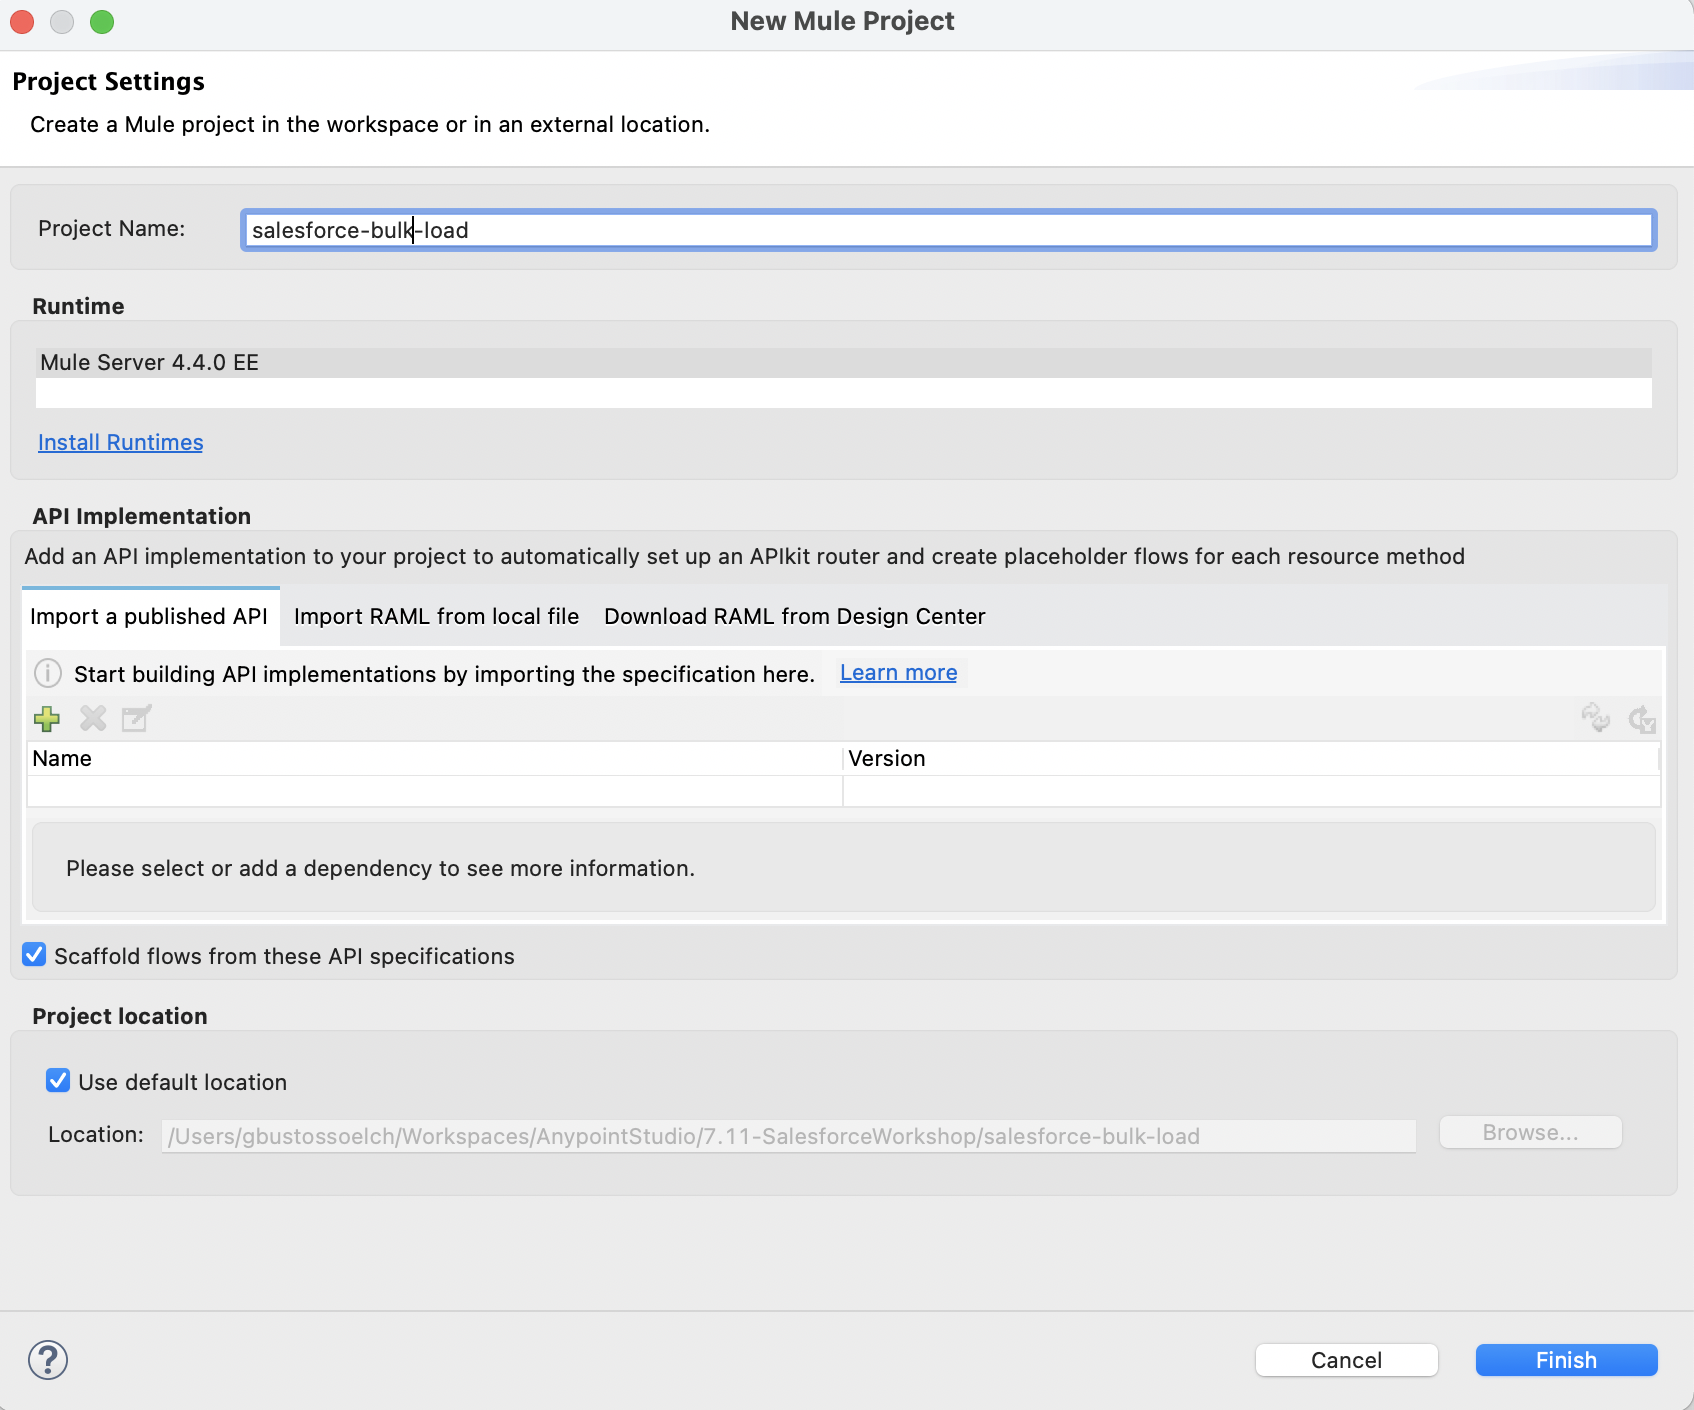
Step 3: Create a new empty Mule Project
In this step we will create a new Mule application in Anypoint Studio from scratch. It implements the logic of a batch API.
Step 3.1: If this is your first Anypoint Studio project
-
Start Anypoint Studio from the desktop icon.

-
In the Workspace Launcher, use the default workspace directory location.
-
In the pop-up window click on Continue to Studio
-
You are now inside Anypoint Studio. First, let’s sync your Anypoint Platform account with Anypoint Studio. Go to Window → Preferences (for windows) or Anypoint Studio → Preference (for Mac) to open the Anypoint Studio Preferences.
-
Then go to Anypoint Studio → Authentication. If you see your account name there, skip to step 7. If not, click the Add button.

-
Login to your Anypoint Platform workshop account. Then click Apply and Close.

Step 4: Add the Saleforce Connector and the File Connector modules
-
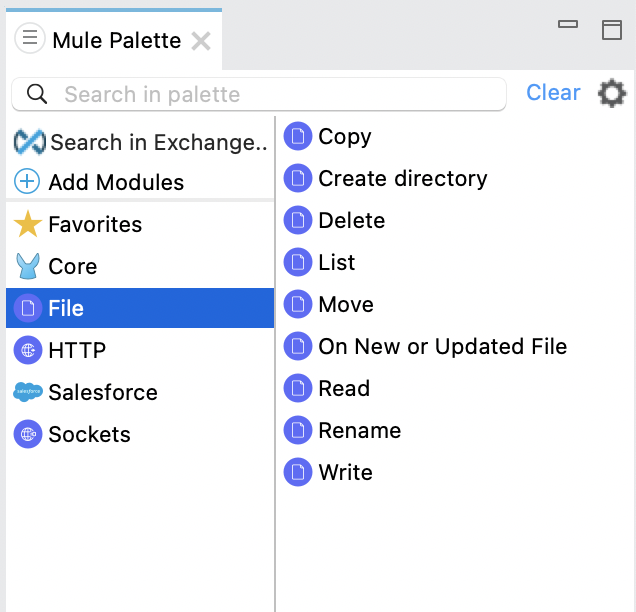
Navigate to the Mule Palette in the upper right
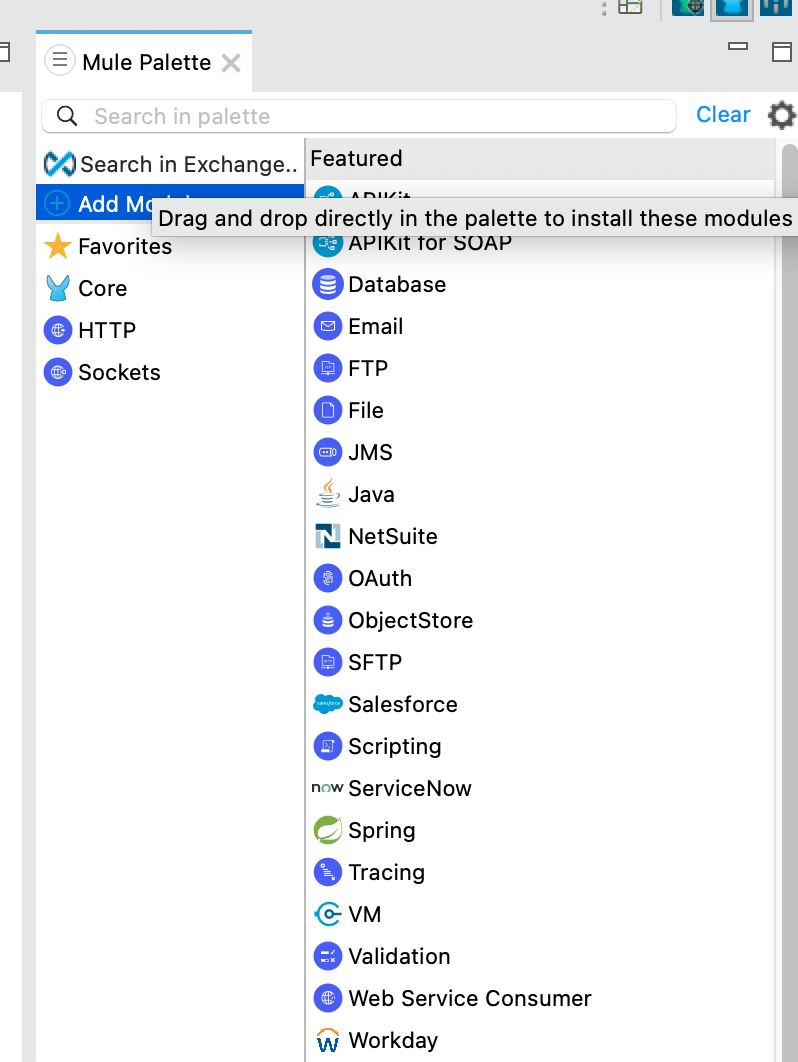
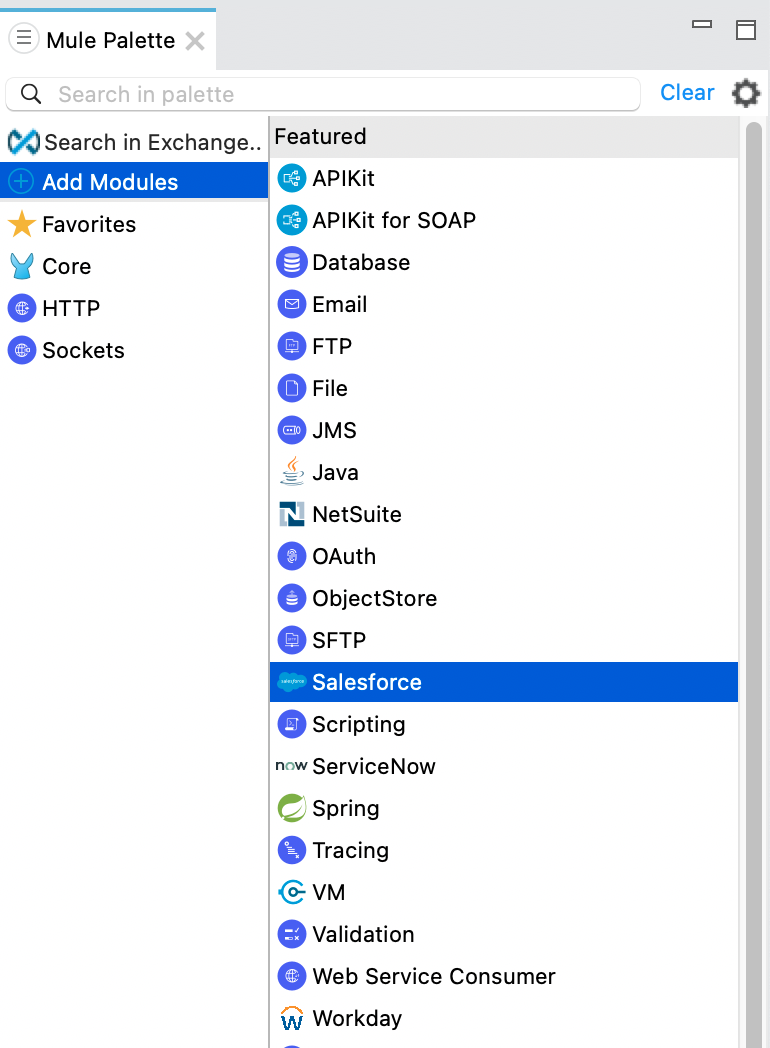
Add the Salesforce Connector Module, by dragging it from the Modules Palette from the right onto the left:
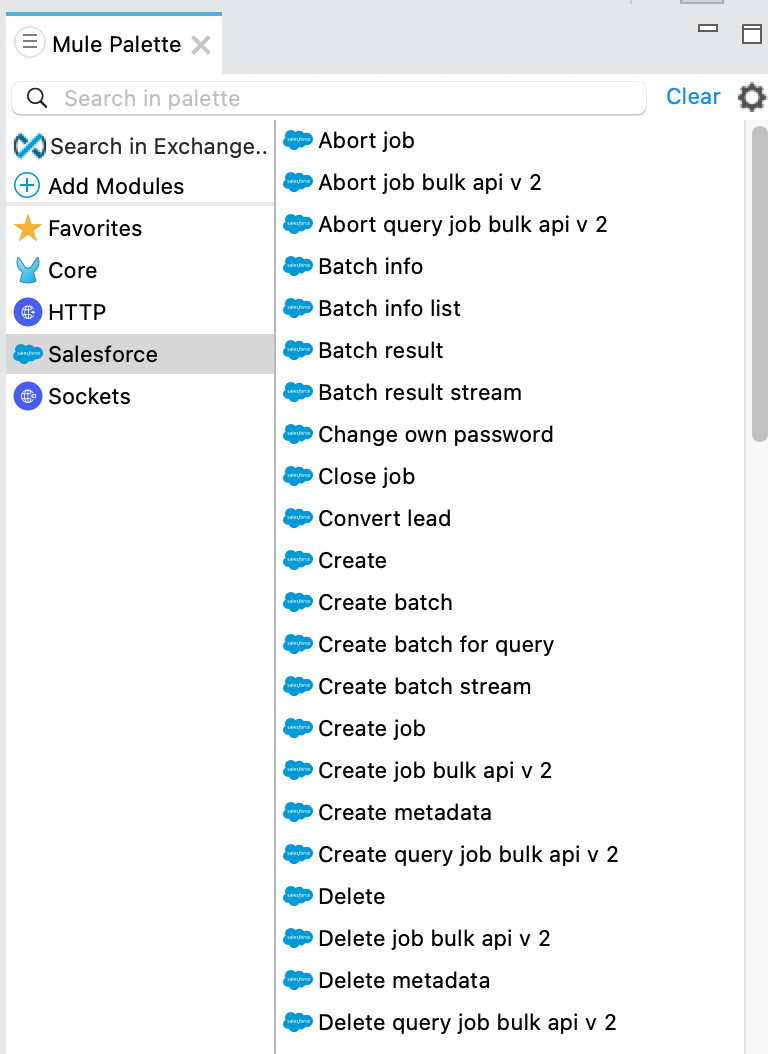
Once added you can explore the different invocations available in the Salesforce Connector for Bulk API V2. In this lab we will focus on the upsert of records using the Bulk API V2.
-
Because we will be upserting data contained in a file, we need to add the File module to read it. Repeat the previous steps to add the File Module. The Mule Palette then looks like this
Step 5: Configure the File Connector
-
Add the File Module’s On New or Updated File to the project by drag-and-dropping it
-
Configure its properties as follows:
-
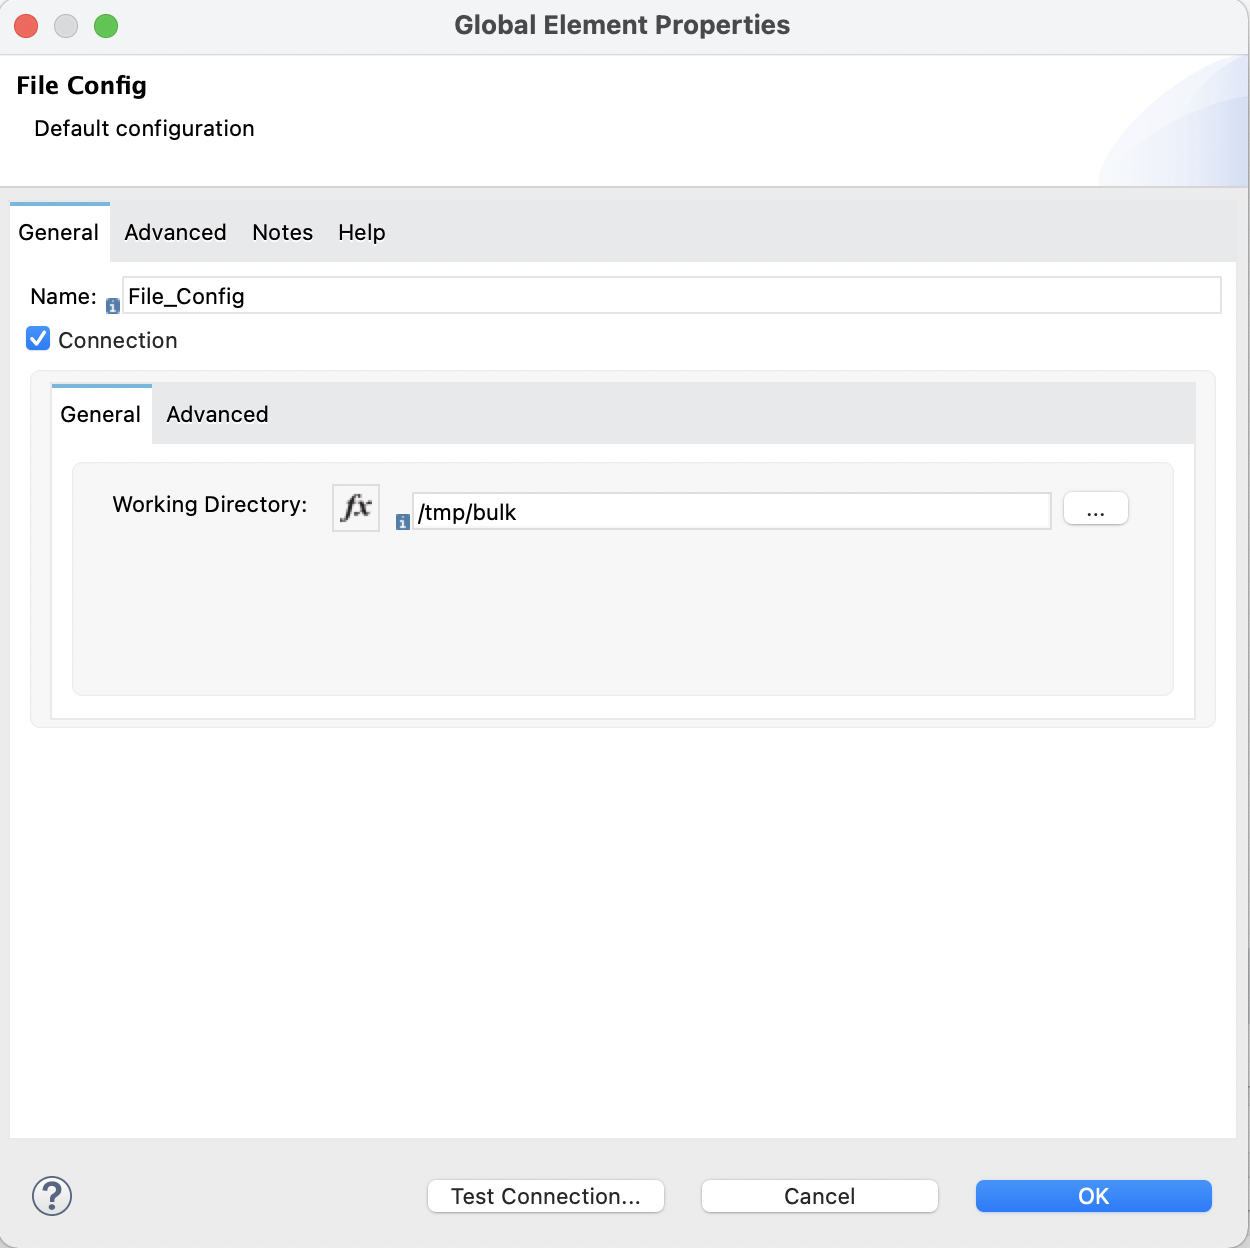
Connector Configuration:
-
On your laptop create an empty directory that serves as the home for the files being processed. For example, you could define it to be /tmp/bulk on a Mac. Under this directory create these subdirectories:
-
in
-
out
-
-
Set the path in the Connector Properties to /tmp/bulk
-
-
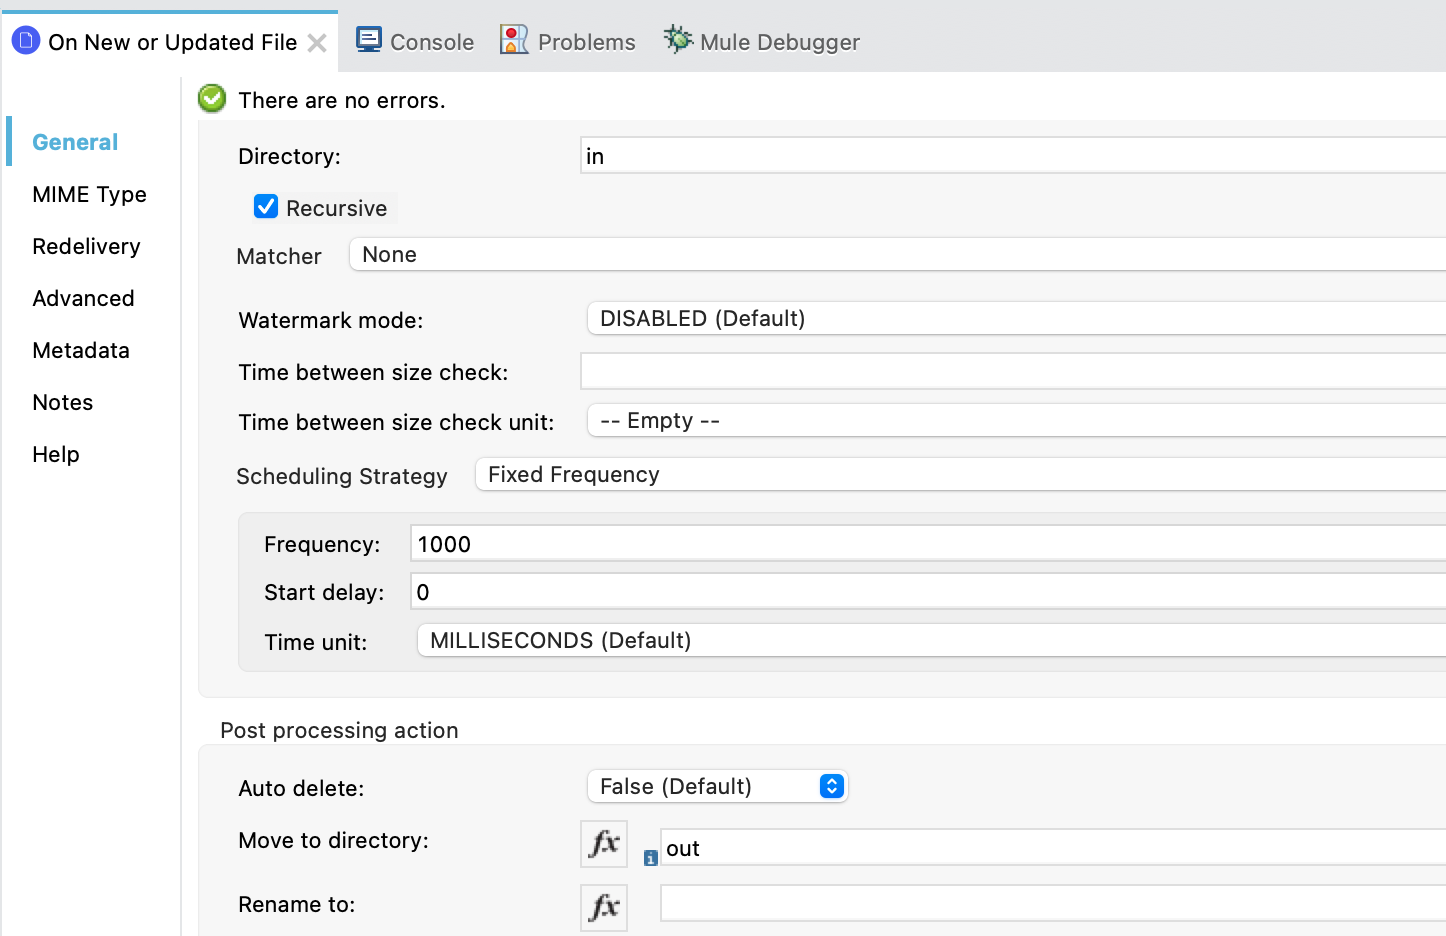
Directory: Is a directory that will be polled for new files. The files will be processed as soon as they are placed on that directory. Set this value to in
-
Scheduling Strategy: To define the polling on the directory to once per second, set it to Fixed Frequency with these parameters:
-
Frequency 1000
-
Start delay: 0
-
Time unit: MILLISECONDS
-
-
Move to directory: set it to out to specify the directory the file is moved to, after reading finishes. Set this value to out
-
Step 6: Configure the Salesforce Connector
-
Add the Salesforce Create job bulk api v2 to the project
-
Let’s now configure the invocation:
-
Connector configuration: add the authentication credentials to the Connector Configuration
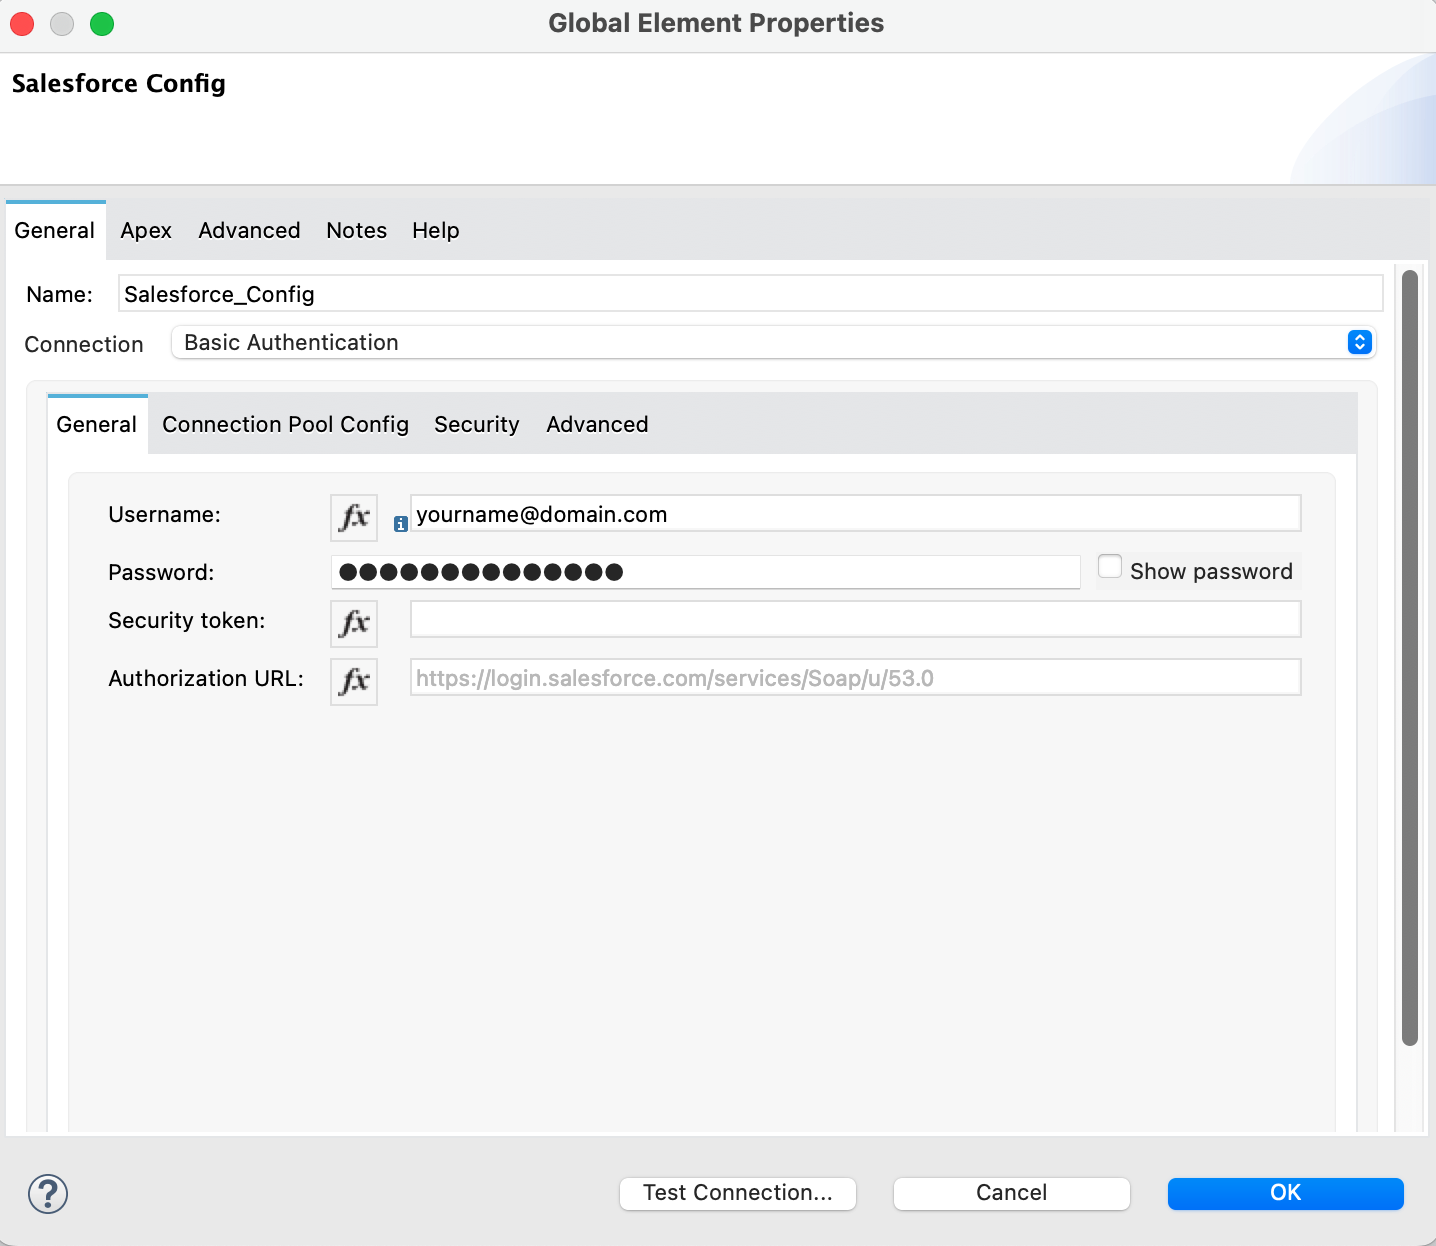
Provide a Security Token if your Salesforce Org requires it.
-
-
Once the connection has been configured and tested, you can now configure the Bulk API invocation. The parameters are:
-
Object type: Account
-
Operation: Upsert
-
External id field name: External_Id__c
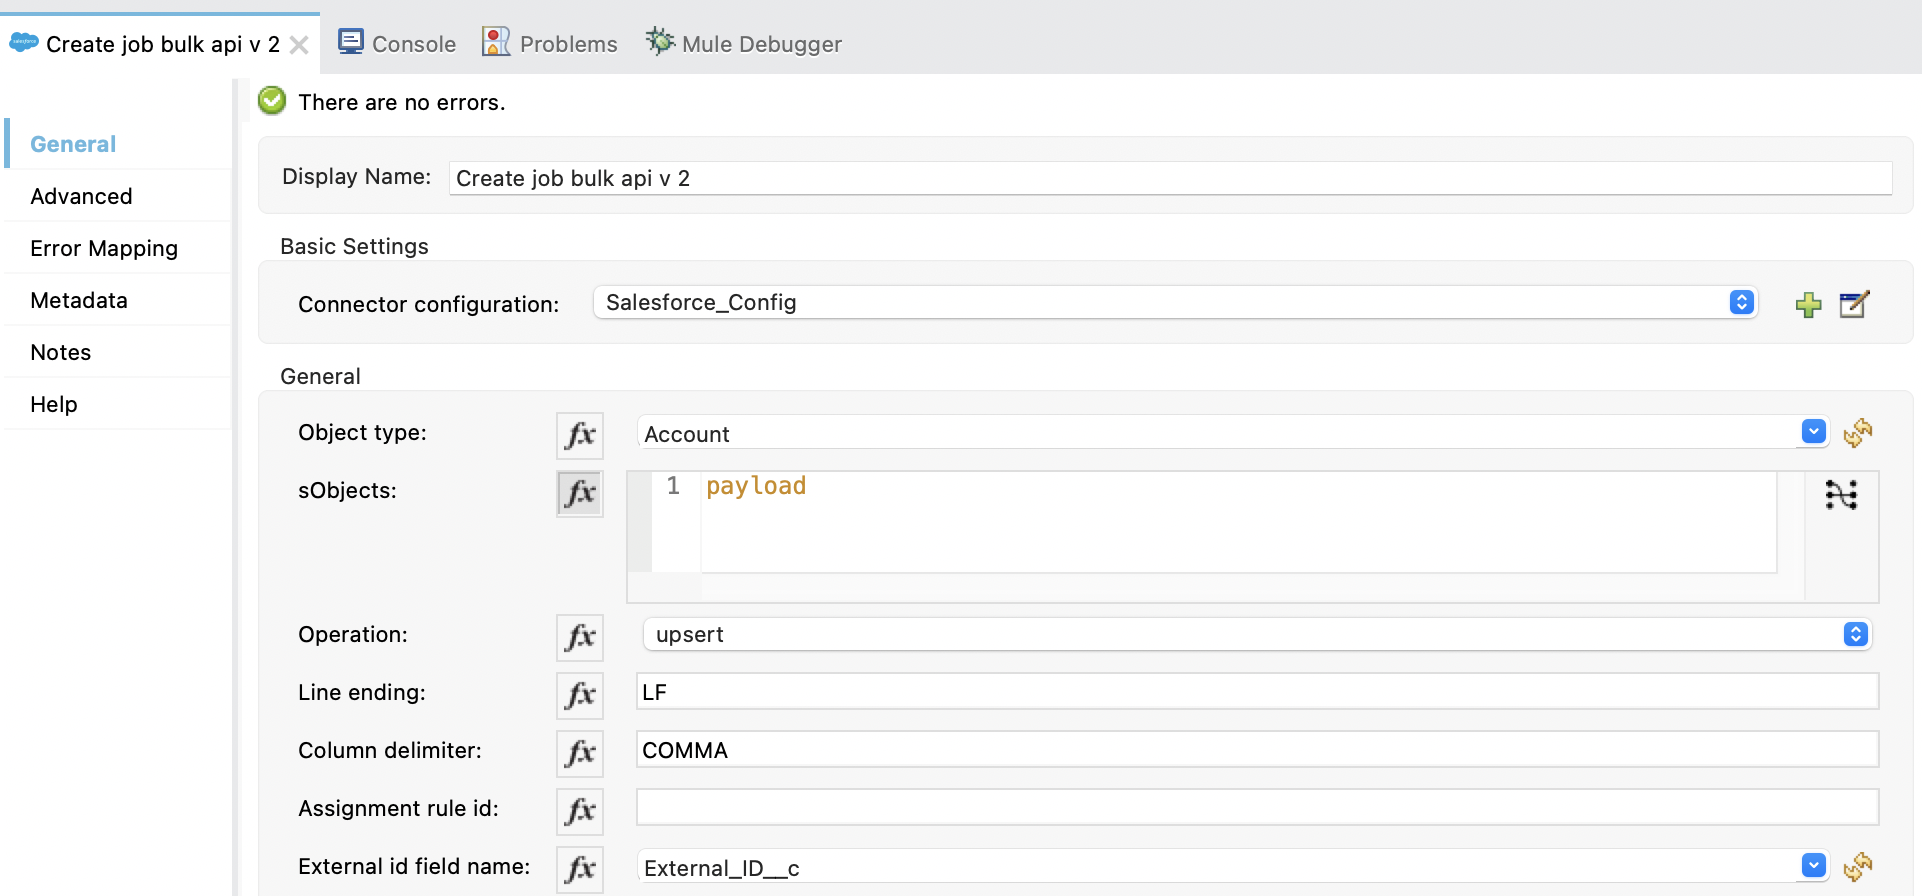
-
Step 7: Transform the records from the file to the Account sObject
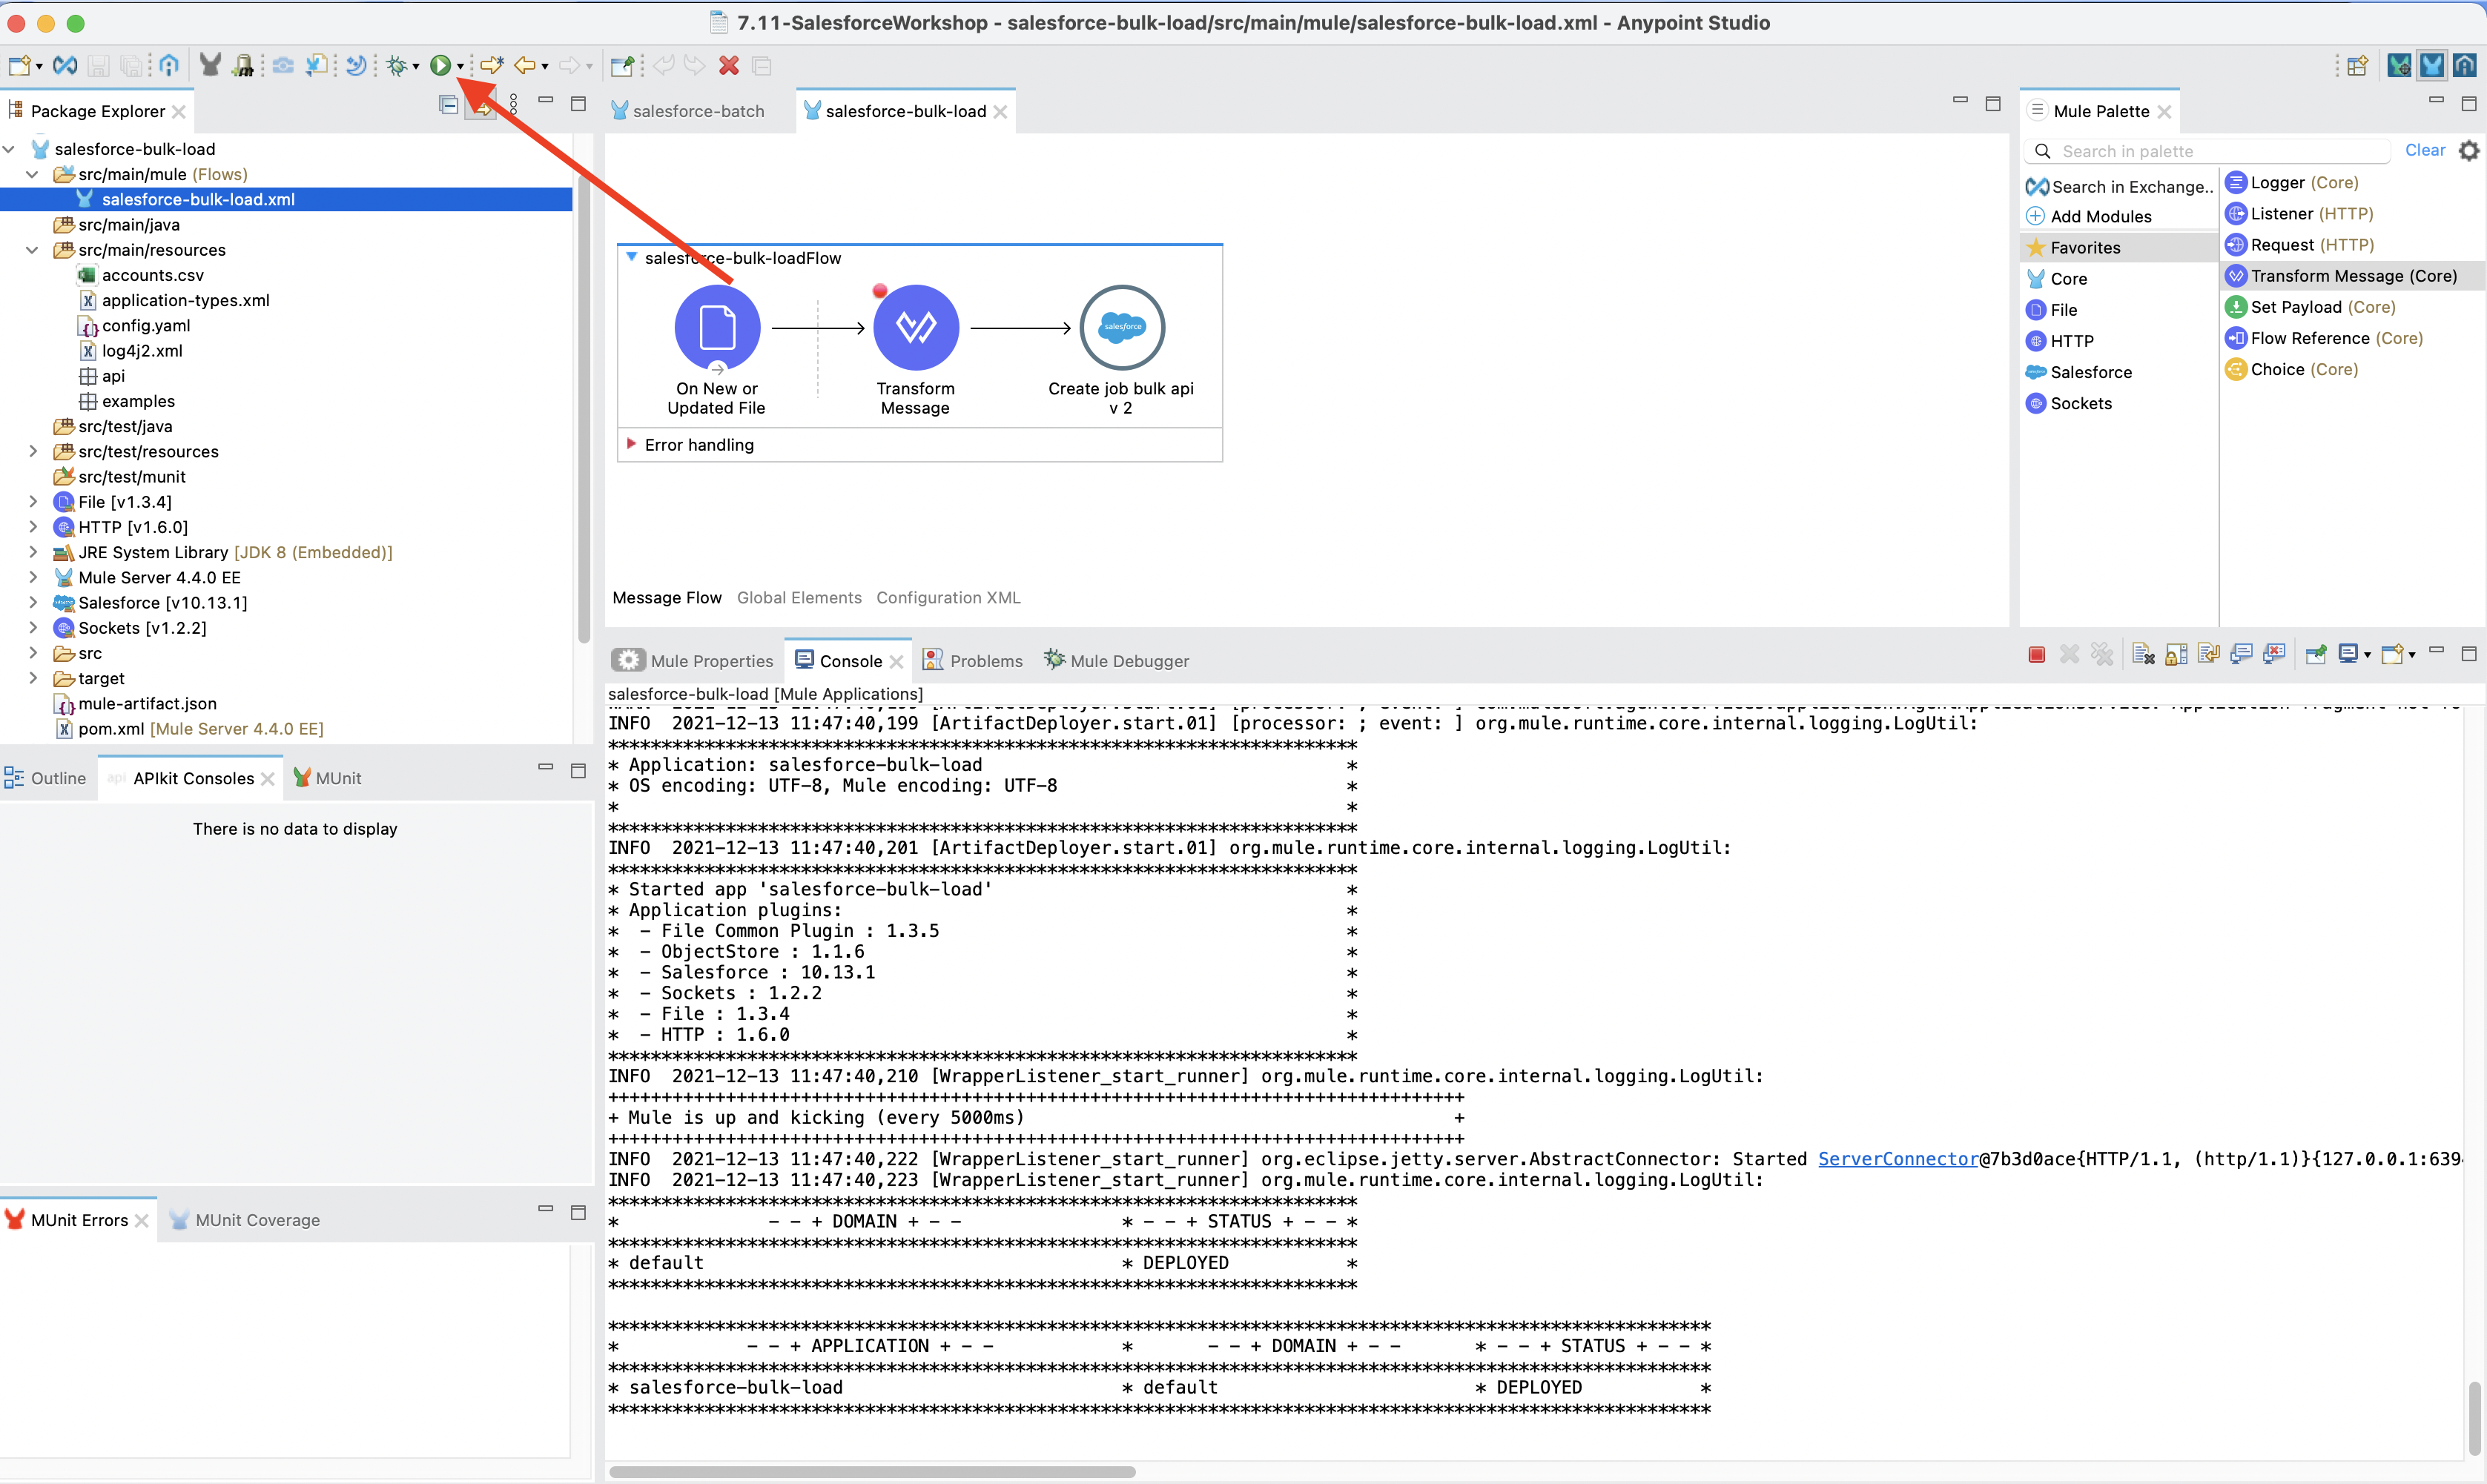
Now the Message Flow in the project looks like this:
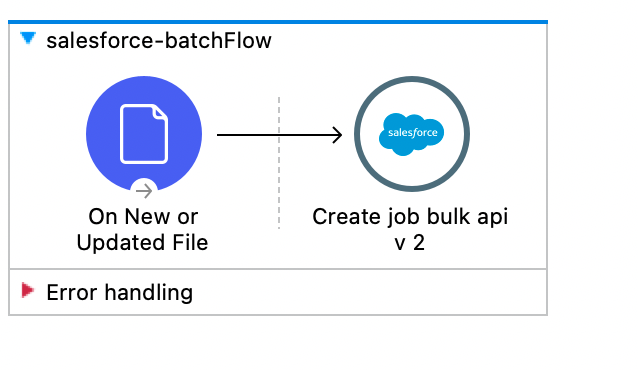
-
From the Mule Palette (n the upper right corner) choose Favorites → Transform Message and place it between the two:
-
Click on Define metadata. Click on add (green cross). Enter AccountsCSV and click on Create type.
-
Set the Type to: CSV and open the accounts.csv file you downloaded in [Step 1. Download the CSV file].
-
Check the Wrap element in a collection box and click OK
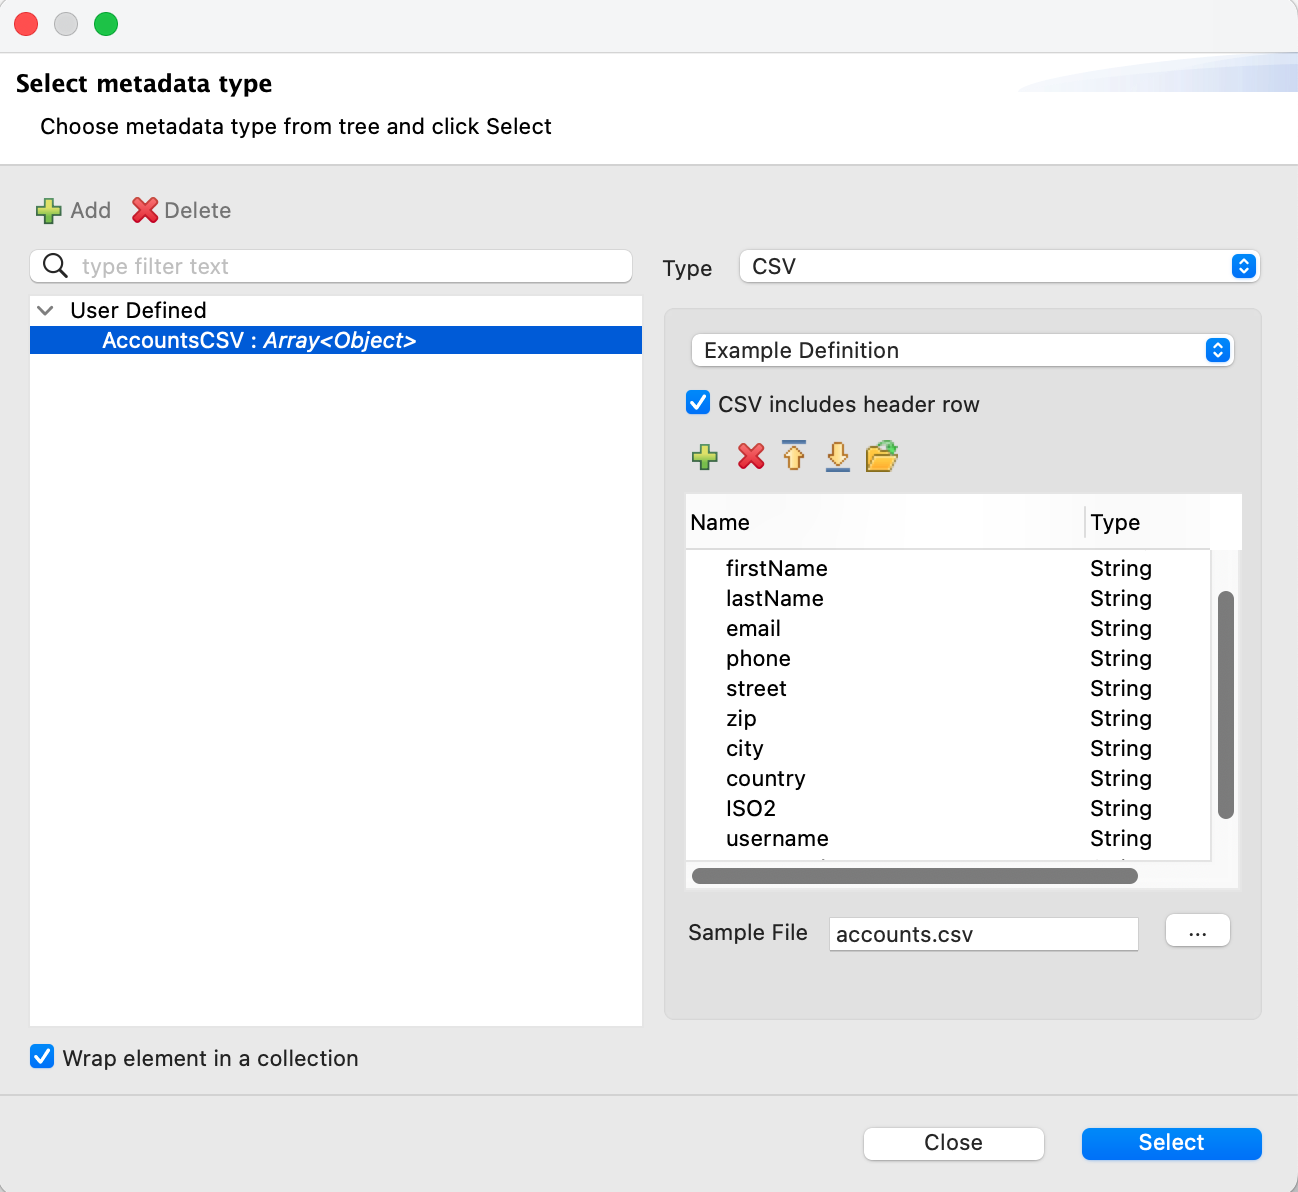
-
Click on Select
-
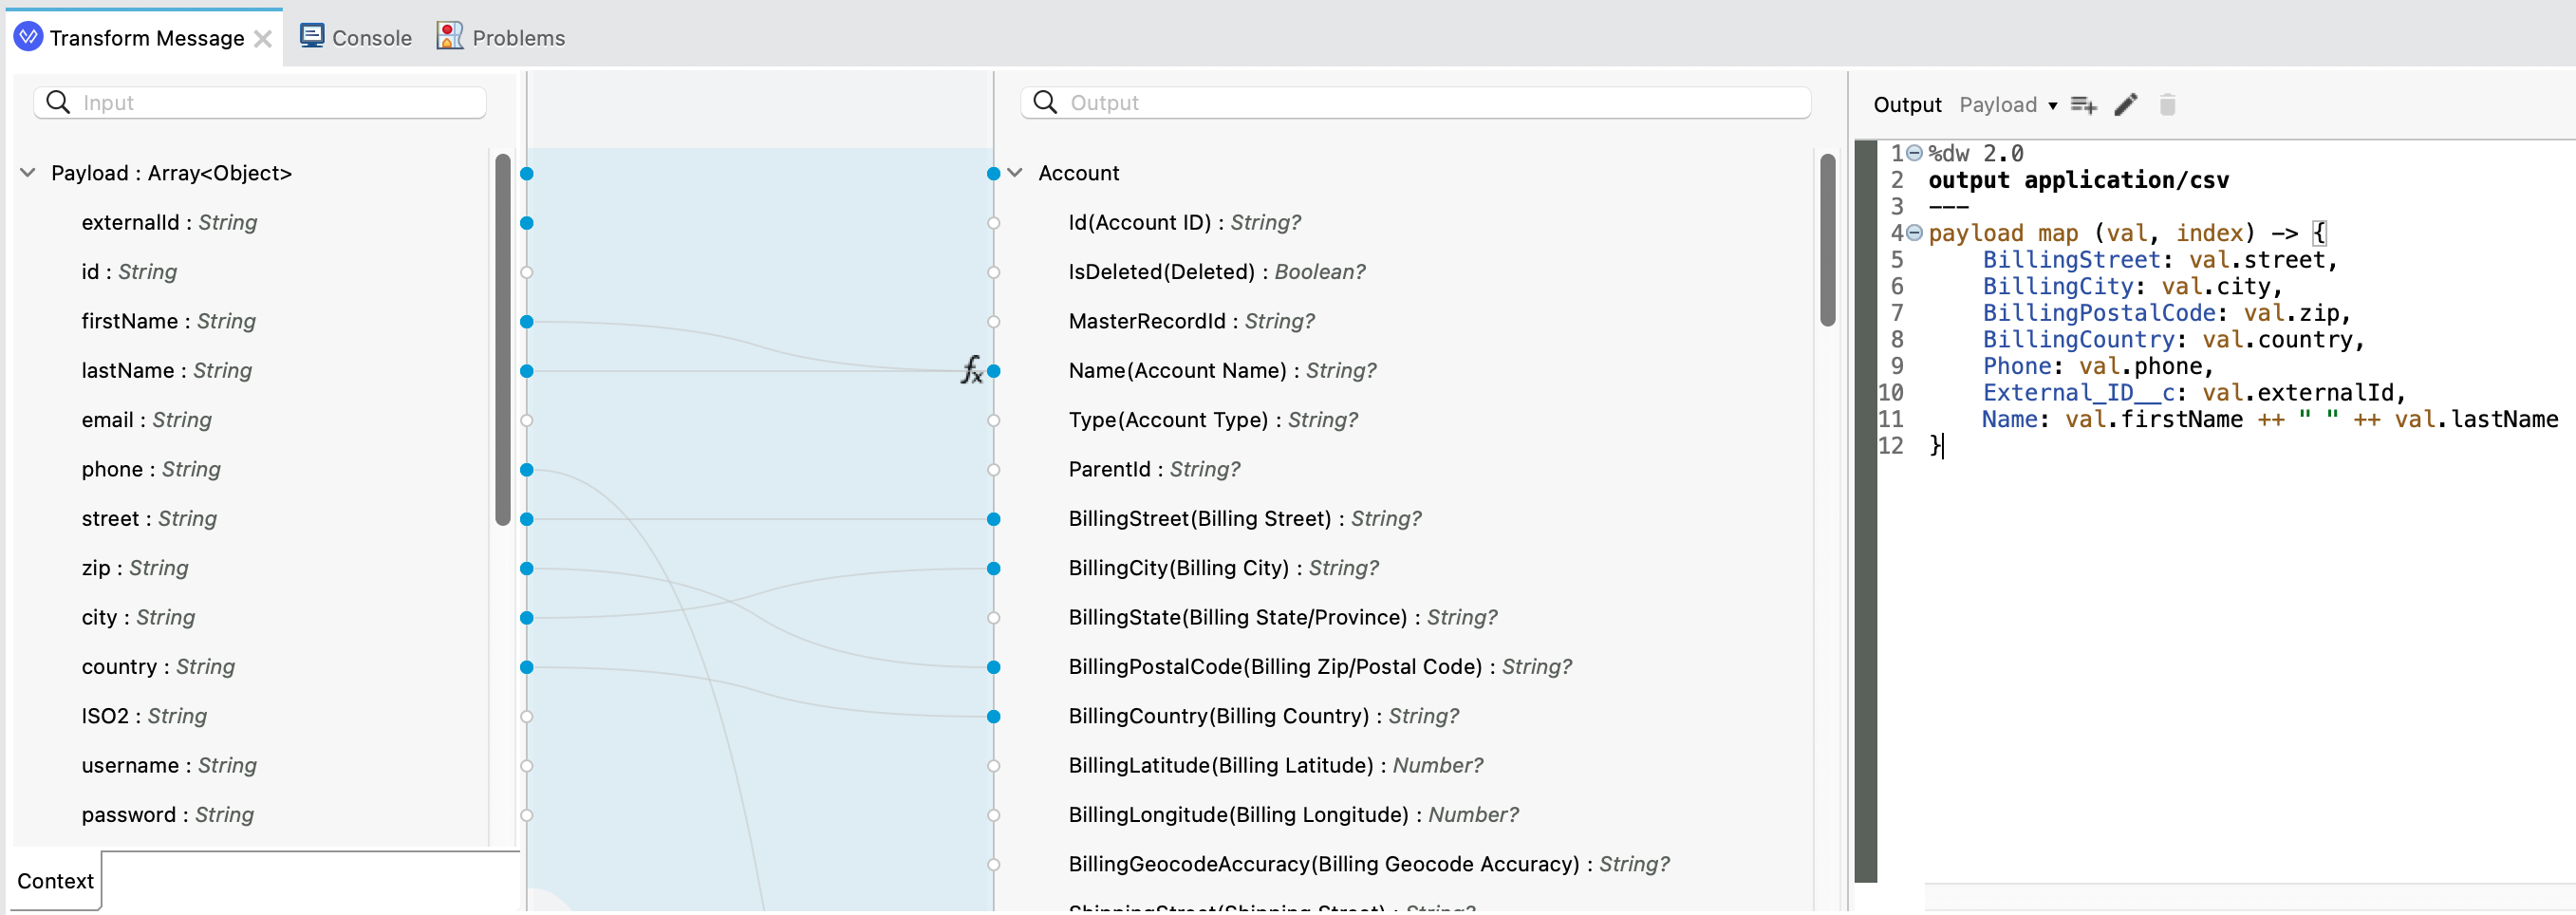
Add the following mapping to the Transform Message. Note that Create Job Bulk API V2 requires the input data to be a CSV. The DataWeave therefore generates application/csv
%dw 2.0
output application/csv
---
payload map (val, index) -> {
	BillingStreet: val.street,
	BillingCity: val.city,
	BillingPostalCode: val.zip,
	BillingCountry: val.country,
	Phone: val.phone,
	External_ID__c: val.externalId,
	Name: val.firstName ++ " " ++ val.lastName
}
The Transform Message then looks like this:
Step 8: Try it out
-
Run the Mulesoft App by clicking the green Play buttton
-
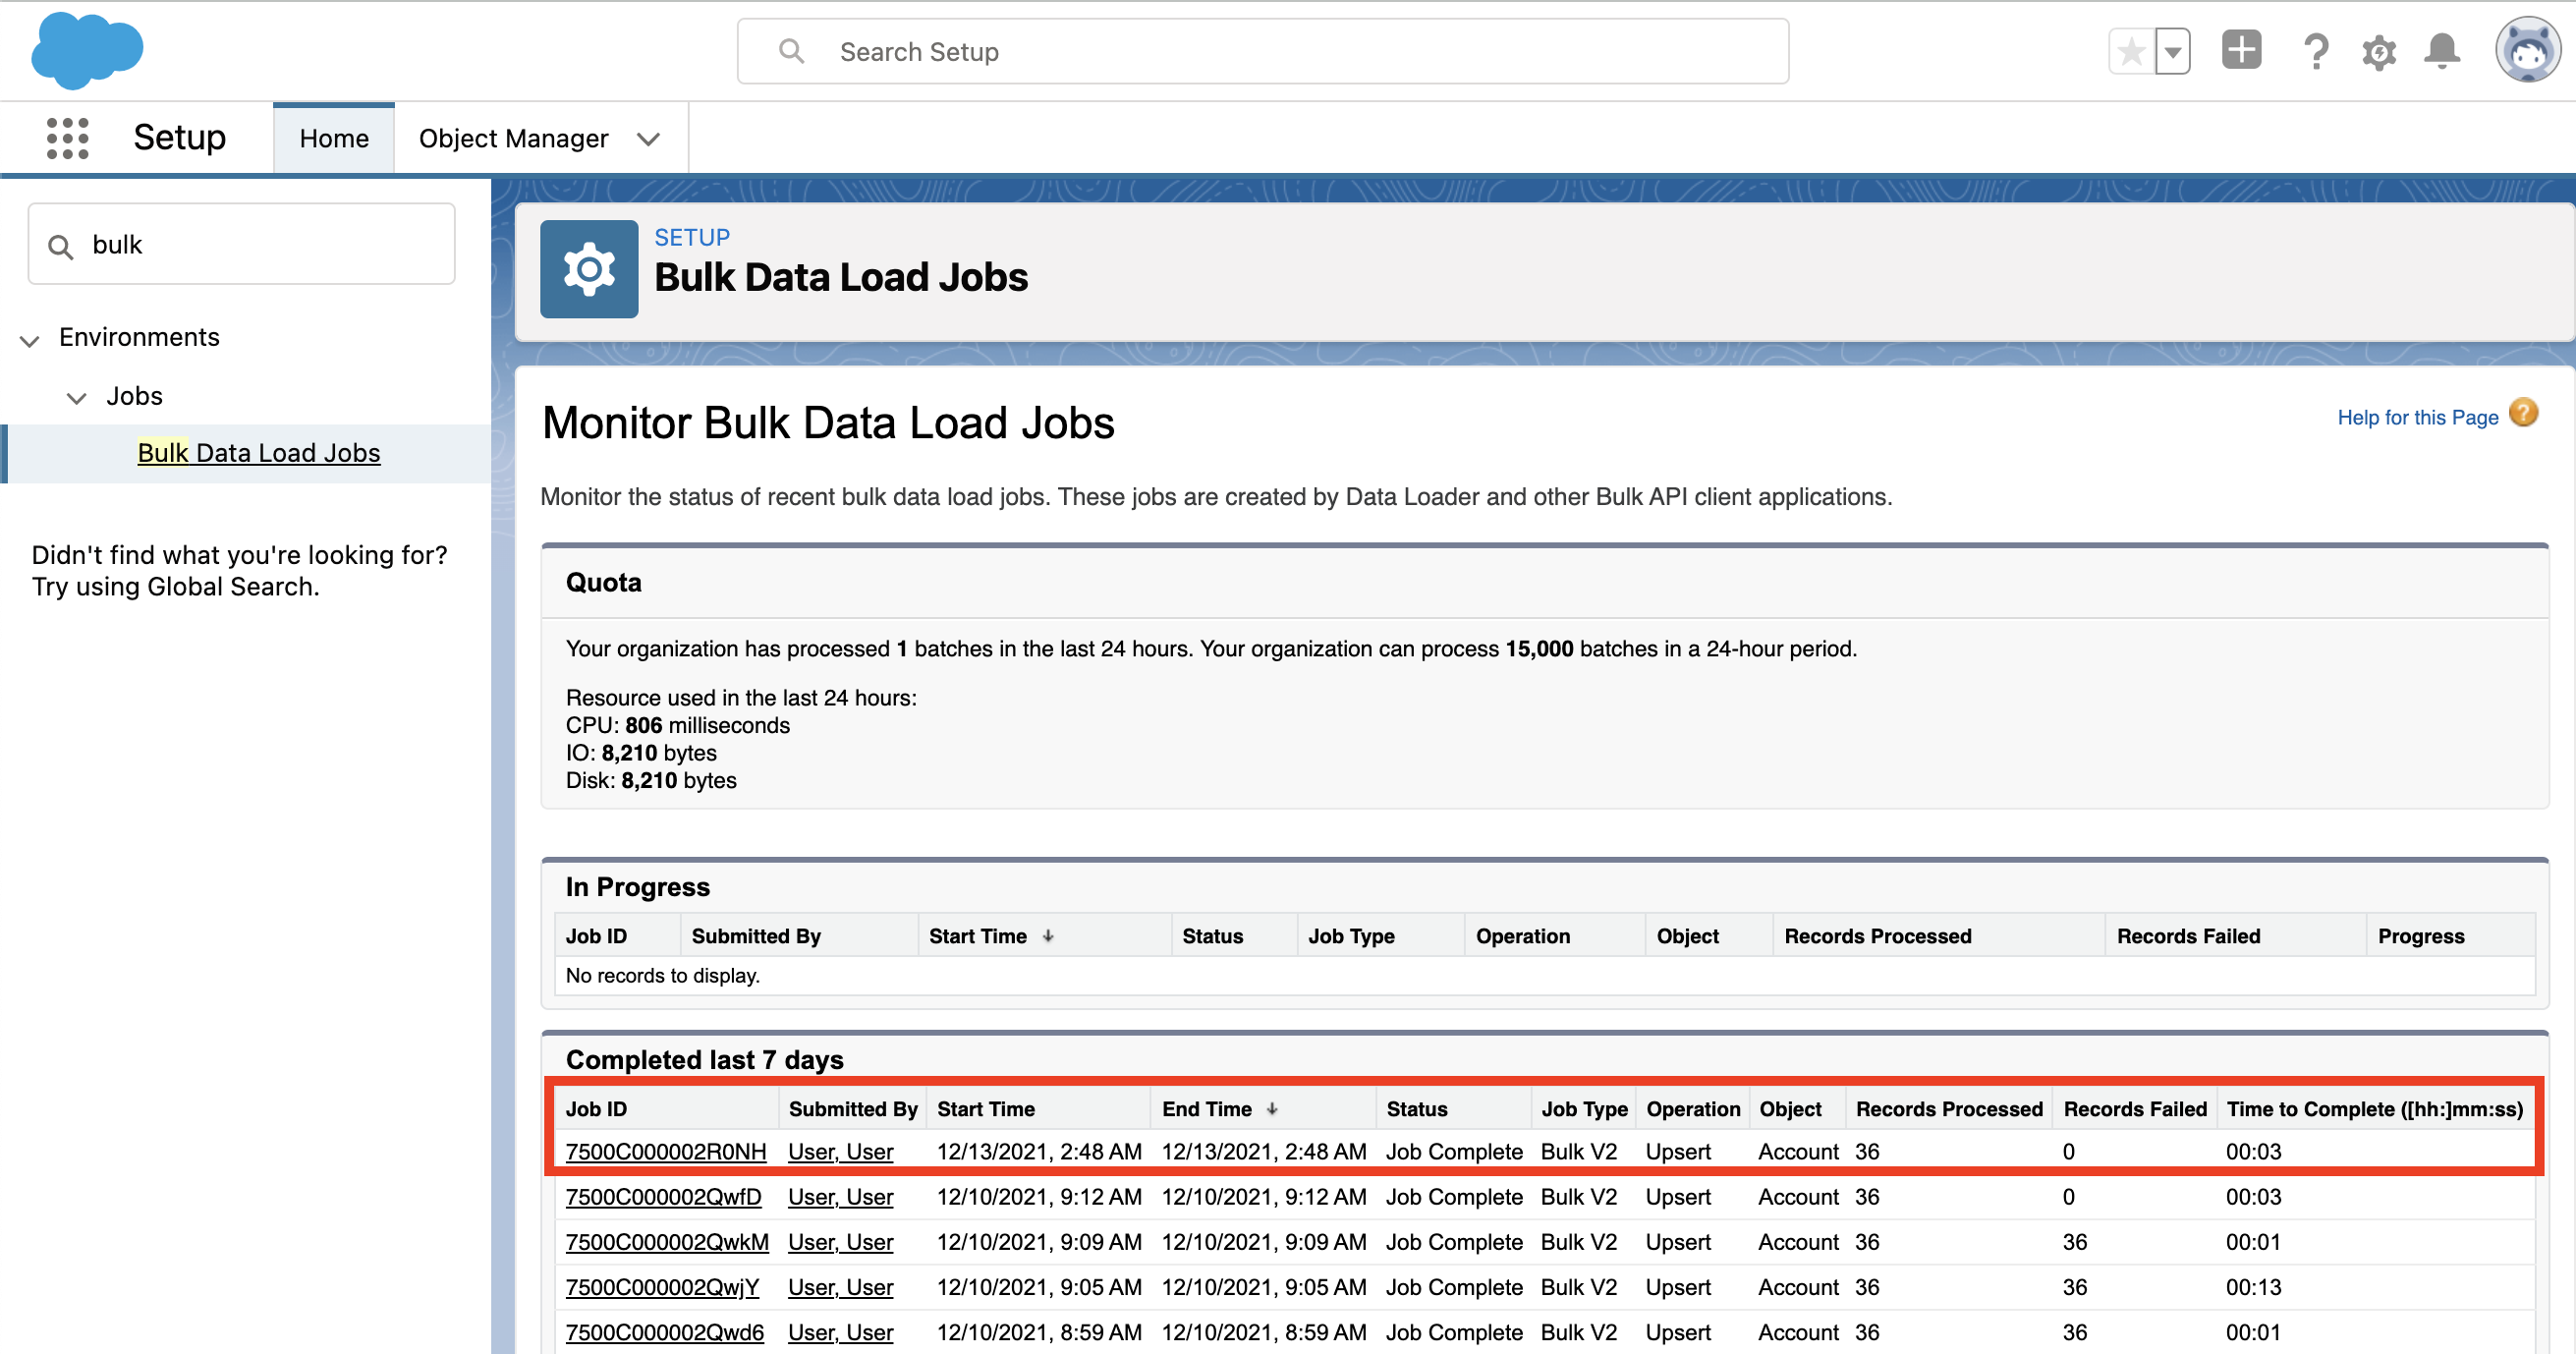
Verify the job completed successfully in Salesforce, Setup → Environments → Jobs → Bulk Data Load Jobs
Congratulations! You have successfully designed, built and deployed your first API!
Summary
In this lab, you were able to successfuly upsert records in Salesforce by usisng the Bulk API V2.
You completed the following steps: