Lab 2: Calling the new External Service from Salesforce Flow
Overview
In this lab we’ll be building a Salesforce Flow that uses the Database System API we developed and deployed in Module 1. Use case: when a new Contact is created in Salesforce, determine some logic, add this account to the Database and link the Id from the Database to the Database_Id__c field on the Contact.
Step 1: Create a new flow
-
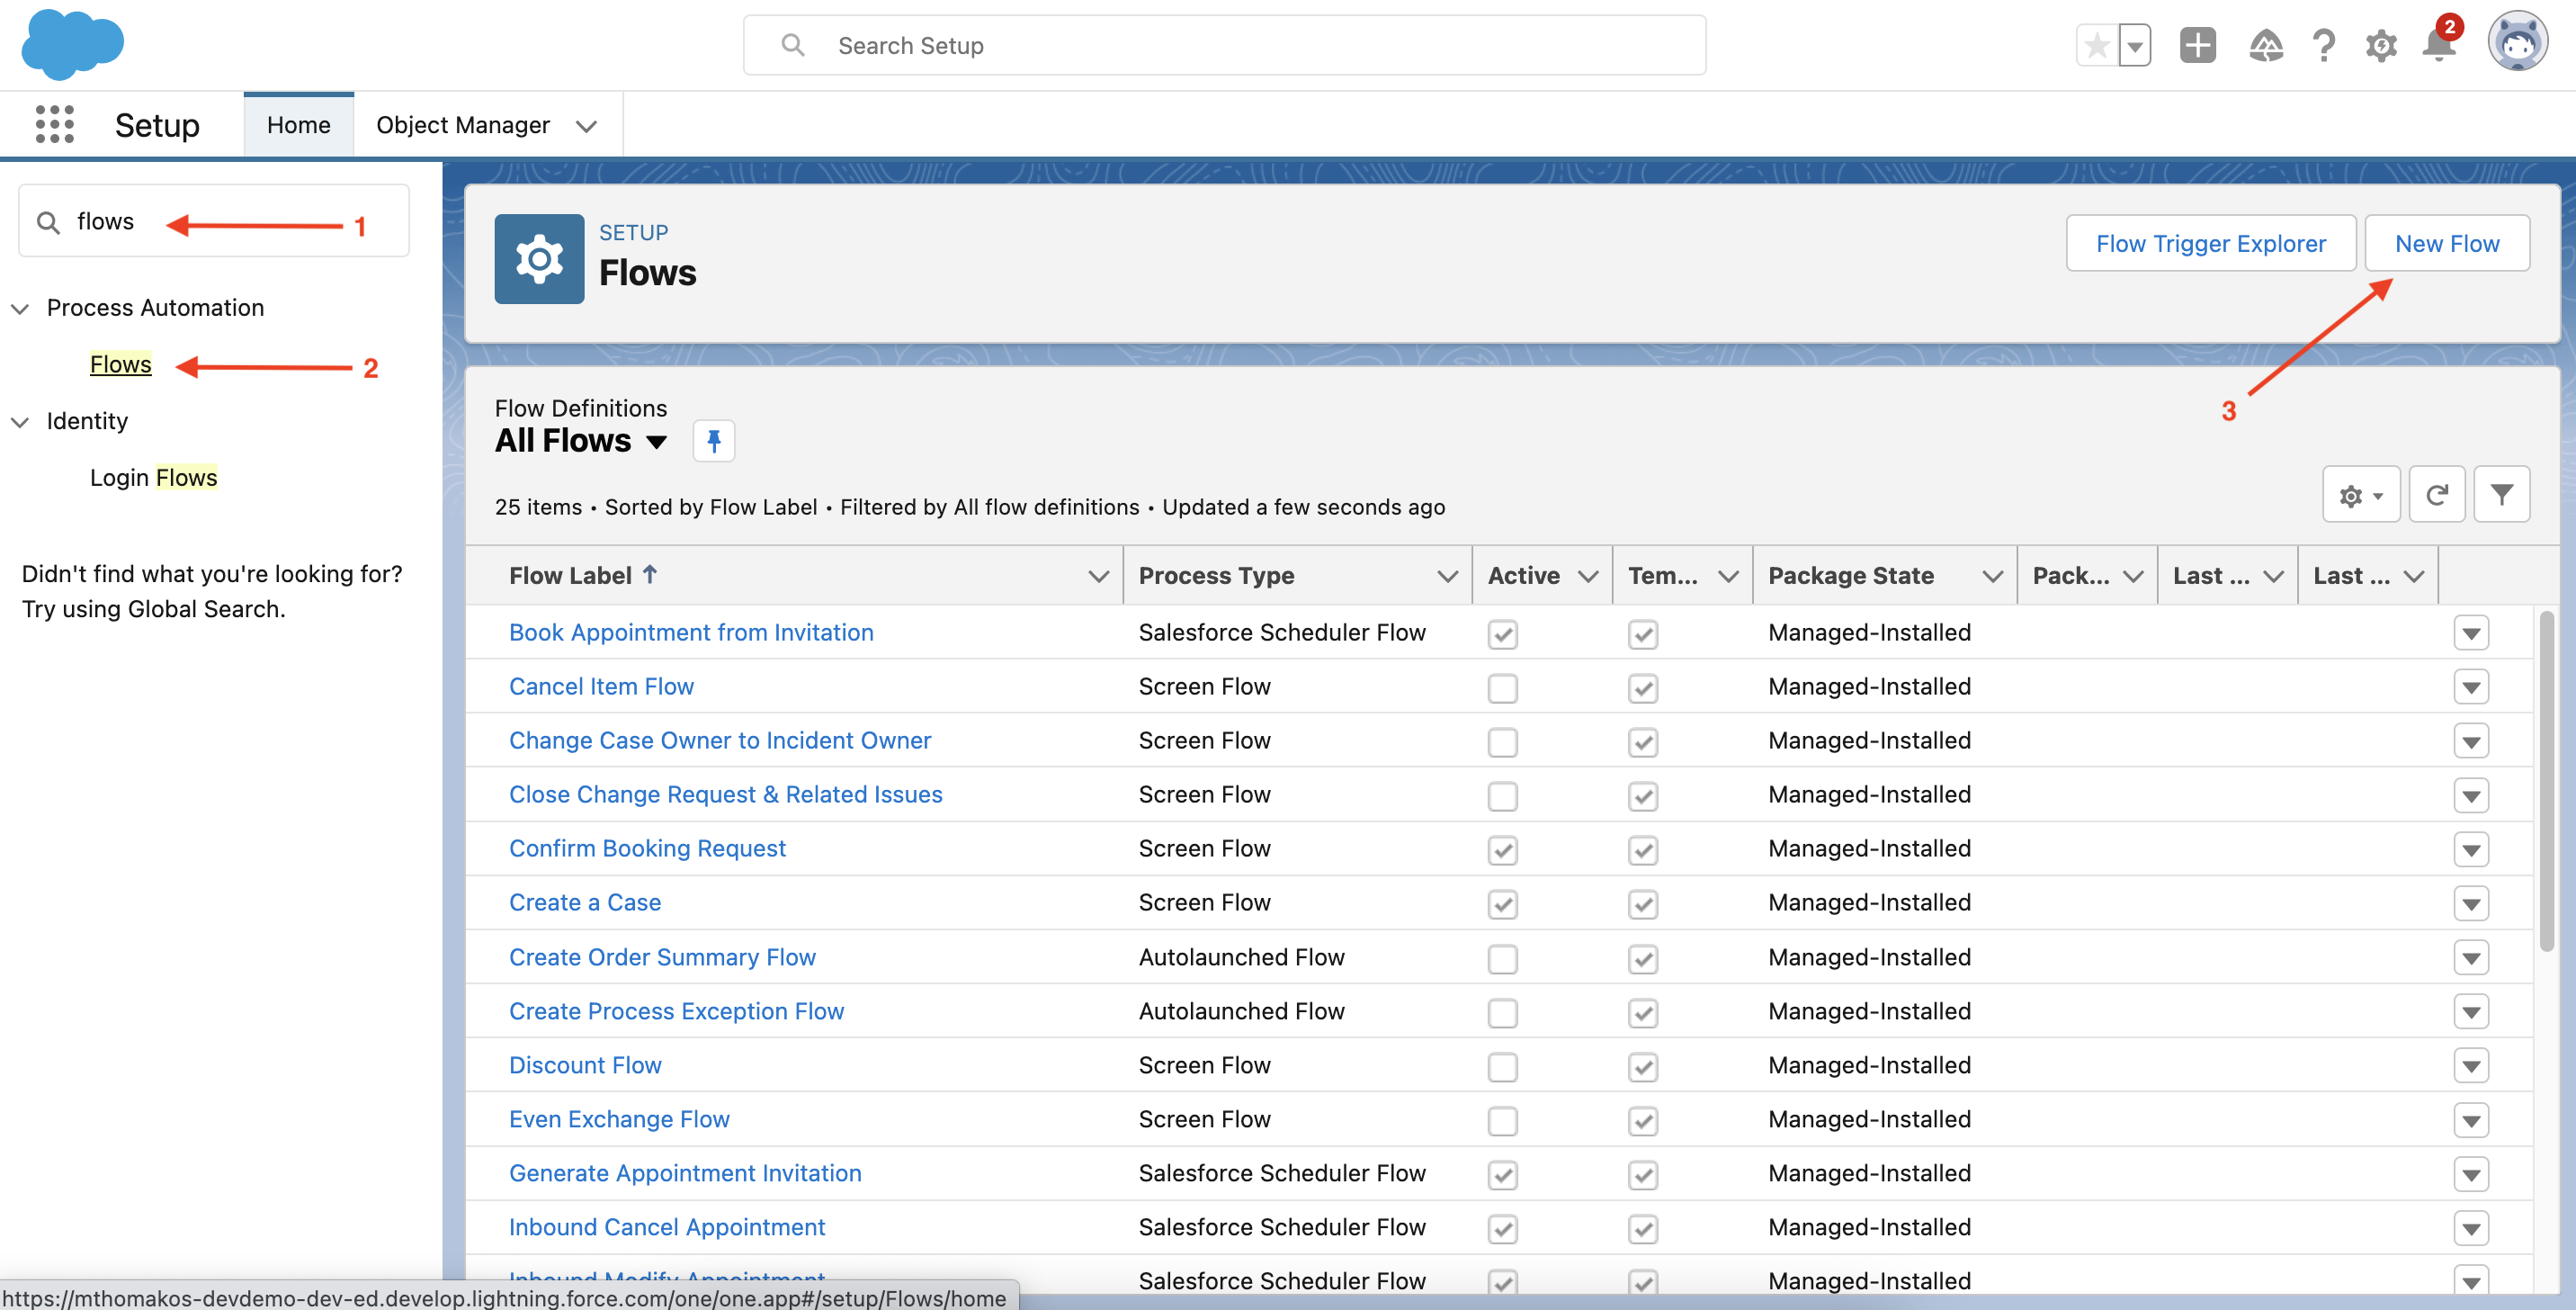
From the setup page, click Home
-
In the Quick Find search bar, type flows
-
Under Process Automation, click Flows
-
Click New Flow
-
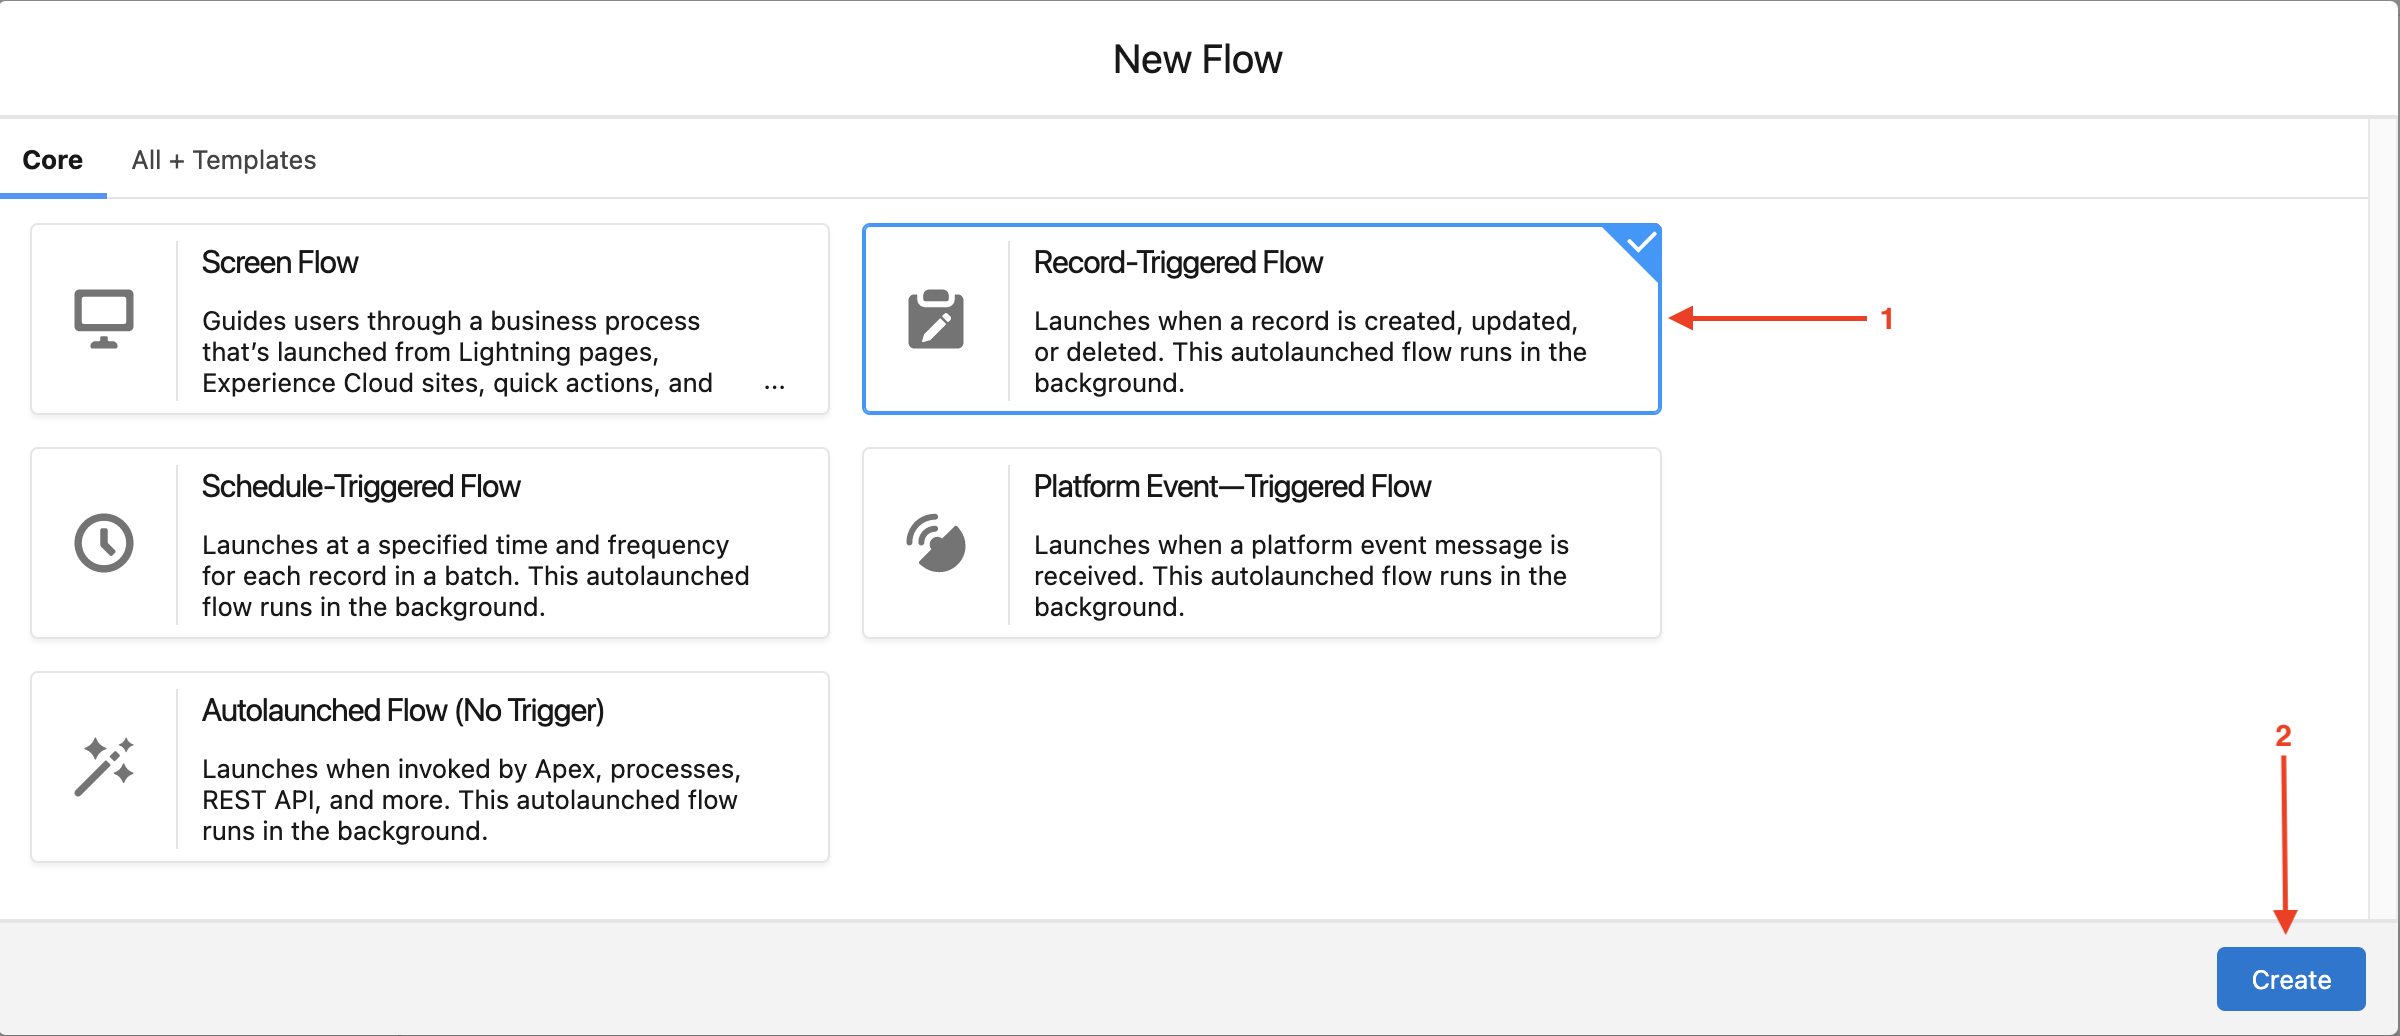
Select Record-Triggered Flow and click Create.
-
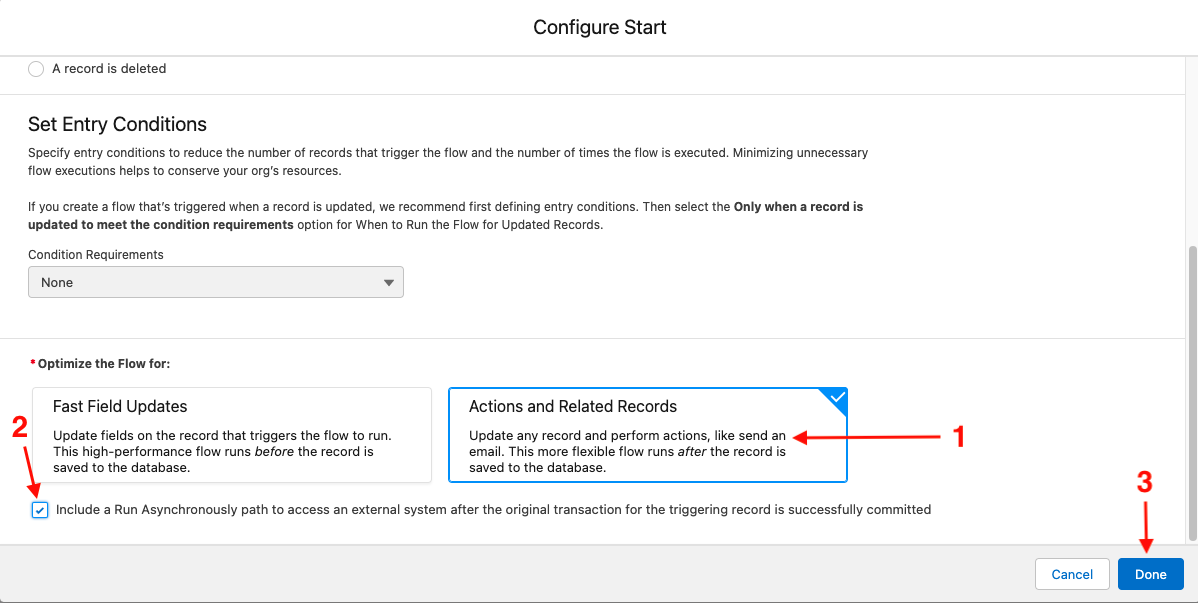
On the Configure Start screen, enter the following details:
-
Object: Contact
-
Trigger the Flow When: A record is created

-
Condition Requirements: None
-
Optimize the Flow for: Actions and Related Records
-
Check the box next to Include a Run Asynchronously path to access an external system after the original transaction for the triggering record is successfully committed
-
-
Click Done
-
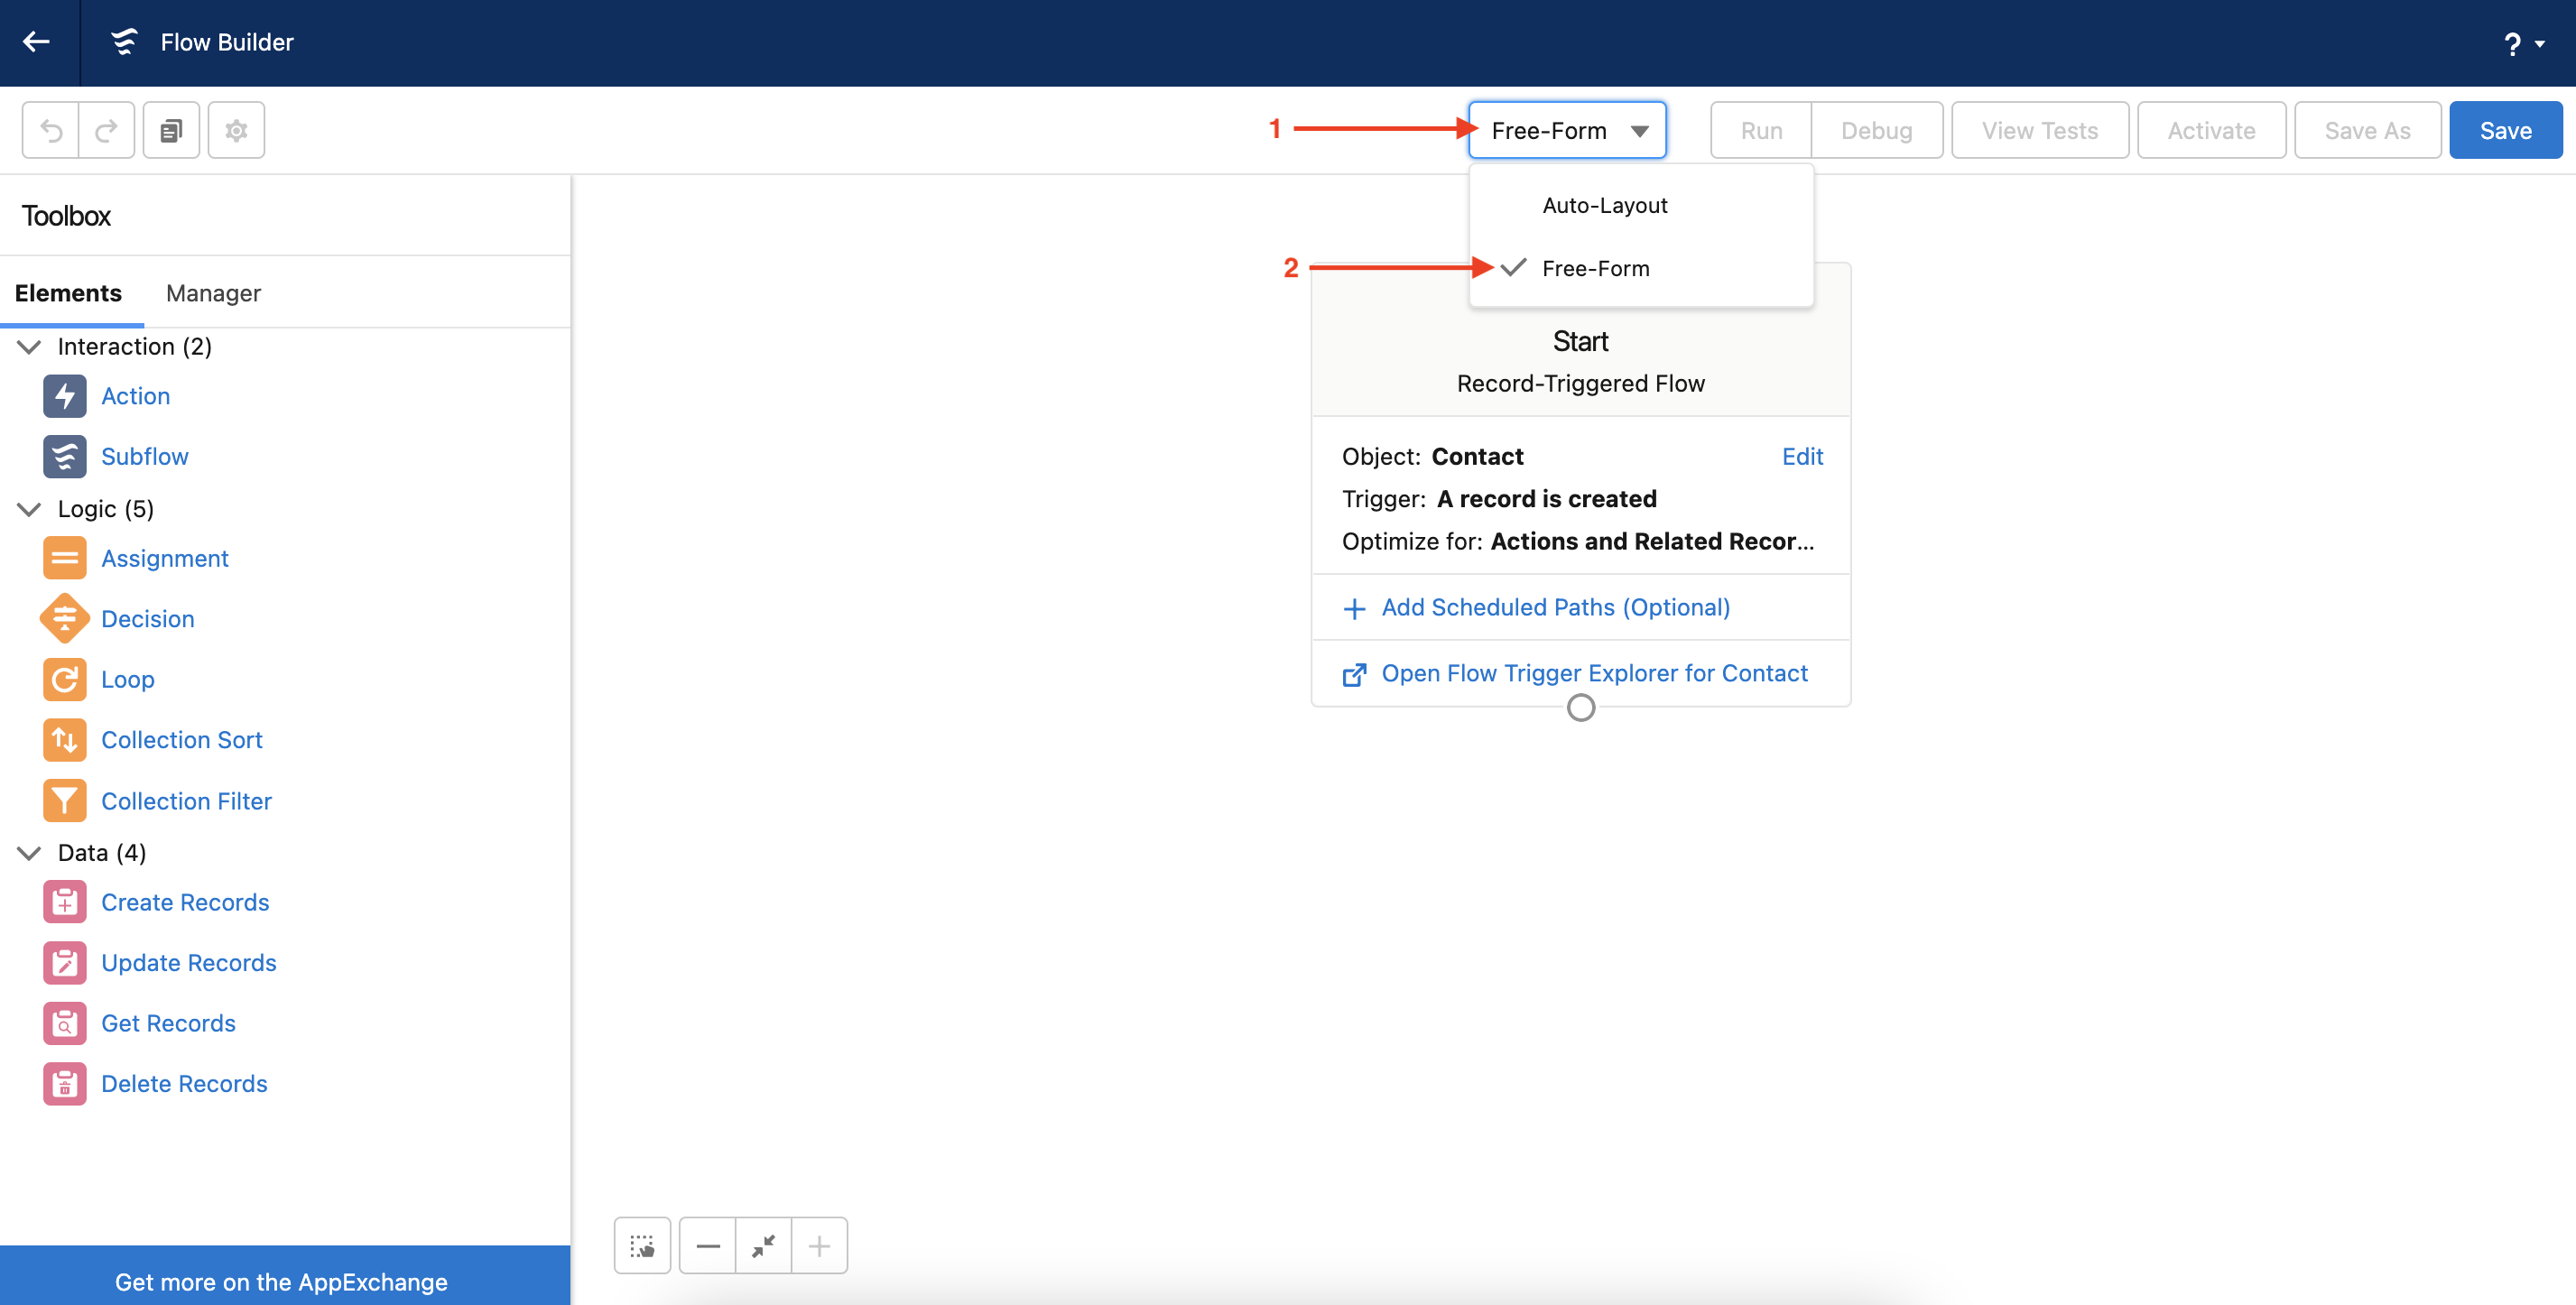
Change the layout type to Free-Form
Step 2: Add the Database SAPI external service to the flow
The Toolbox on the left side of the screen contains the elements that can be used in a flow. To reference our new external service, we will use the Action element from the Interaction section.
-
Click and drag the Action Interaction element onto the canvas.
-
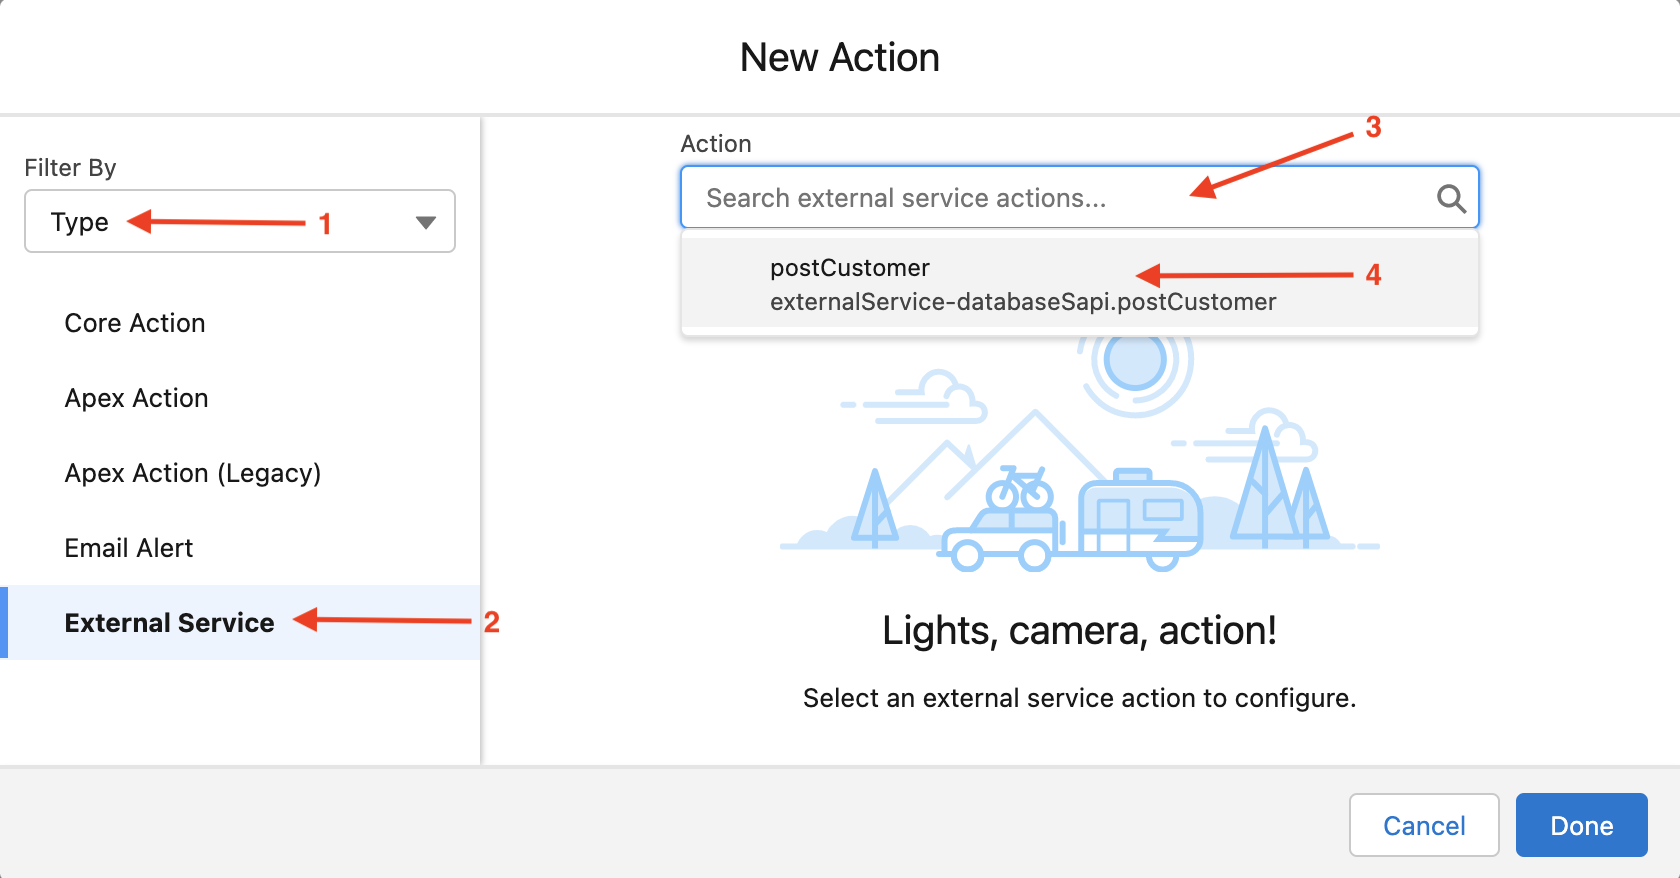
Change the Filter By drop to Type
-
Select External Service
-
Click the Action search bar and select the postCustomer action
-
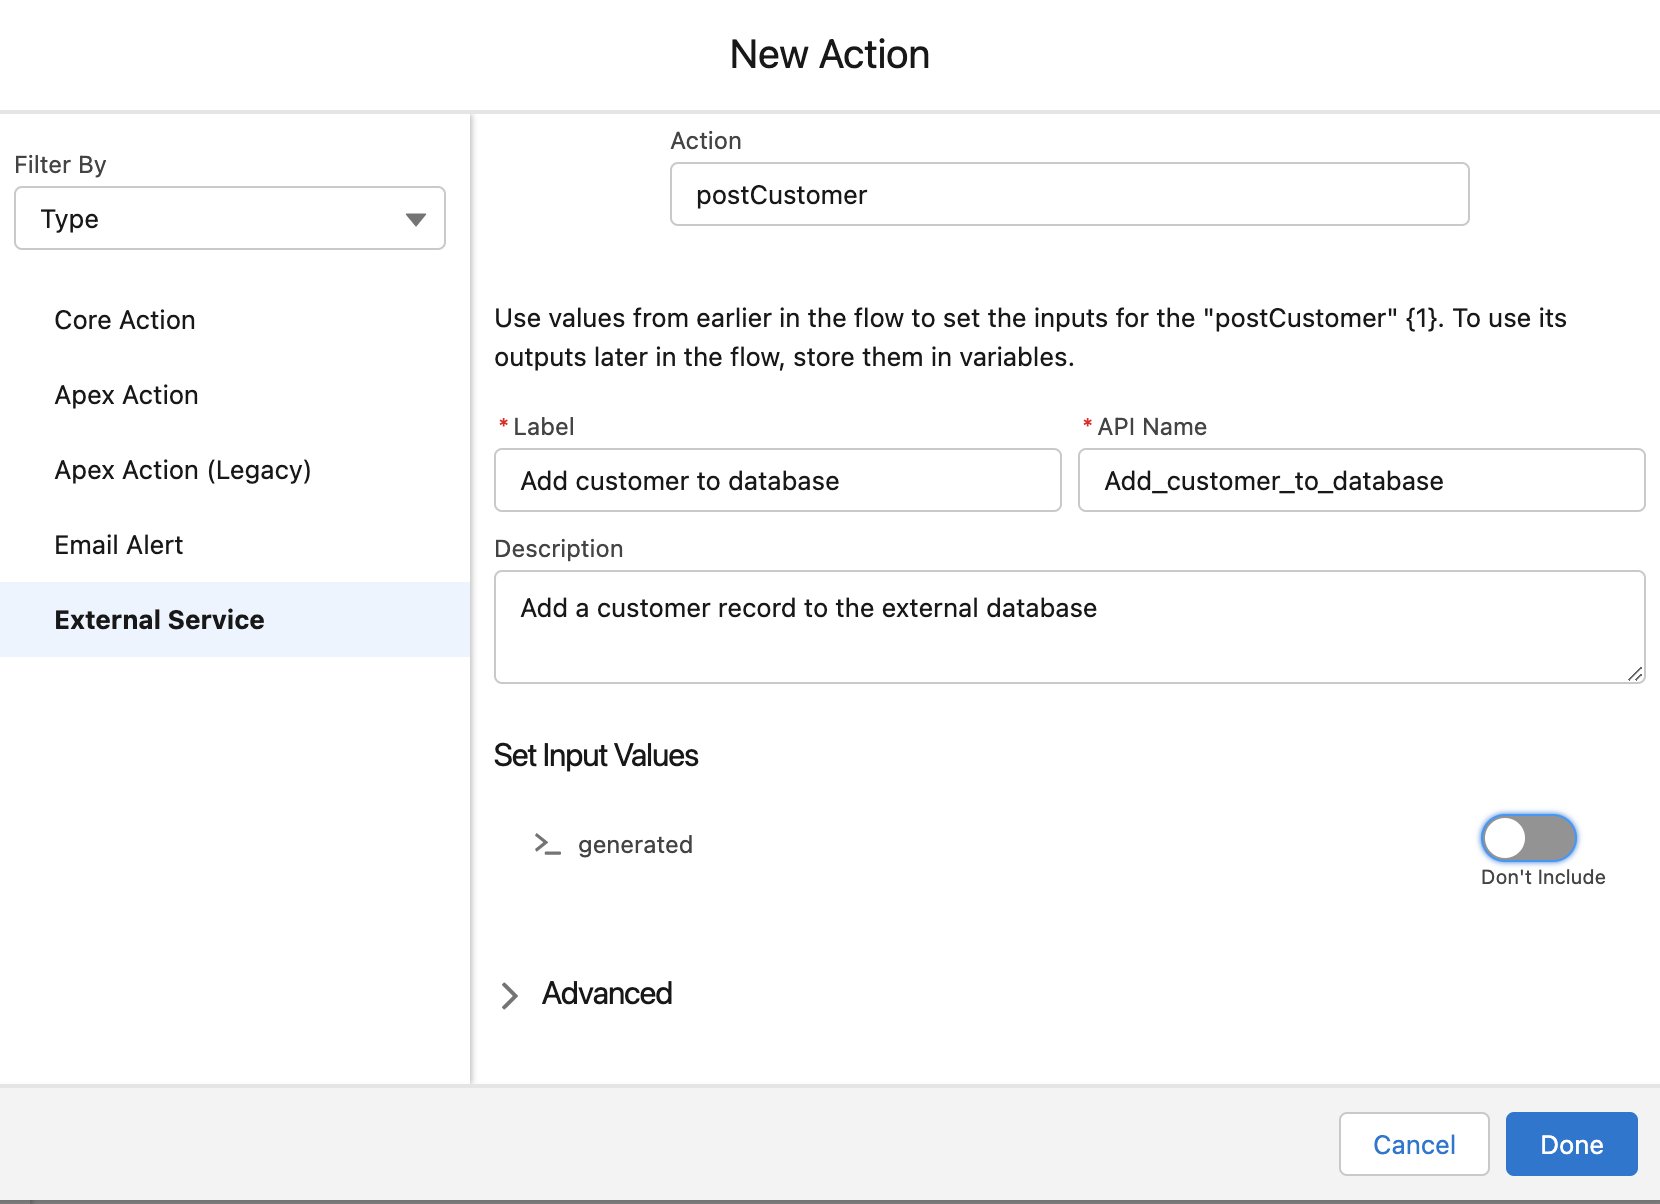
Enter the following details:
-
Label: Add customer to database
-
API Name: Add_customer_to_database (auto-filled)
-
Description: Add a customer record to the external database
-
-
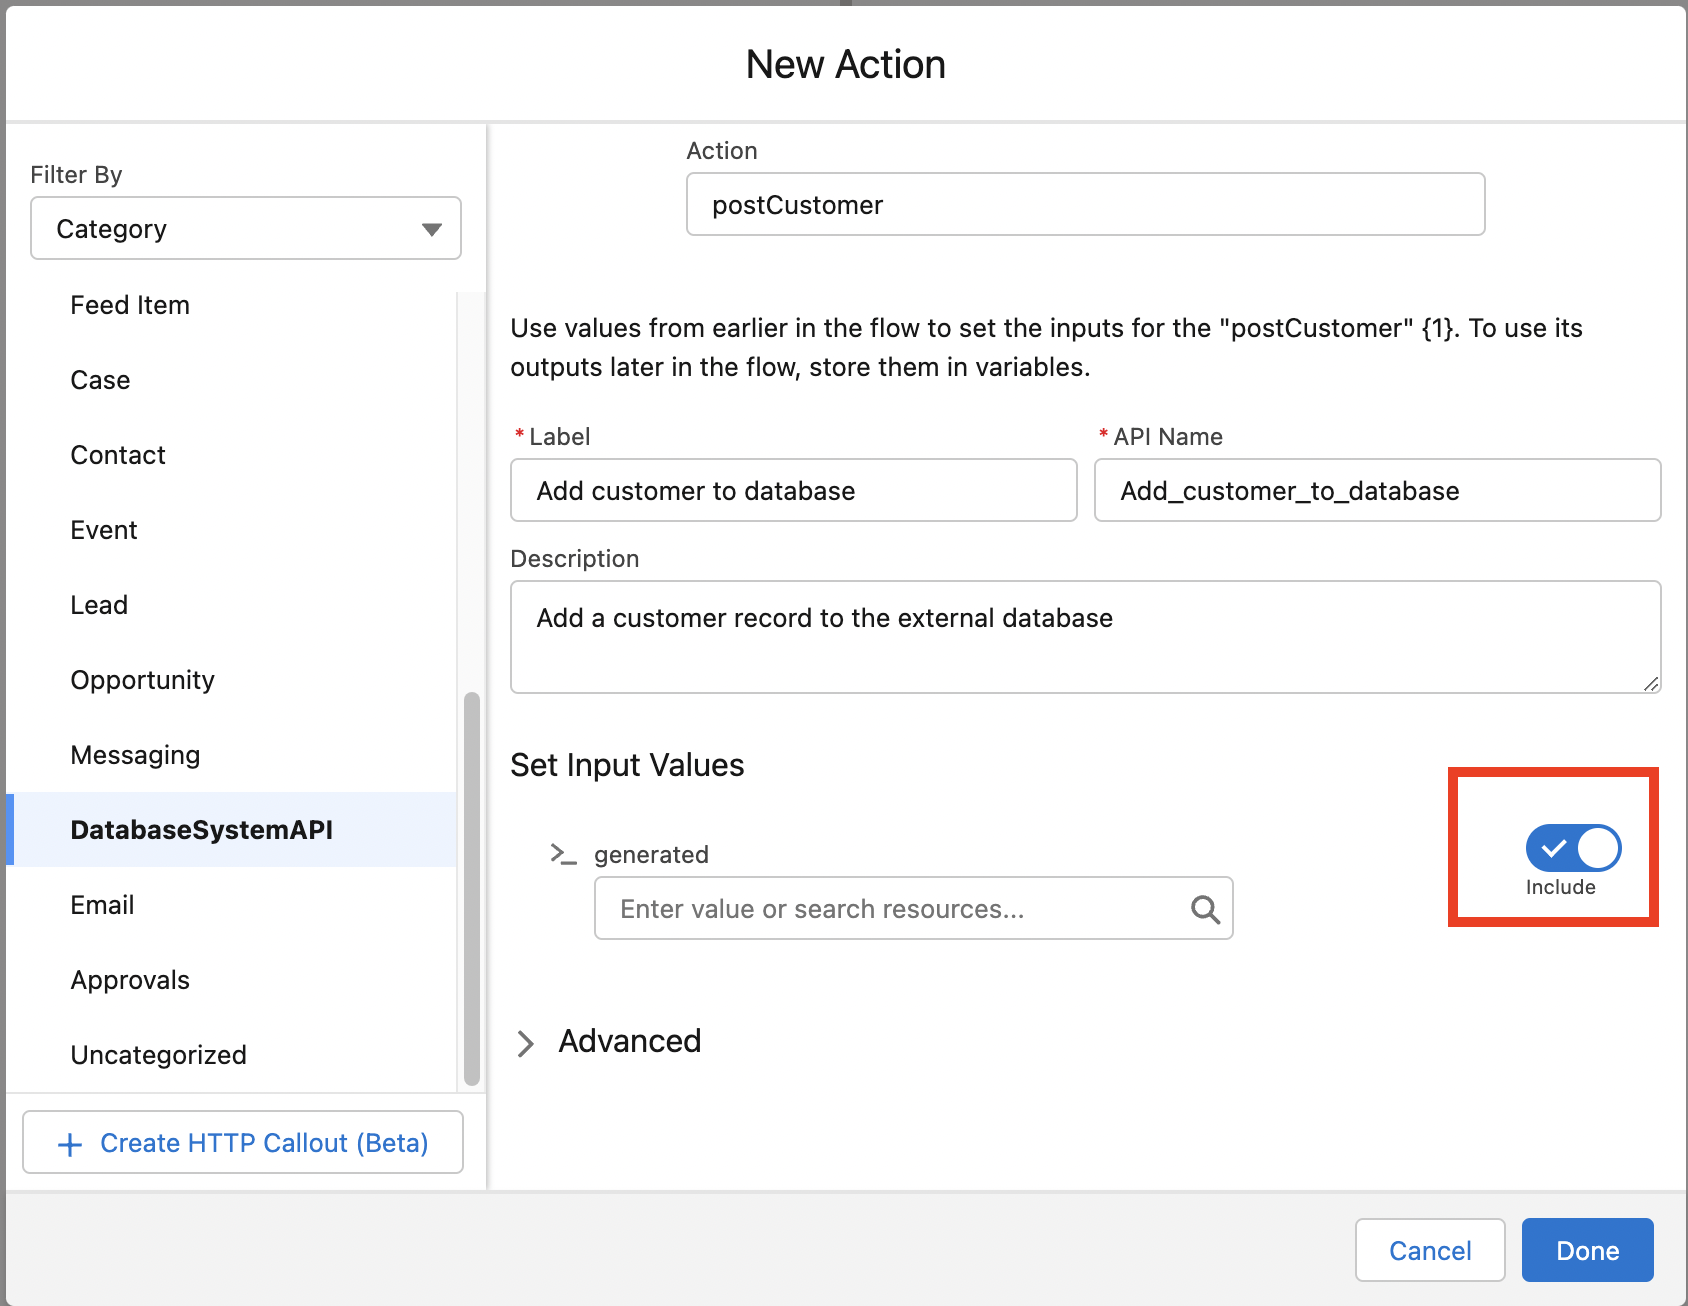
Under Set Input Values, click the toggle next to the generated input.
-
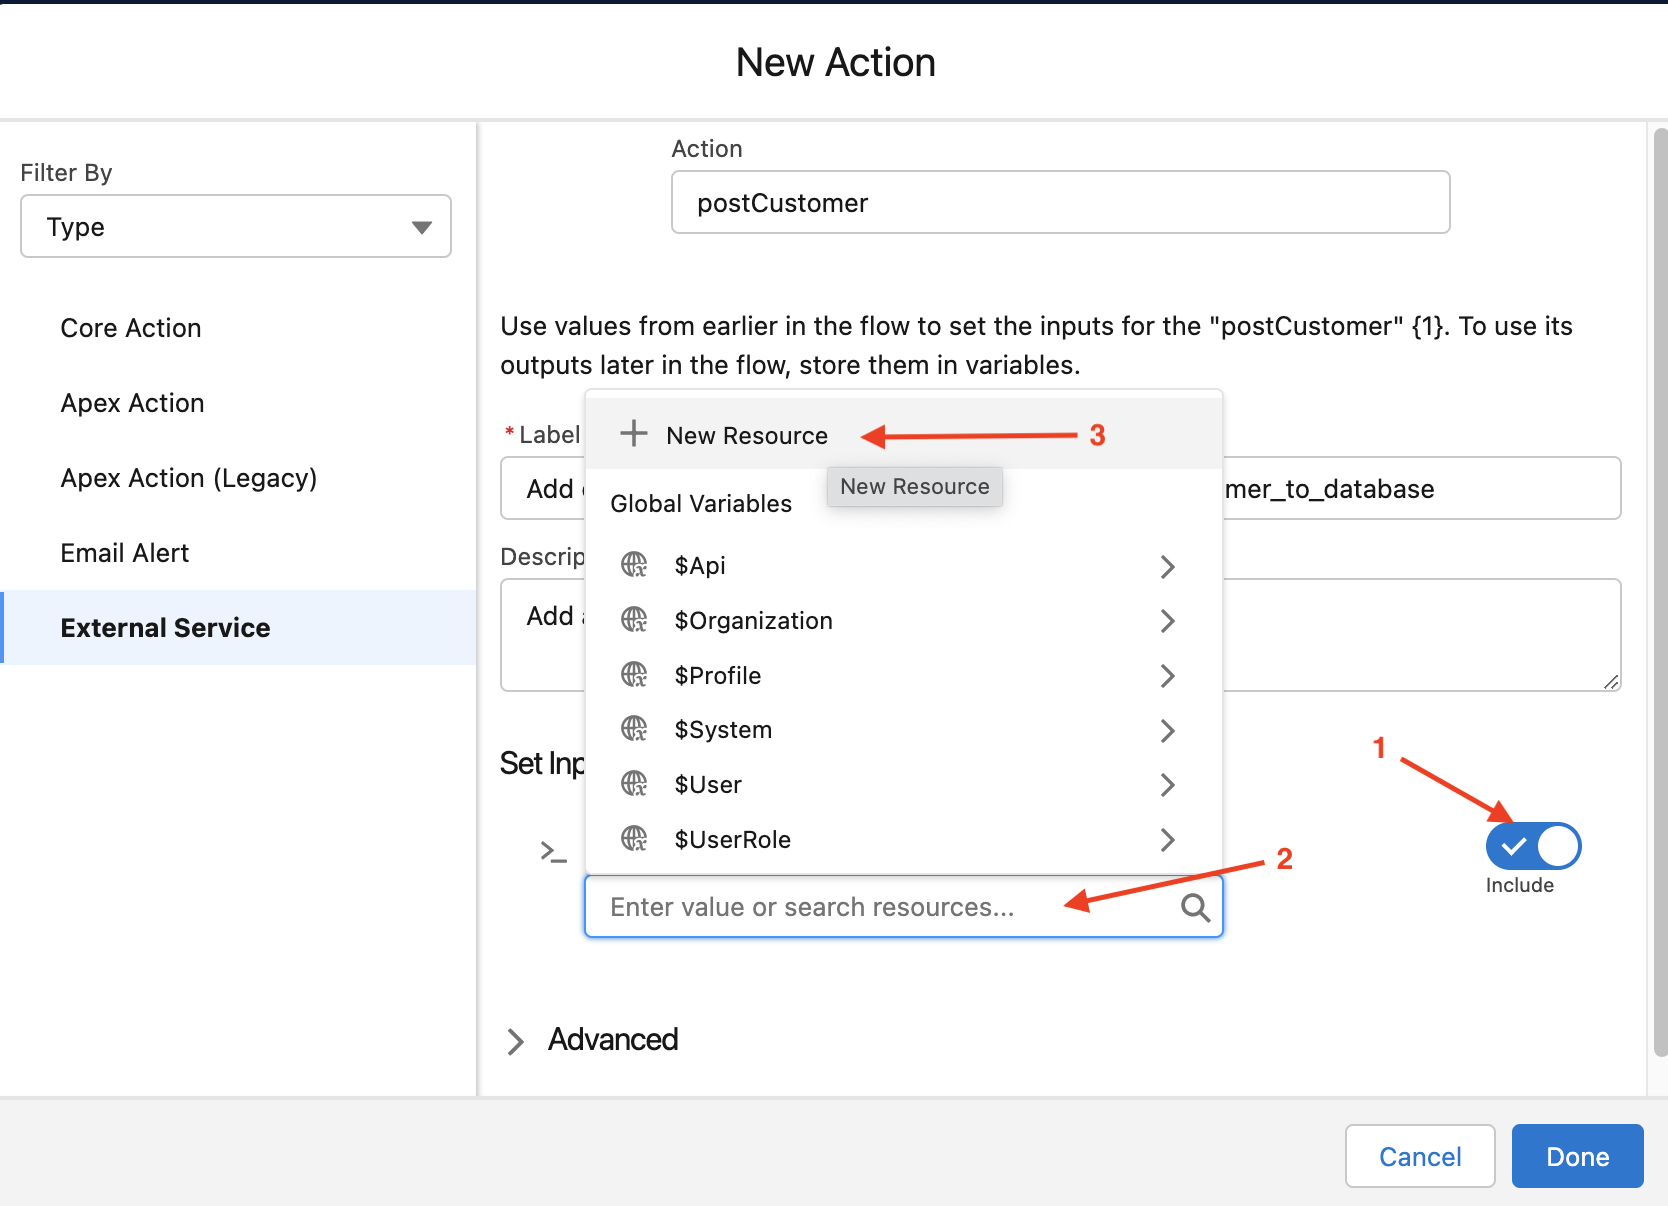
Click the search bar to assign a resource to the input.
-
Click New Resource
-
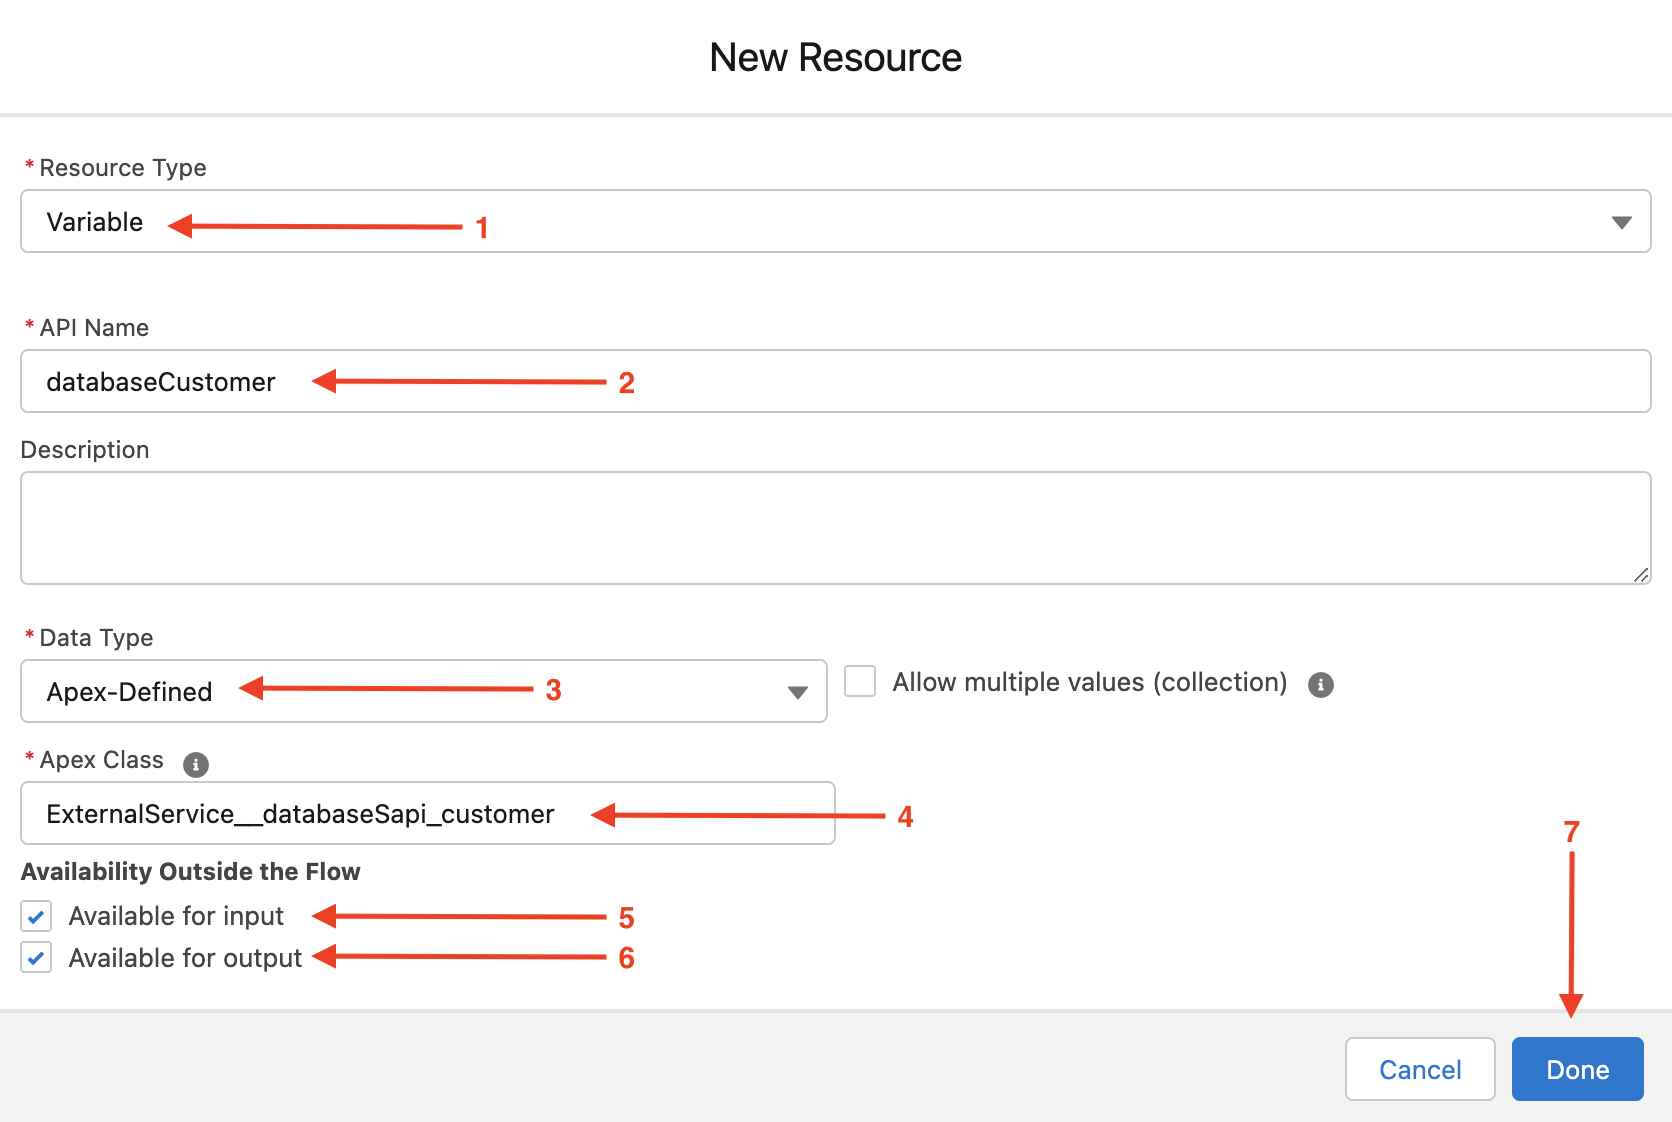
Enter the following details:
-
Reource Type: Variable
-
API Name: databaseCustomer
-
Data Type: Apex-Defined
-
Apex Class: ExternalService__databaseSapi_customer
-
Available for input: true
-
Available for output: true
-
-
Click Done.
-
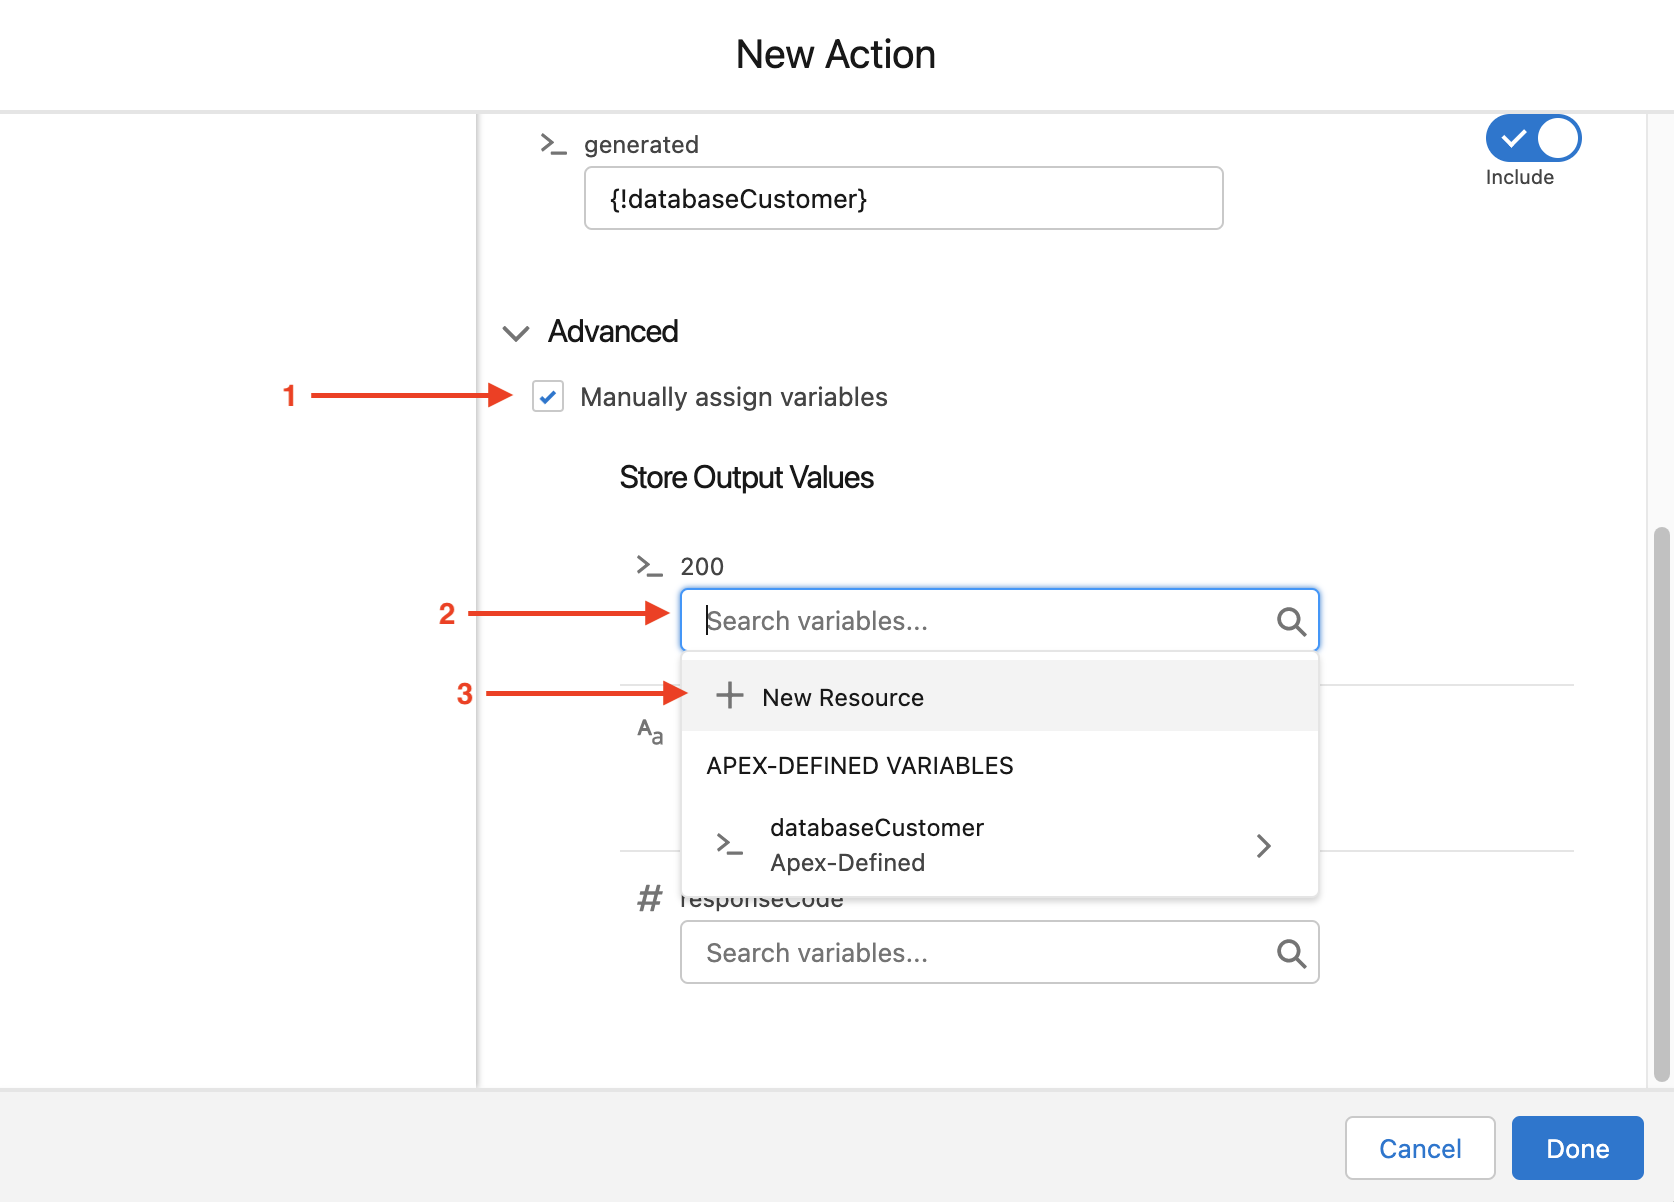
Click the arrow next to Advanced to open the advanced options.
-
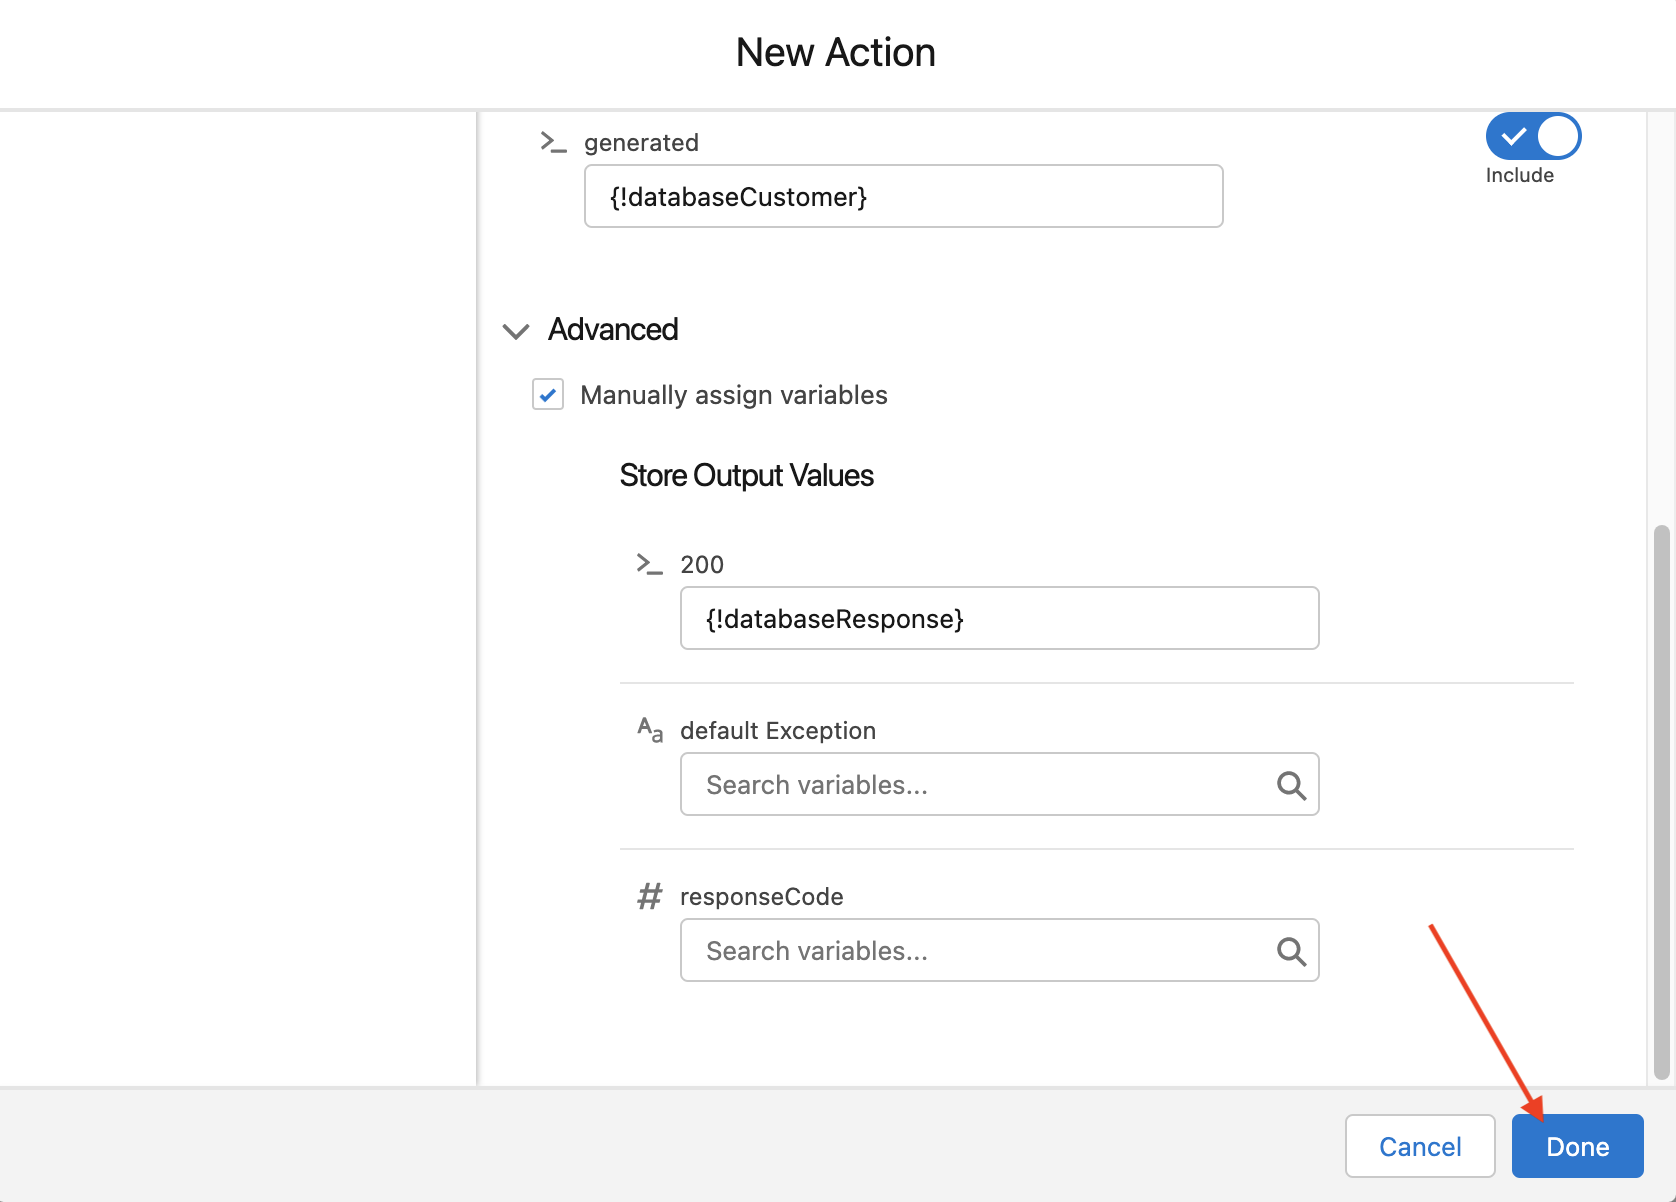
Check the box next to Manually assign variables.
-
Click the search bar under the 200 output value.
-
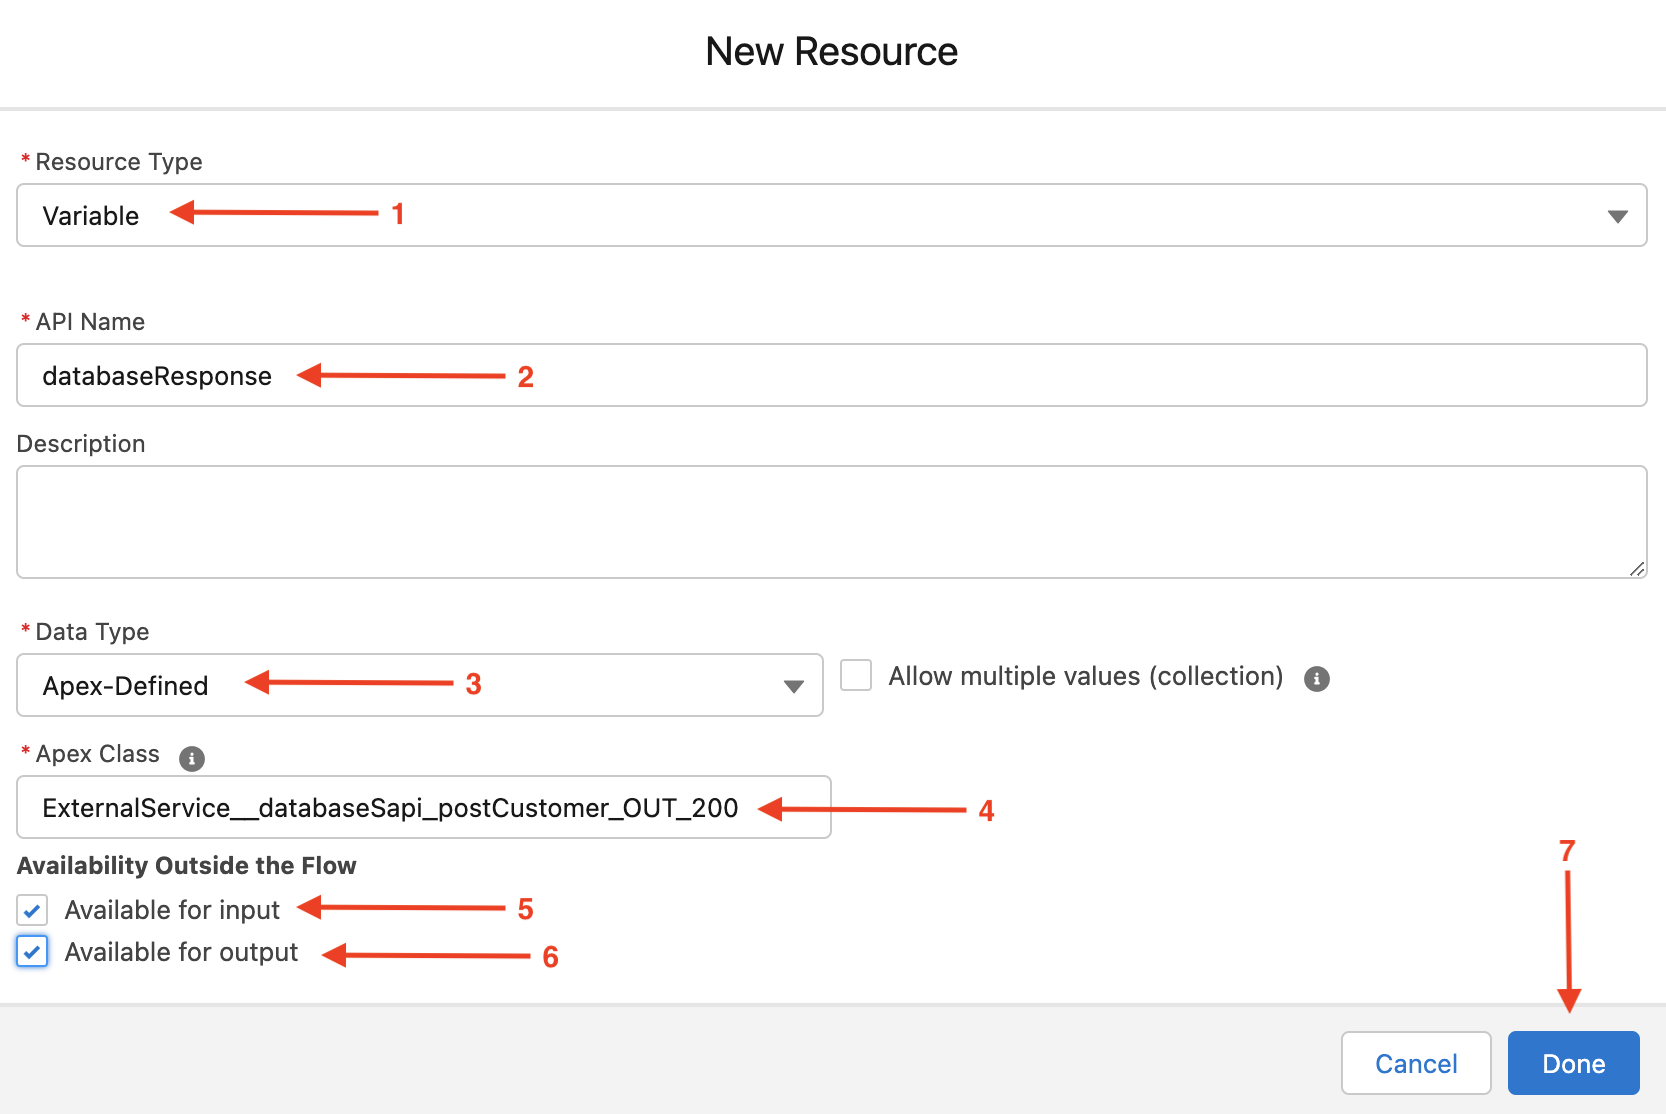
Click New Resource and enter the following details:
-
Resource Type: Variable
-
API Name: databaseResponse
-
Data Type: Apex-Defined
-
Apex Class: ExternalService__databaseSapi_postCustomer_OUT_200
-
Available for input: true
-
Available for output: true
-
-
Click Done and Done
Step 3: Add business logic
Note: Before proceeding with Step 3, please ensure you have completed step 2.3 in the prerequisites module. Prerequisite step 2.3 walks through creating a new custom field on the Contact object, which we will use to store the Database Id returned by our API as an external Id on the Contact record. If you haven’t completed this step please return to Prerequisites and complete step 2.3.
With the action configured on the canvas, the next step is to extract the relevant record details and add them to the variable we have created that represents the API input payload.
-
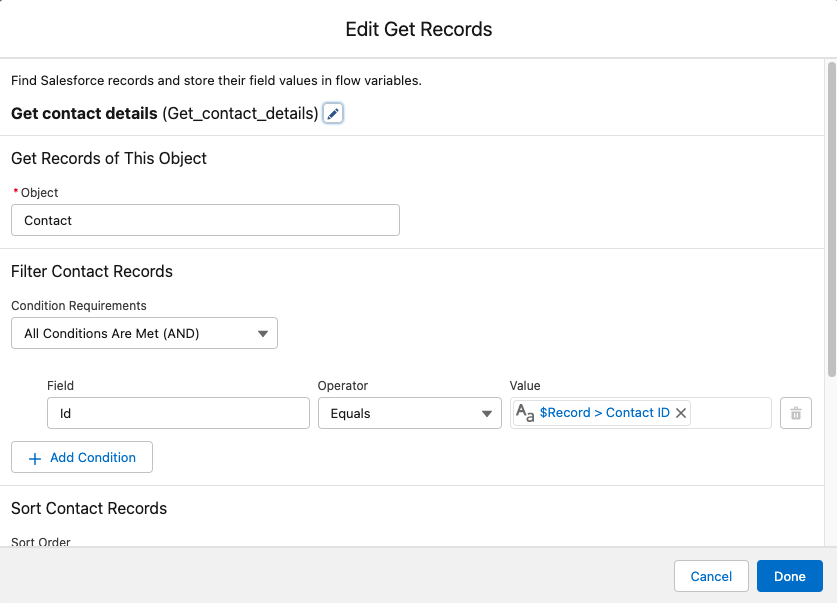
Click and drag the Get Records Data element onto the canvas.
-
Enter the following details:
-
Label: Get contact details
-
API Name: Get_contact_details (auto-filled)
-
Object: Contact
-
Condition Requirements: All Condition Are Met (AND)
-
Field: Id
-
Operator: Equals
-
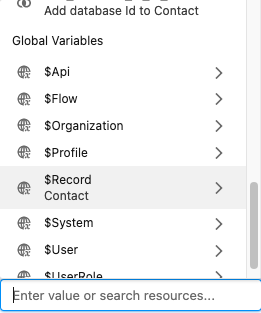
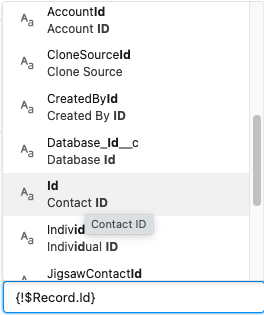
Value: $Record.Id
Note: This value can be selected by clicking the search bar, scrolling down to Global Variables, clicking "Record" and "Id".
-
-
Click Done
-
Click and drag the Assignment Logic element onto the canvas.
-
Enter the following details:
-
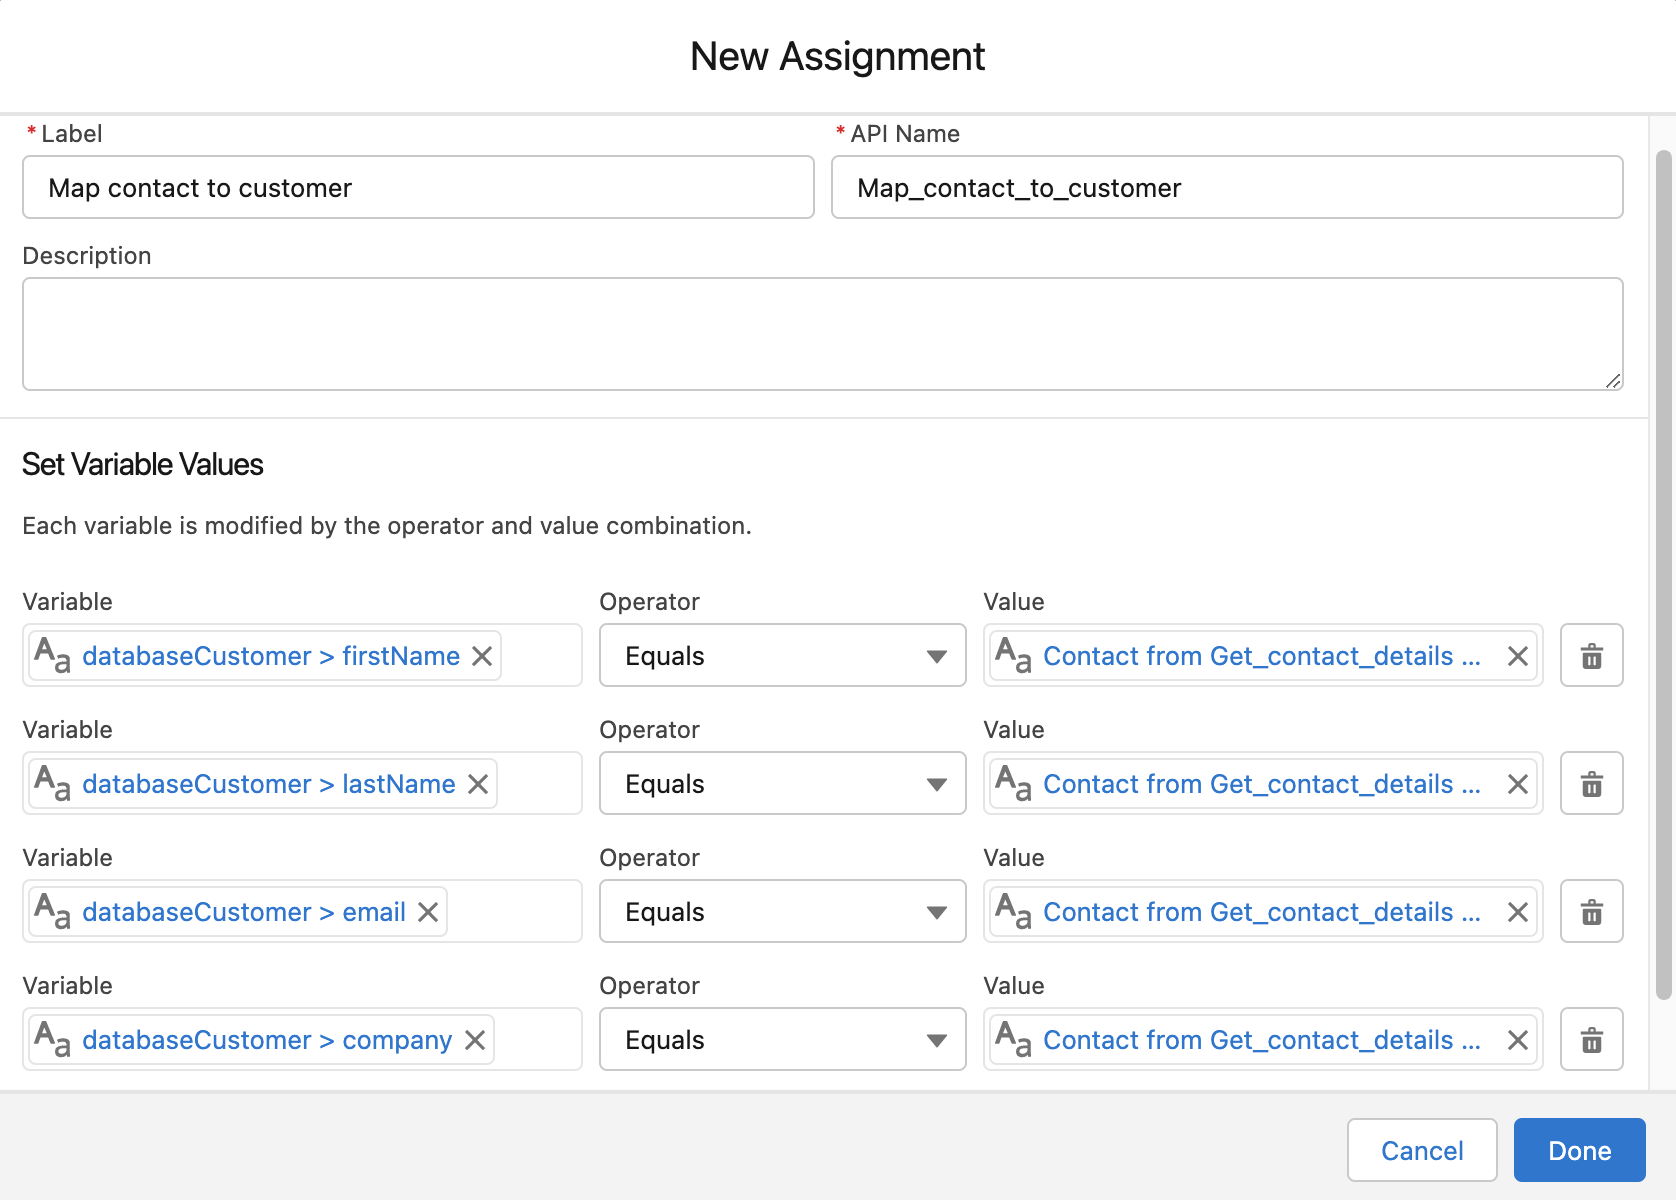
Name: Map contact to customer
-
API Name: Map_contact_to_customer (auto-fill)
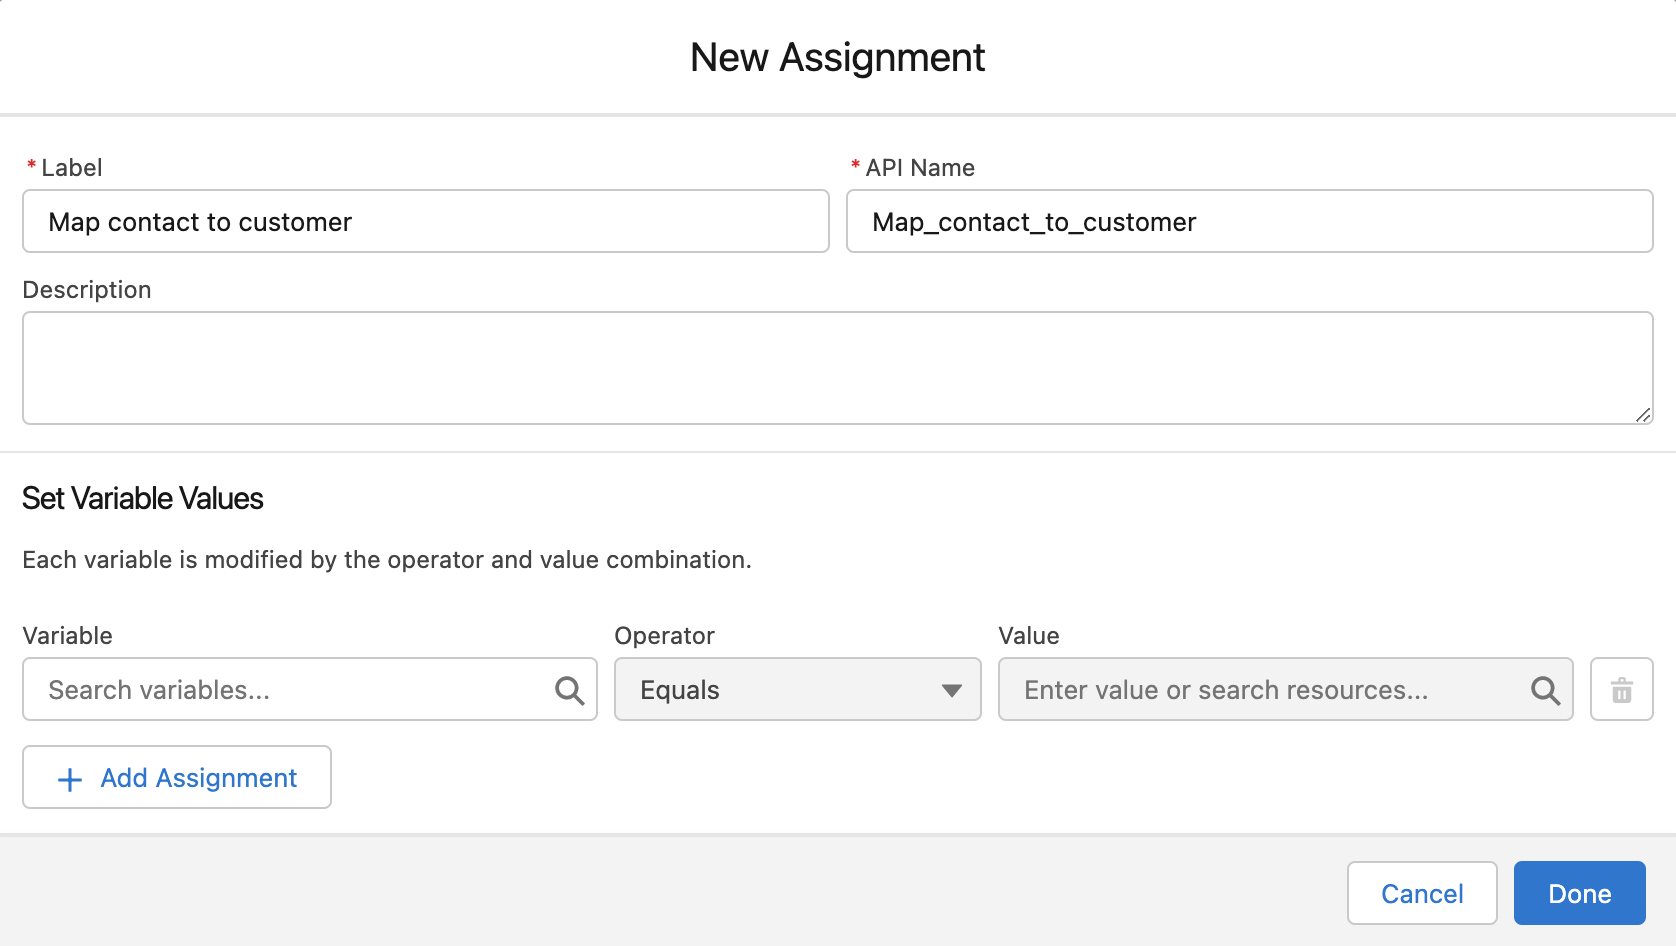
Now we need to assign the contact details to the relevant fields of the databaseCustomer variable we created in Step 2.
-
-
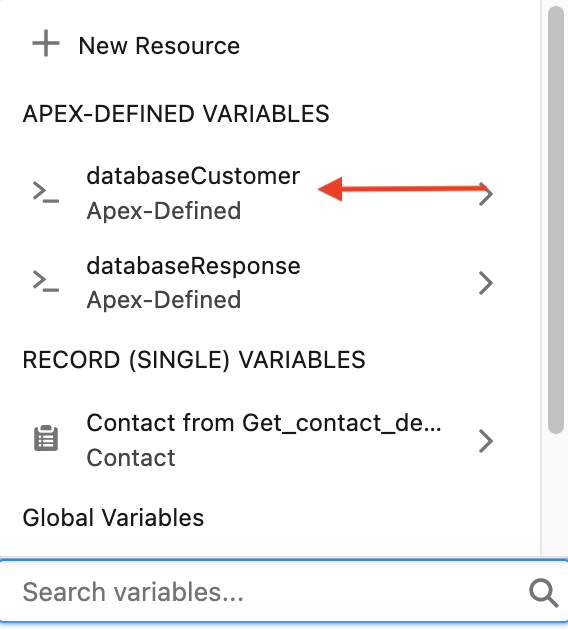
Click the Search variables search bar
-
Select the databaseCustomer apex-defined variable
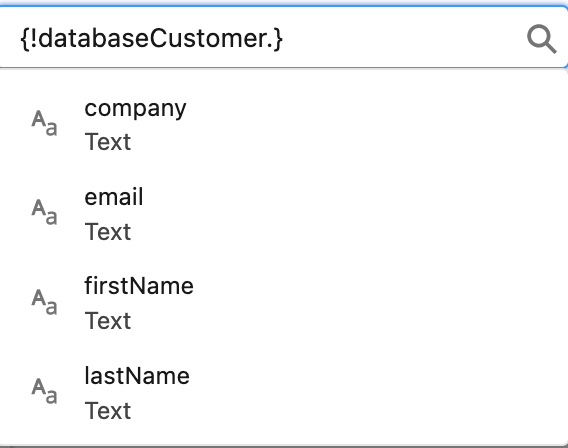
-
Select the firstName field
-
Set the operator to Equals
-
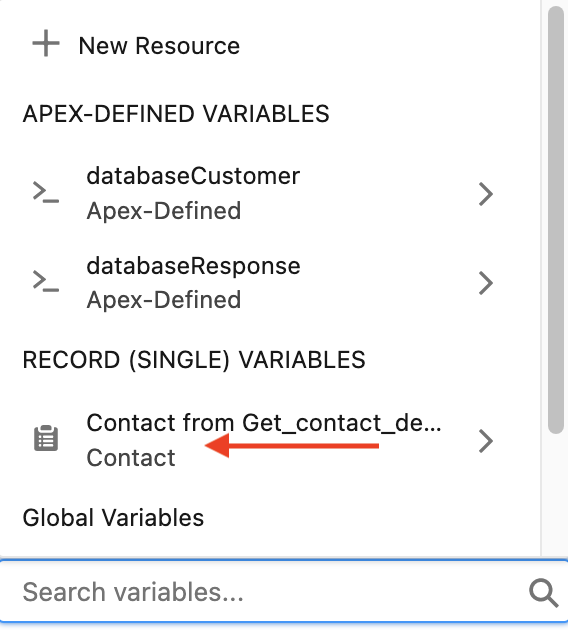
Click the Enter value or search resources search bar
-
Select the Contact from Get_contact_details Record (Single) Variable
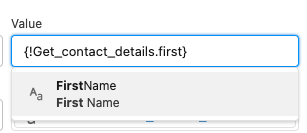
-
Select the FirstName field
-
Click Add Assignment and repeat steps 6 - 12 for the following fields:
-
databaseCustomer.lastName Equals Get_contact_details.LastName
-
databaseCustomer.email Equals Get_contact_details.Email
-
databaseCustomer.company Equals Get_contact_details.Account.Name
-
-
Click Done
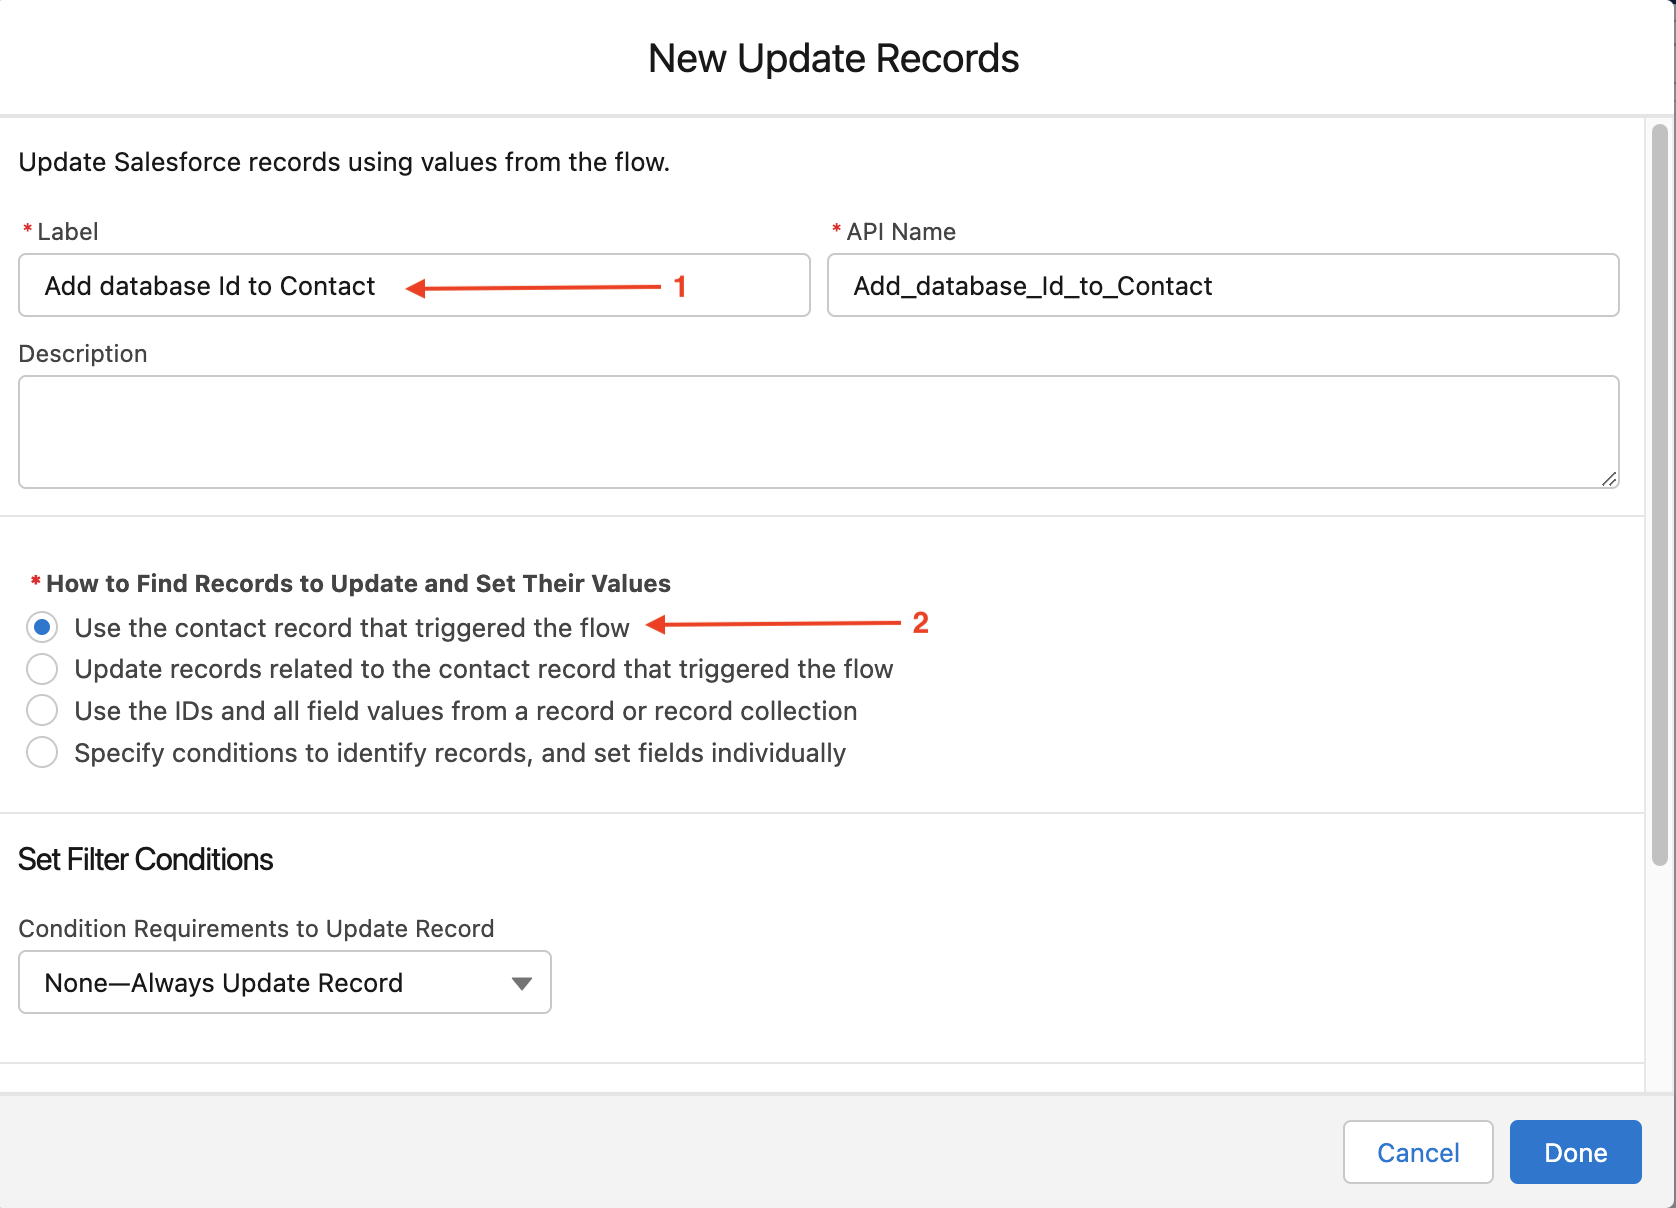
The final element to be added is to use the response from the external service to update the contact record we created.
-
Click and drag the Update Records Data element onto the canvas and enter the following details:
-
Label: Add database Id to Contact
-
API Name: Add_database_Id_to_Contact
-
How to Find Records to Update and Set Their Values: Use the contact record that triggered the flow
-
Condition Requirements to Update Record: None-Always Update Record
-
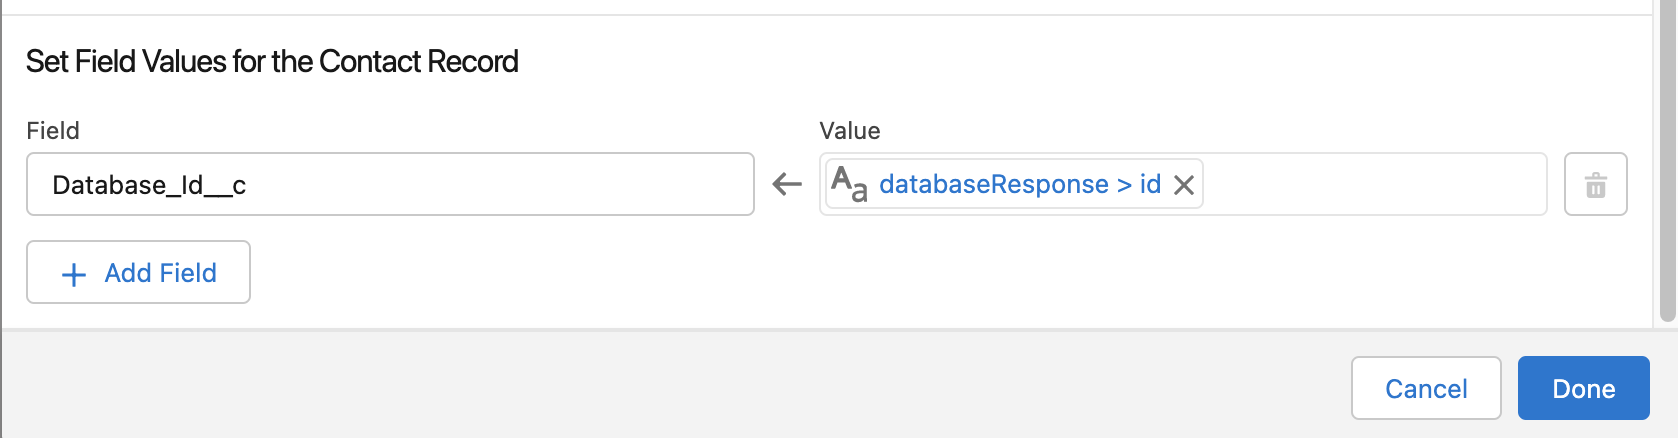
Field: Database_Id__c
-
Value: databaseResponse.id
-
-
Click Done
-
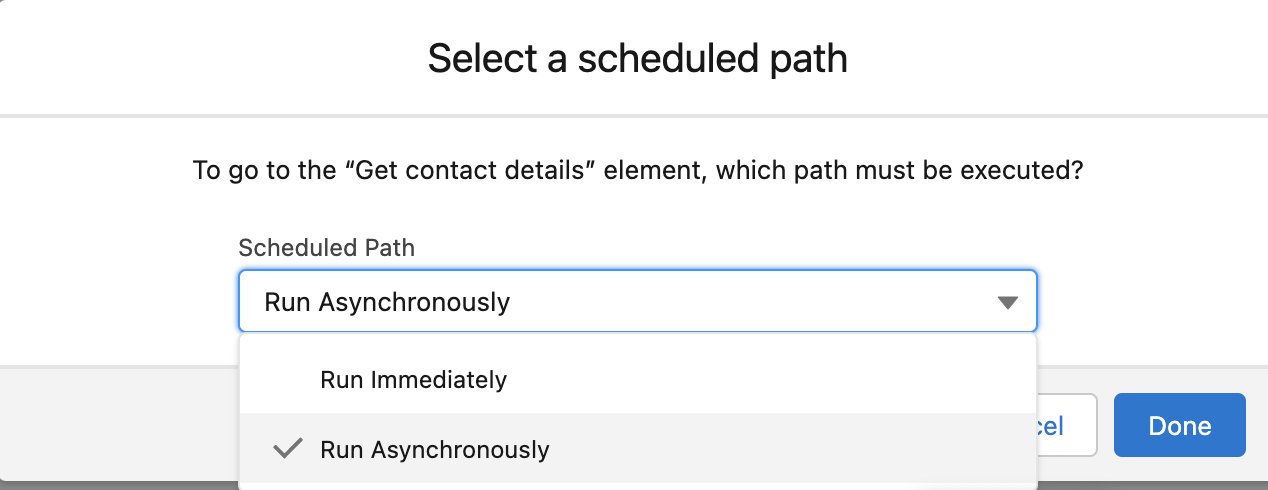
Connect the start element to the Get contact details element
-
Select the Run Asynchronously path
-
Connect the rest of the configured elements in the following order:
-
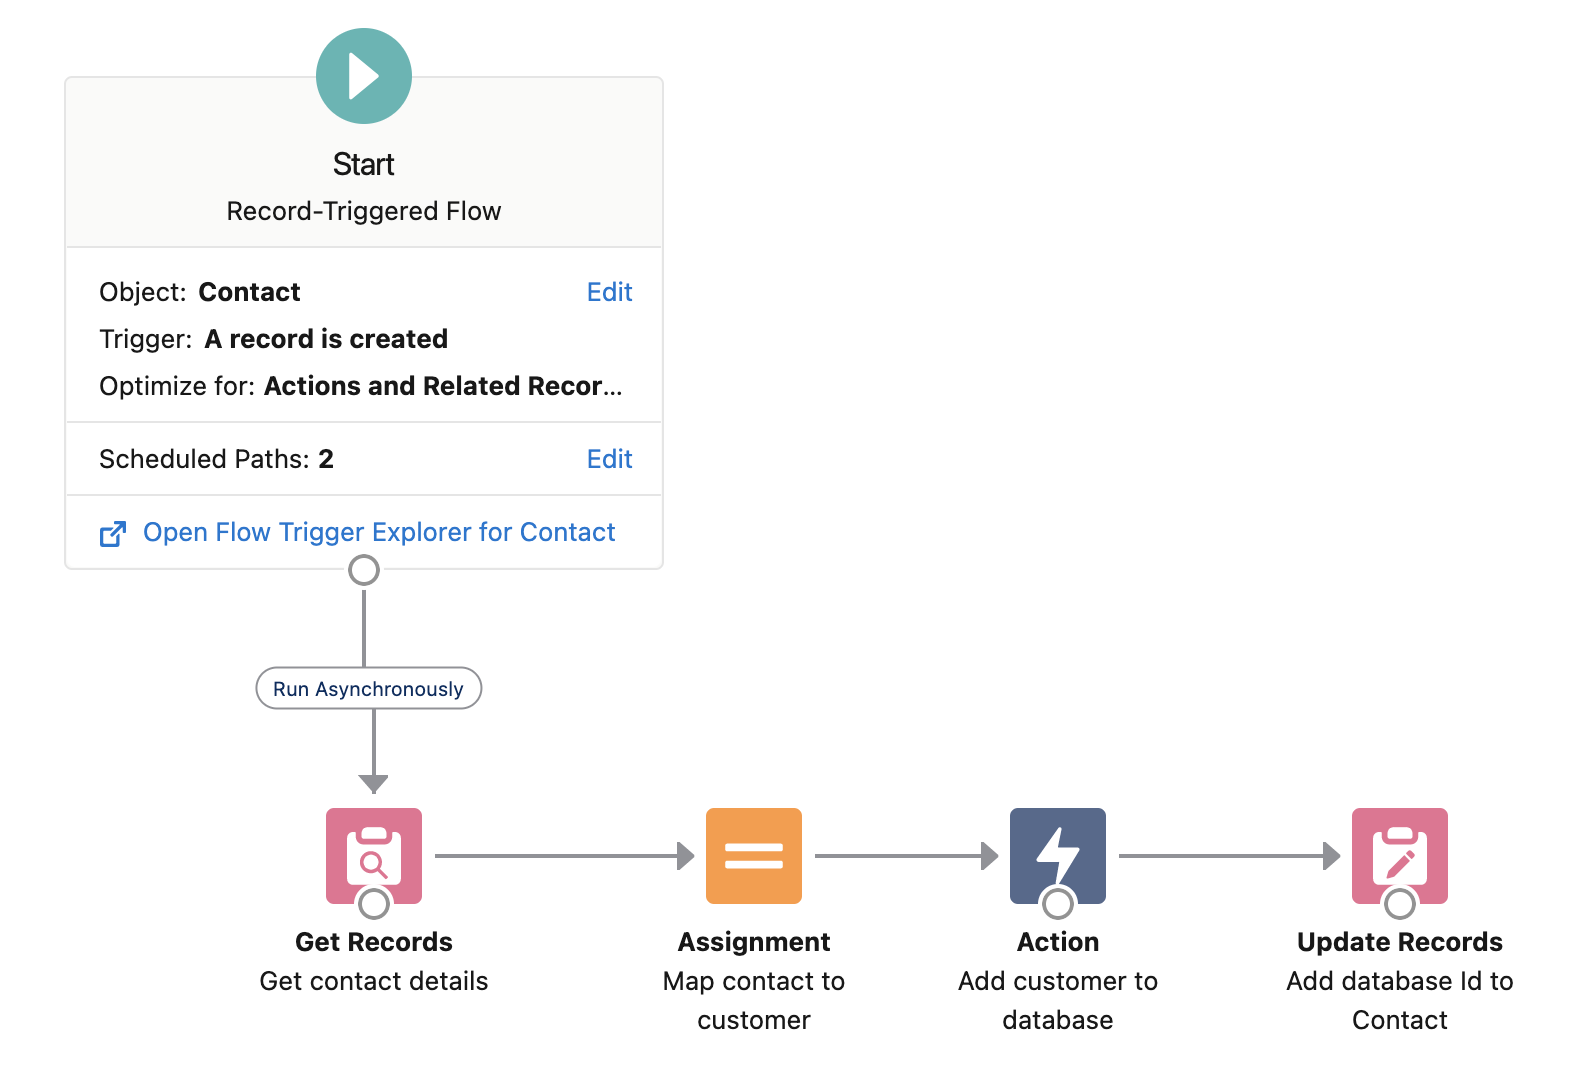
Get contact details → Map contact to customer → Add customer to database → Add database Id to Contact
-
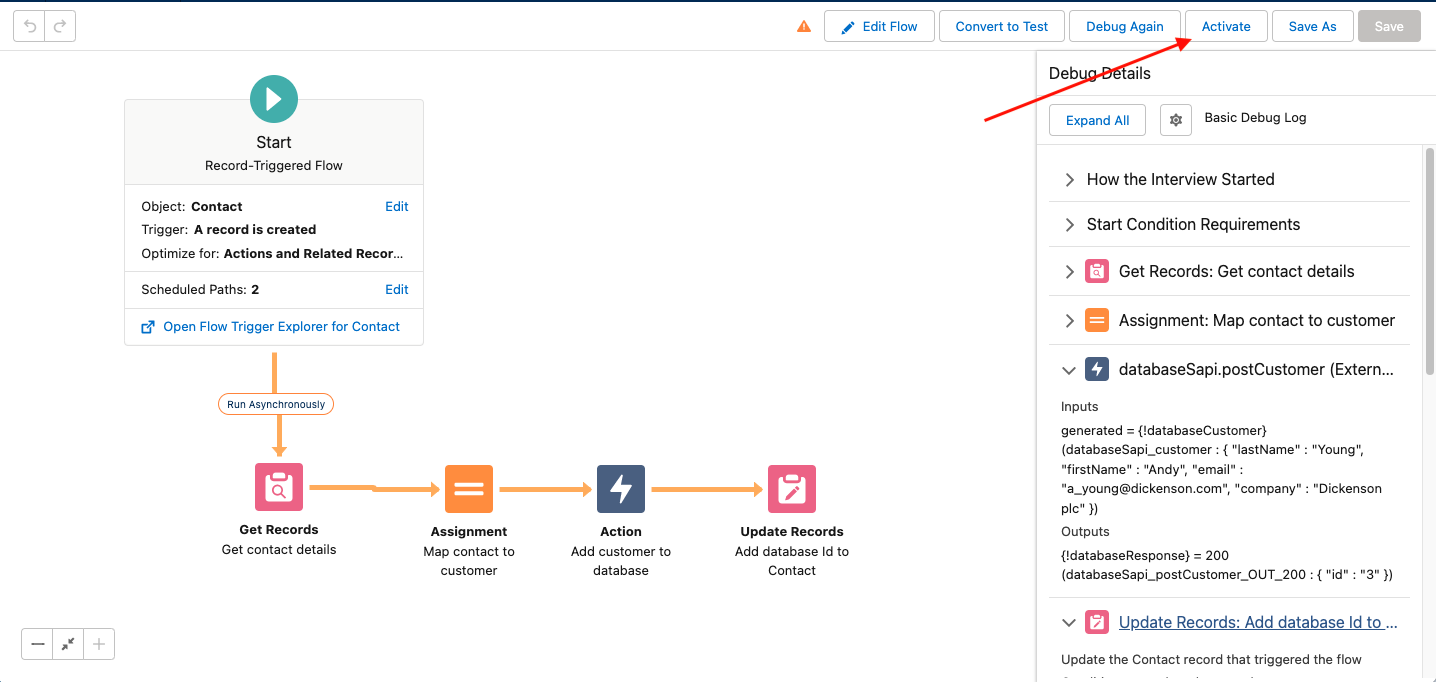
Your final flow should look similar to this.
-
-
Click Save and name the flow:
-
Flow label: Database Sync on New Contact
-
Flow API Name: Database_Sync_on_New_Contact
-
-
Click Save
Step 4: Test and activate
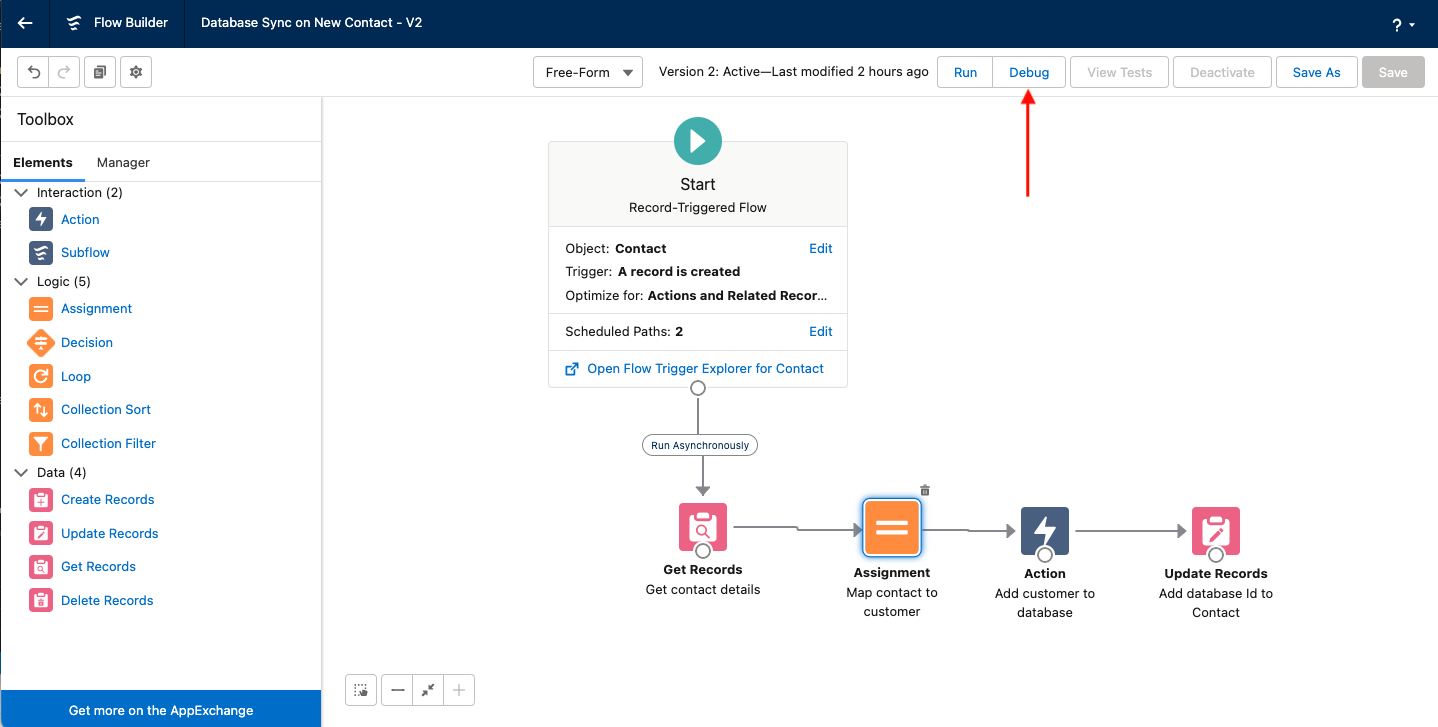
Before Activating the flow, we will use the debug window to test the functionality of our flow.
-
Click Debug
-
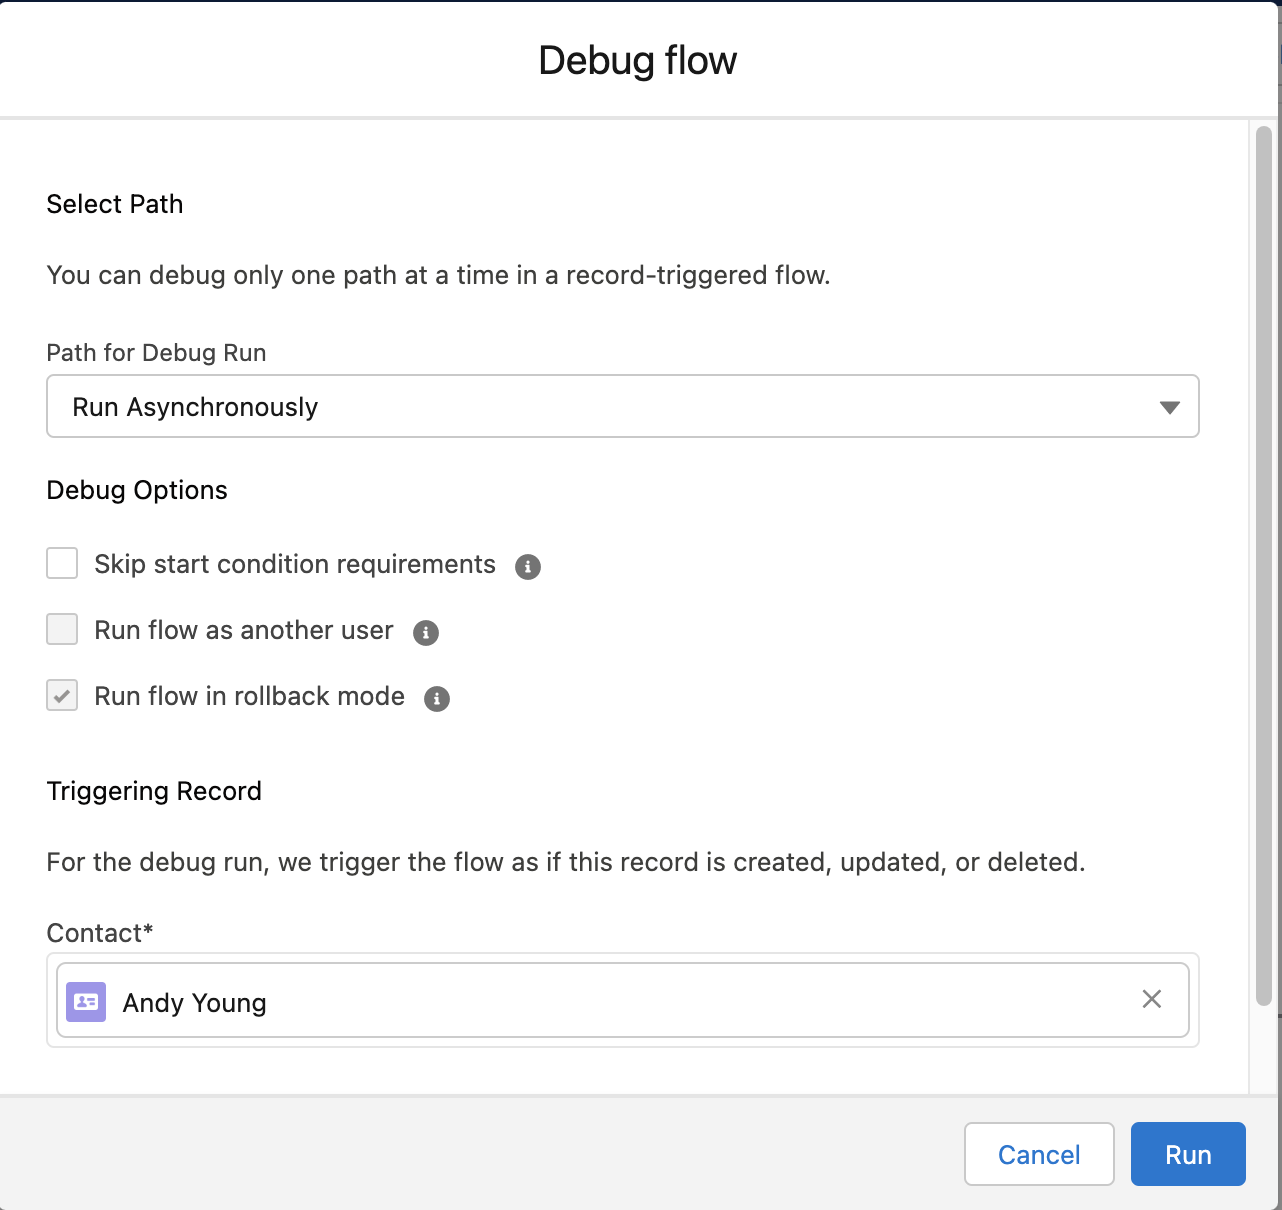
Ensure the Path for Debug run is set to Run Asynchronously
-
Select Andy Young as the Contact
Note: Andy Young should simply be the first contact to appear in the list, you can select any Contact available in your environment for this step.
-
Click Run
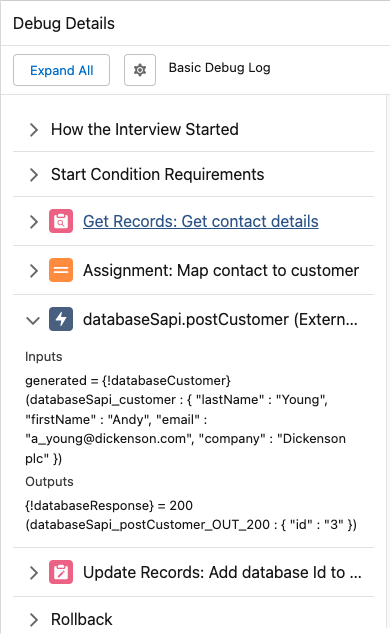
The Debug Details on the right side of the window let you see the inputs and outputs of each element and provides details about actions taken in Salesforce.
-
Expand the databaseSapi action details
-
You should see Andy’s details populating the "inputs" section and the databaseId in the output.
-
-
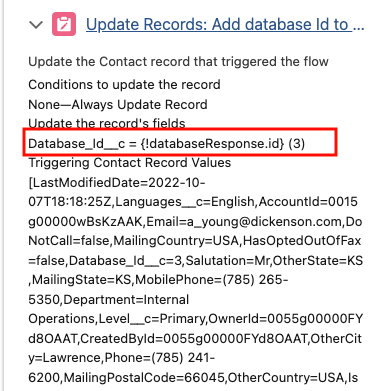
Expand the Update Records details.
-
Here you can see a summary of the updates applied to the record. Notably, the Database_Id__c field has been set to the value of the databaseSapi output.
-
-
Having tested the flow with the debugger, we can now activate it by clicking the Activate button
-
Exit the Flow Builder by clicking the Back arrow in the top left of the window.

-
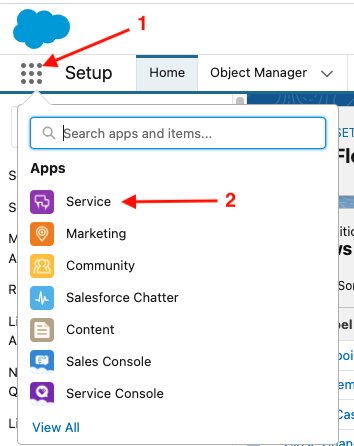
Navigate to the Service app by clicking the App Launcher icon and clicking Service
-
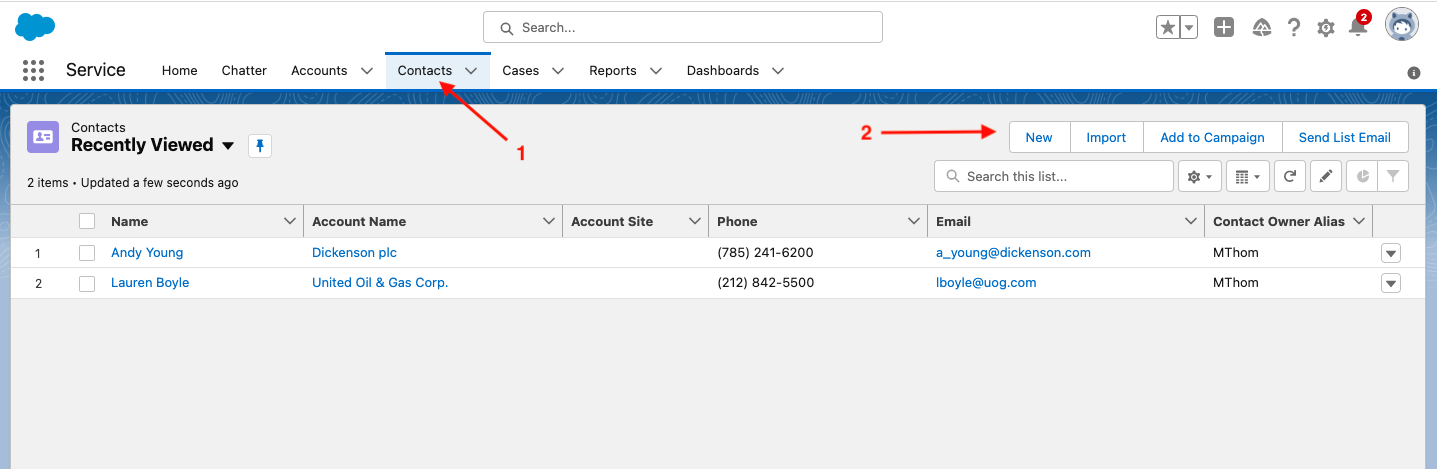
Click Contacts
-
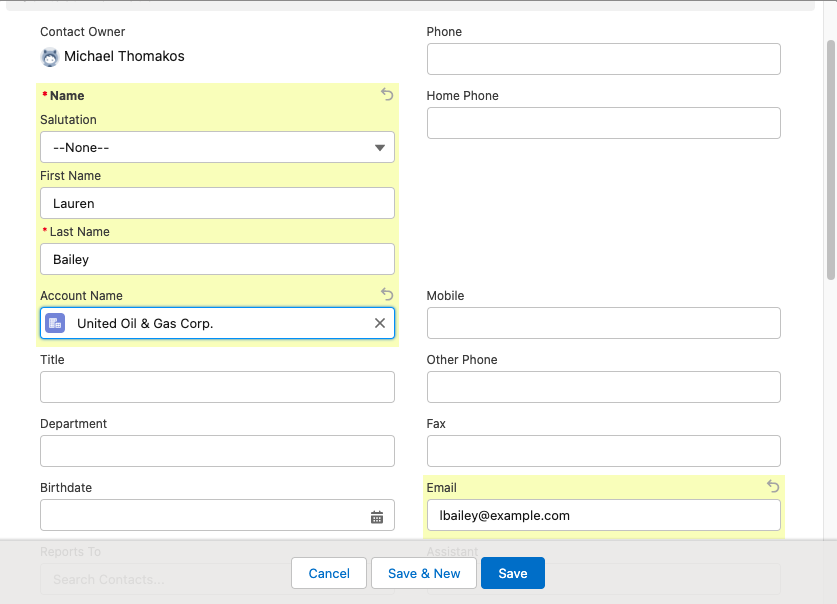
Click New to create a new contact, entering the following details:
-
First Name: Lauren
-
Last Name: Bailey
-
Account: United Oil & Gas Corp.
-
Email: lbailey@example.com
-
-
Click Save
-
When the record page loads, click into the Details tab
-
Scroll down to the Database Id field and notice that it has been populated automatically.

Note: Since we are making a call to an external service, there may be some delay before the flow is able to run, recieve a response and update the record. If the field hasn’t populated yet, wait a few moments and reload the page. The flow should run within a few minutes.
Summary
In this module you completed these steps to create a flow, automatically triggered by the creation of a record in Salesforce, that leverages the Database API you created in Module 1 and automatically synced the data returned by the API back to the original record. You also performed some simple debugging to very quickly and easily test and validate the functionality of your flow.
Congratulations! You have successfully made excellent use of a MuleSoft API, designed and built by you, from your Salesforce Org without writing a single line of code!
Please proceed to Module 3