Workshop Prerequisites
This section will guide you through the steps needed to prepare your environment for the workshop.
1. Anypoint Platform
We’ll need an Anypoint Platform account to design our first API. You can sign up for a free trial account here (https://anypoint.mulesoft.com/login/#/signup?apintent=generic).
2. Obtain a Salesforce Org
A Developer Edition Org is required during the workshop. You can obtain a Salesforce Developer Edition here (https://developer.salesforce.com/get-started#trial). As alternative, you could also use a Salesforce Sandbox, but keep in mind that the login URL then changes to https://test.salesforce.com.
2.2 OPTIONAL: Obtain a Security Token to connect
In the following Labs we will use Mulesofts Salesforce Connector in our APIs in order to connect to Salesforce.
Connecting to Salesforce can be done in multiple ways but for the workshop we will use the Basic Authentication method, therefore we may need a Security Token in addition to our username and password.
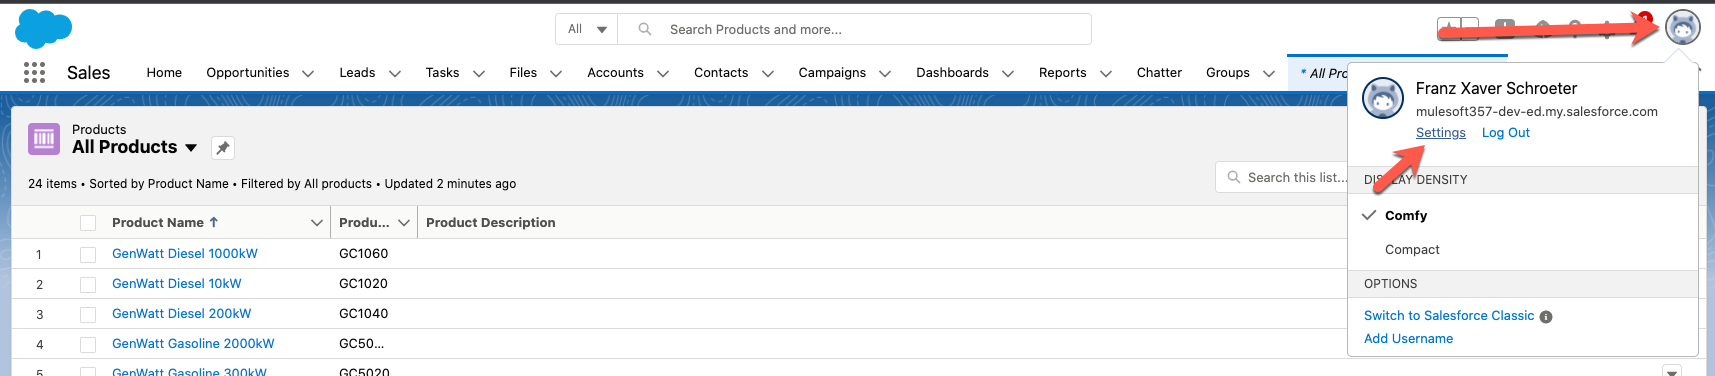
In Salesforce, navigate to your User Settings by clicking on the Astro Avatar on the top right of your Salesforce Org and next on Settings
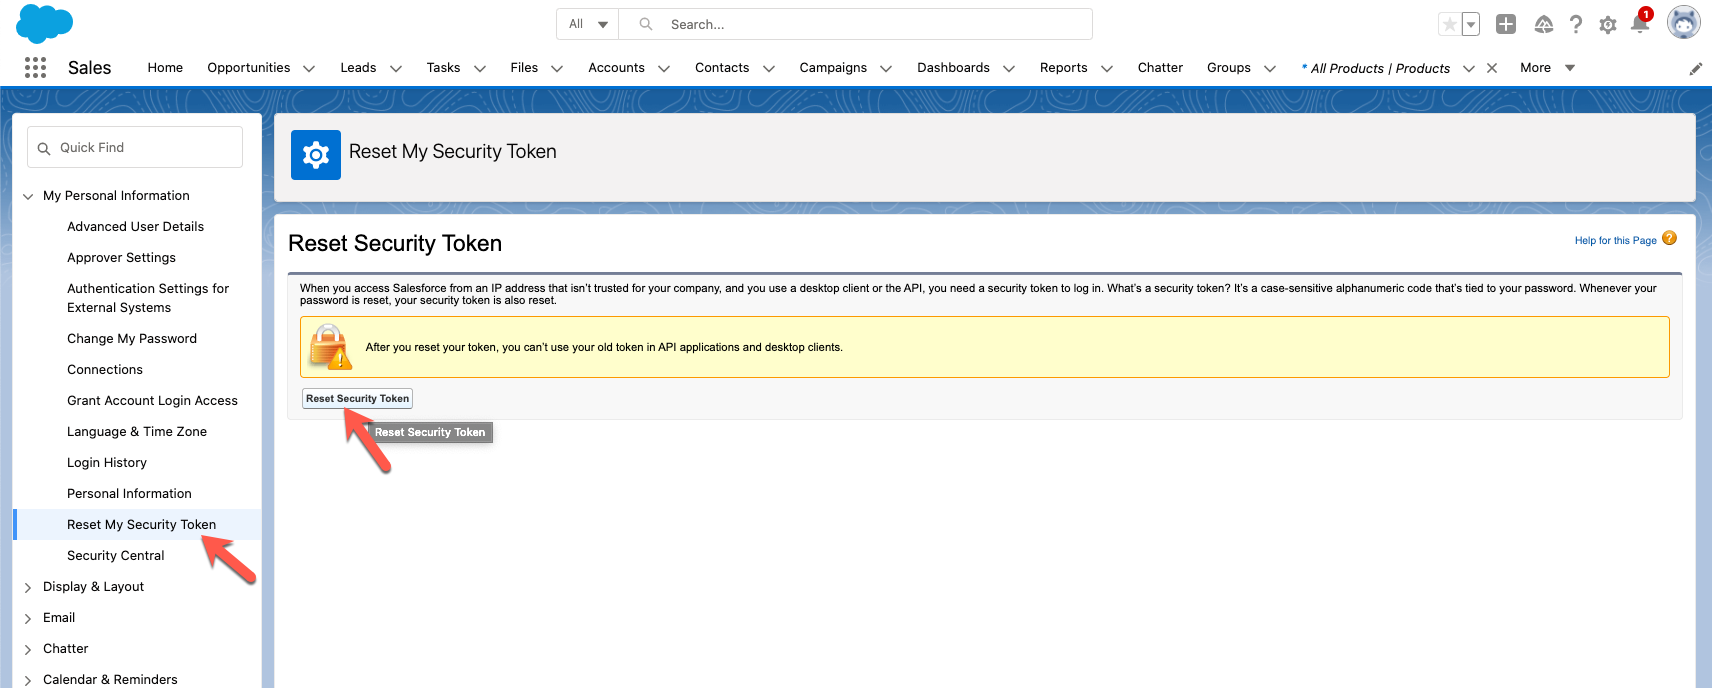
Once in the User Settings please navigate to Reset My Security Token and click Reset Security Token.
This action will trigger an email issuing your personal Token we will need later in this workshop.
2.3 Create a custom external Id field on the Contact object
-
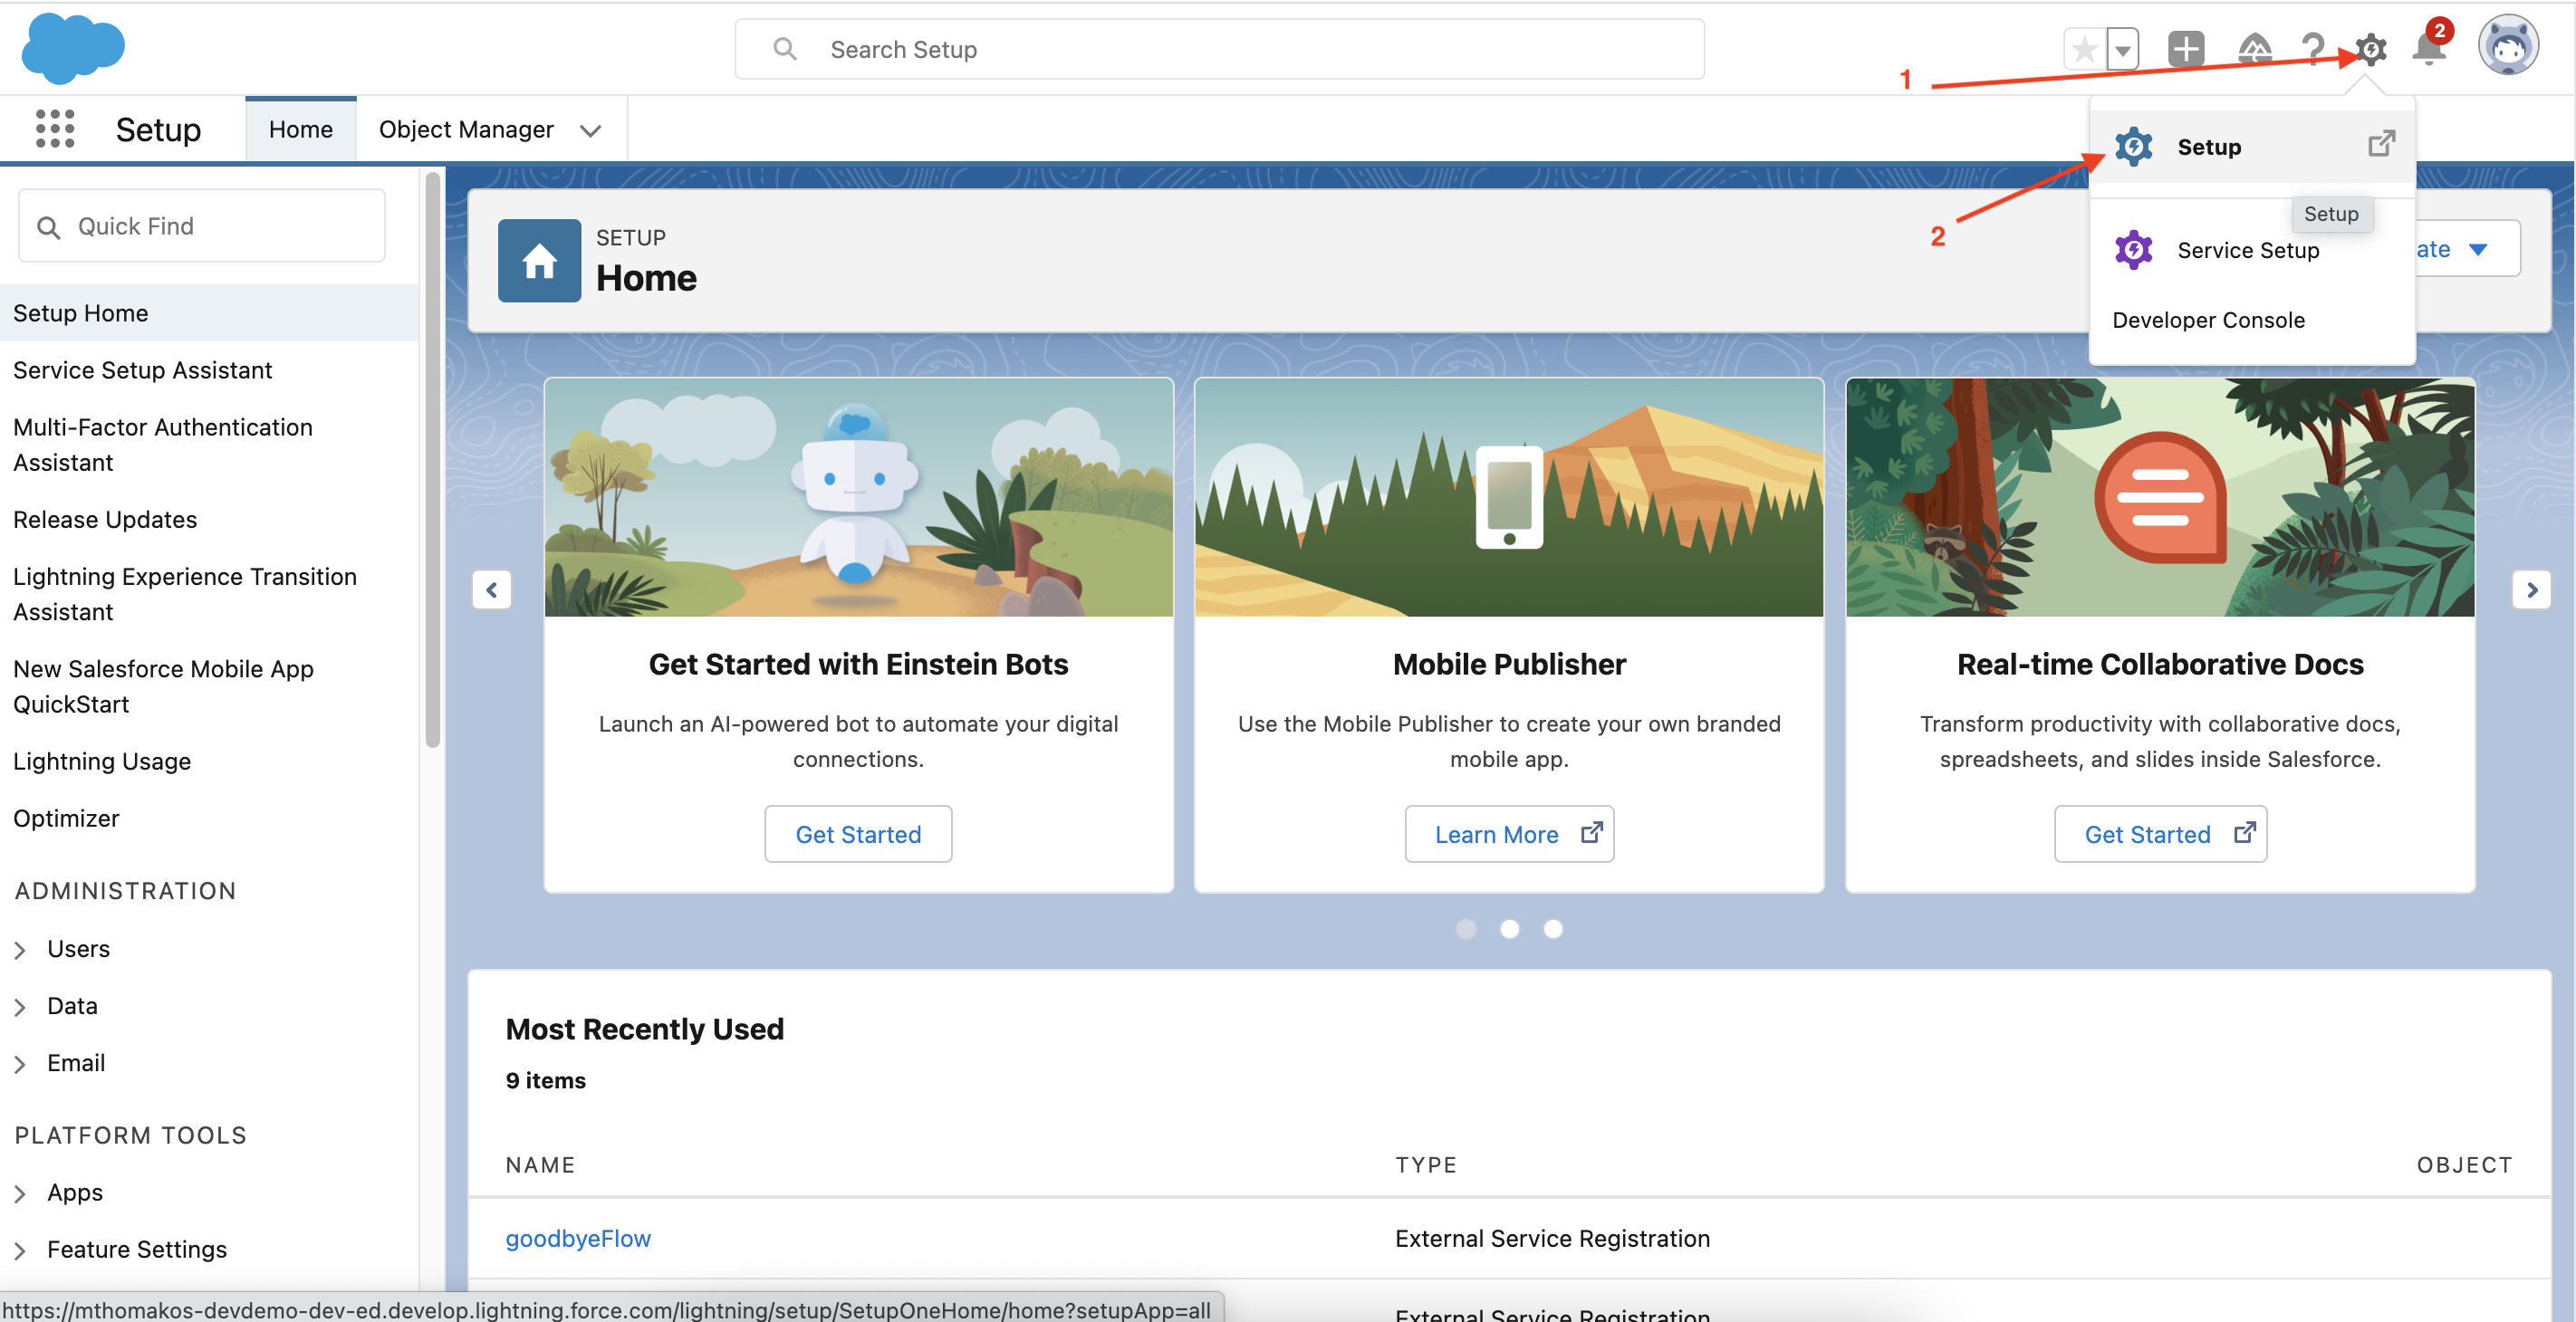
If you are not automatically directed to the Setup page on login, navigate there by clicking the cog in the upper-right corner of the screen and clicking the icon labelled "Setup".
-
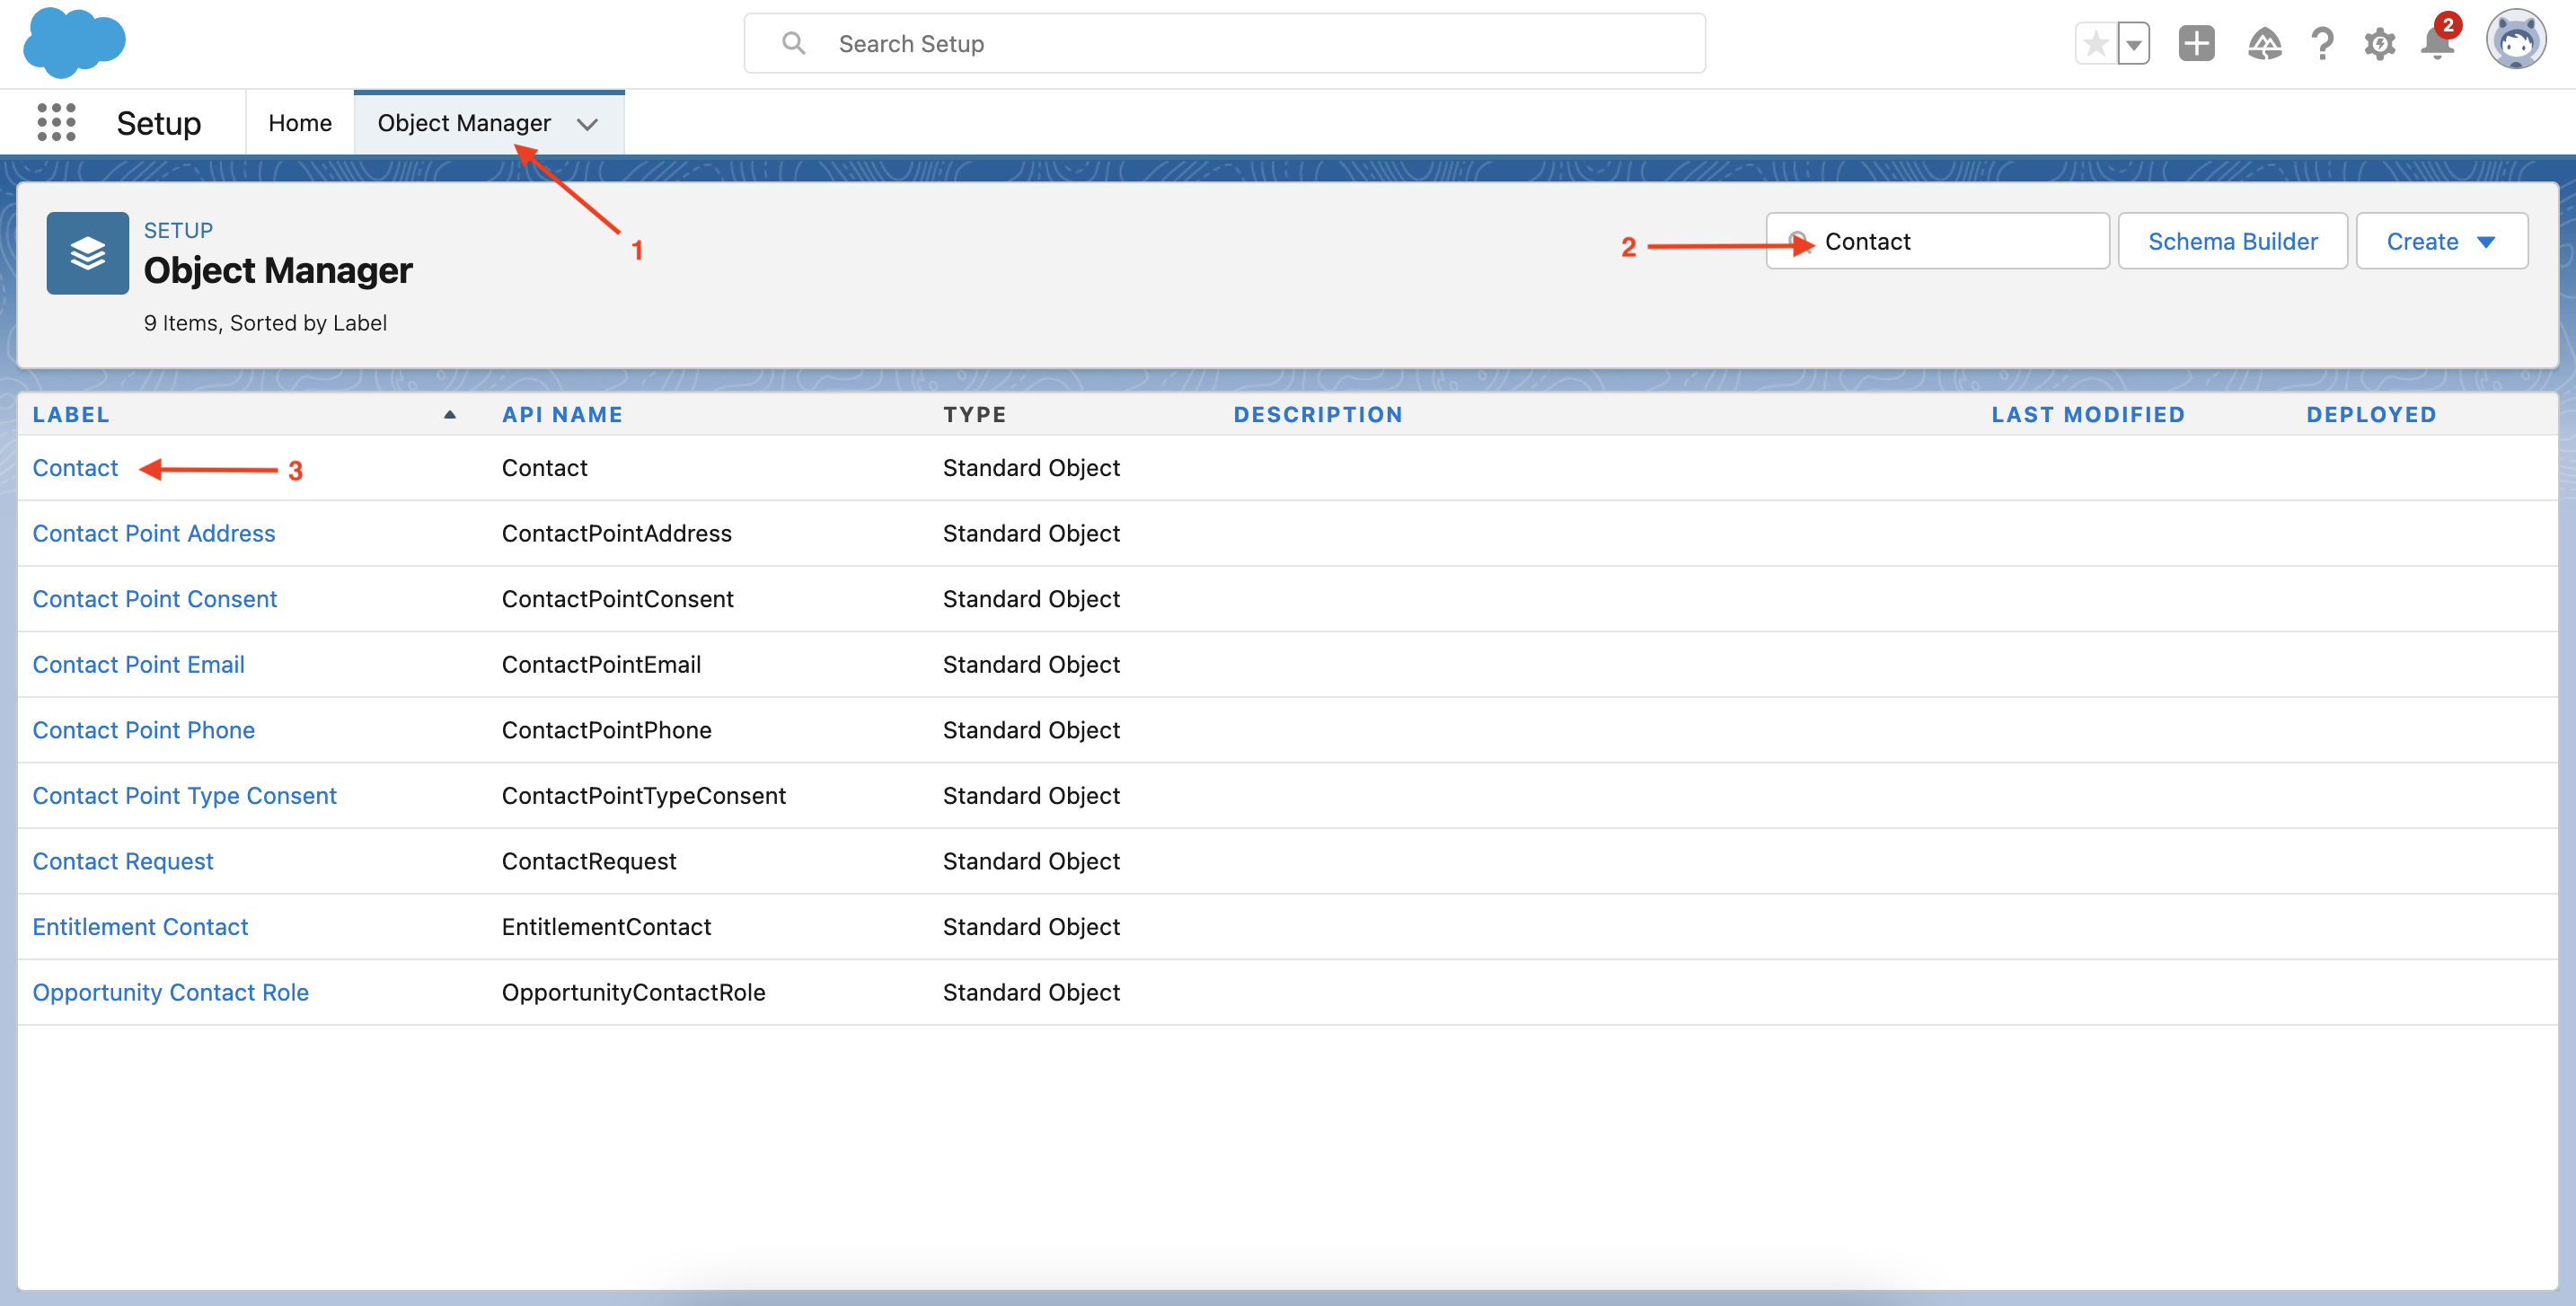
Click Object Manager
-
Enter "Contact" in the Quick Find search bar
-
Click "Contact"
-
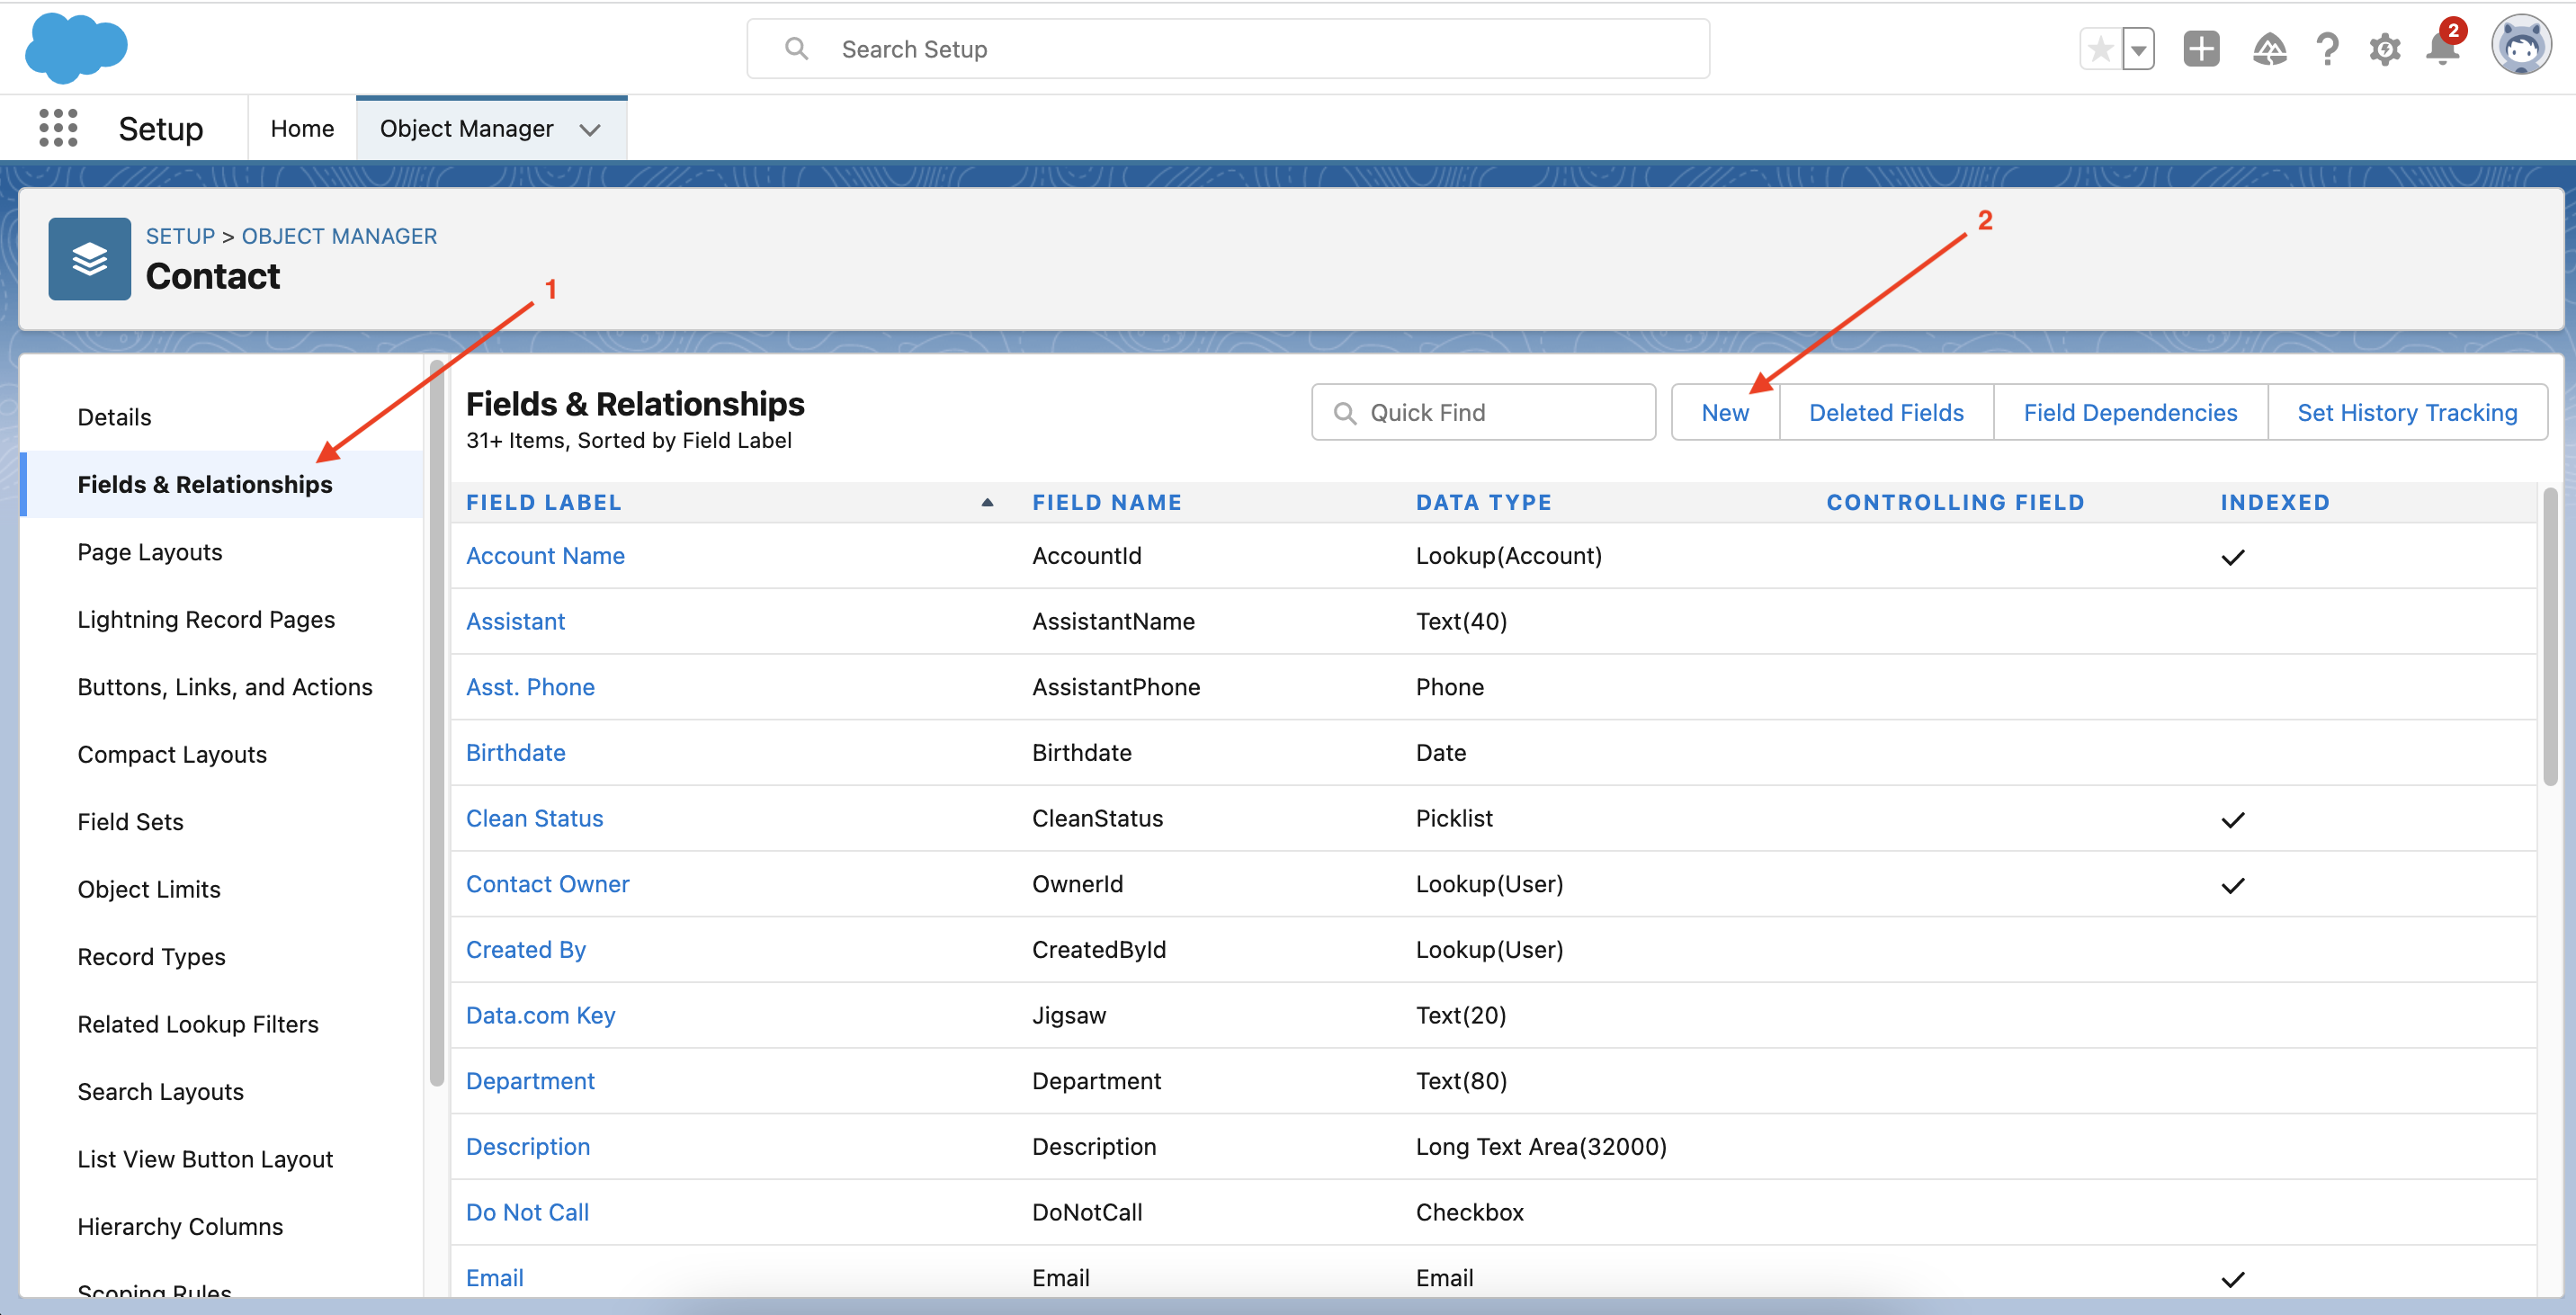
Click "Fields & Relationships"
-
Click "New"
-
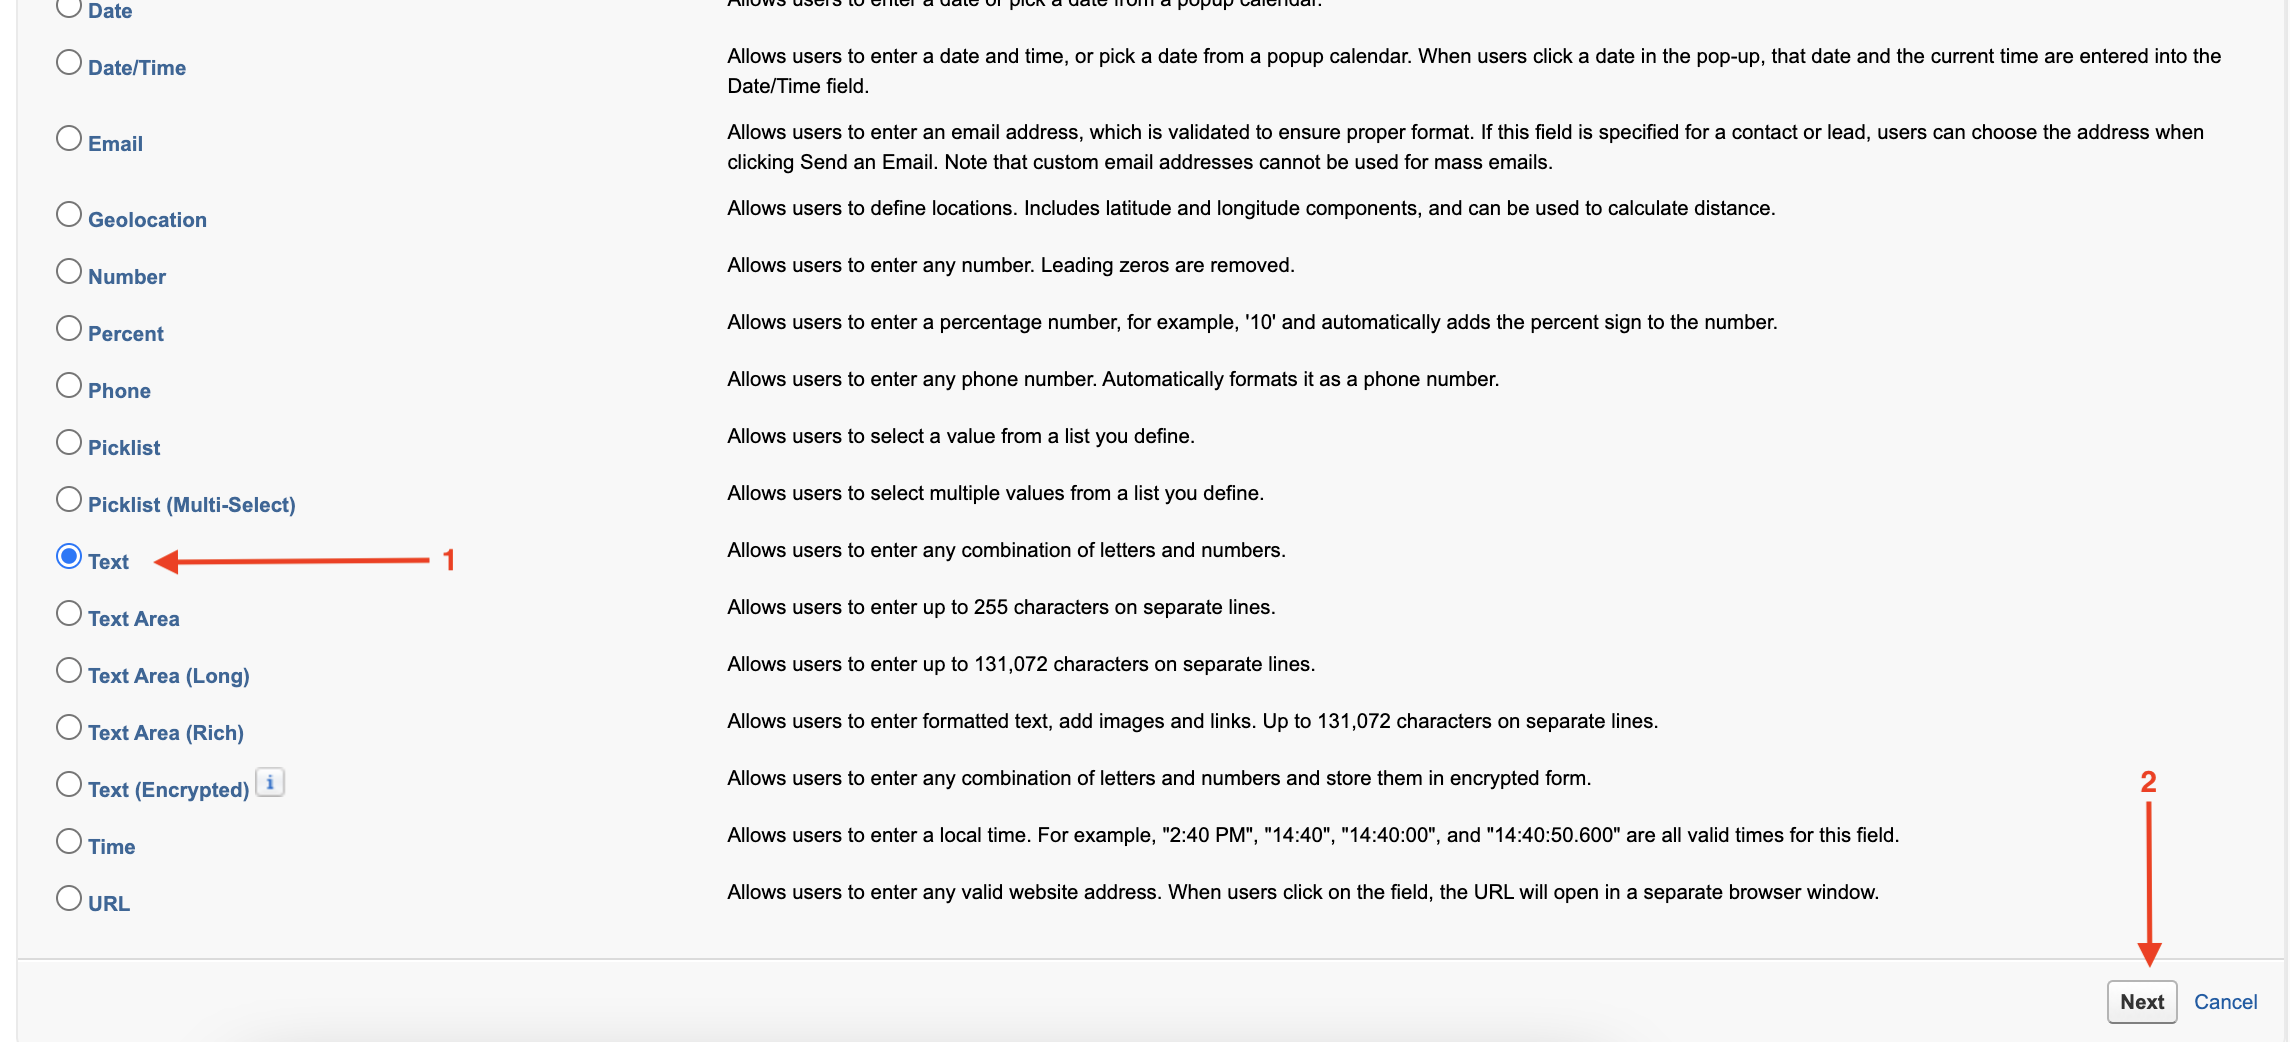
Scroll down and pick "Text" as the field type and click "Next"
-
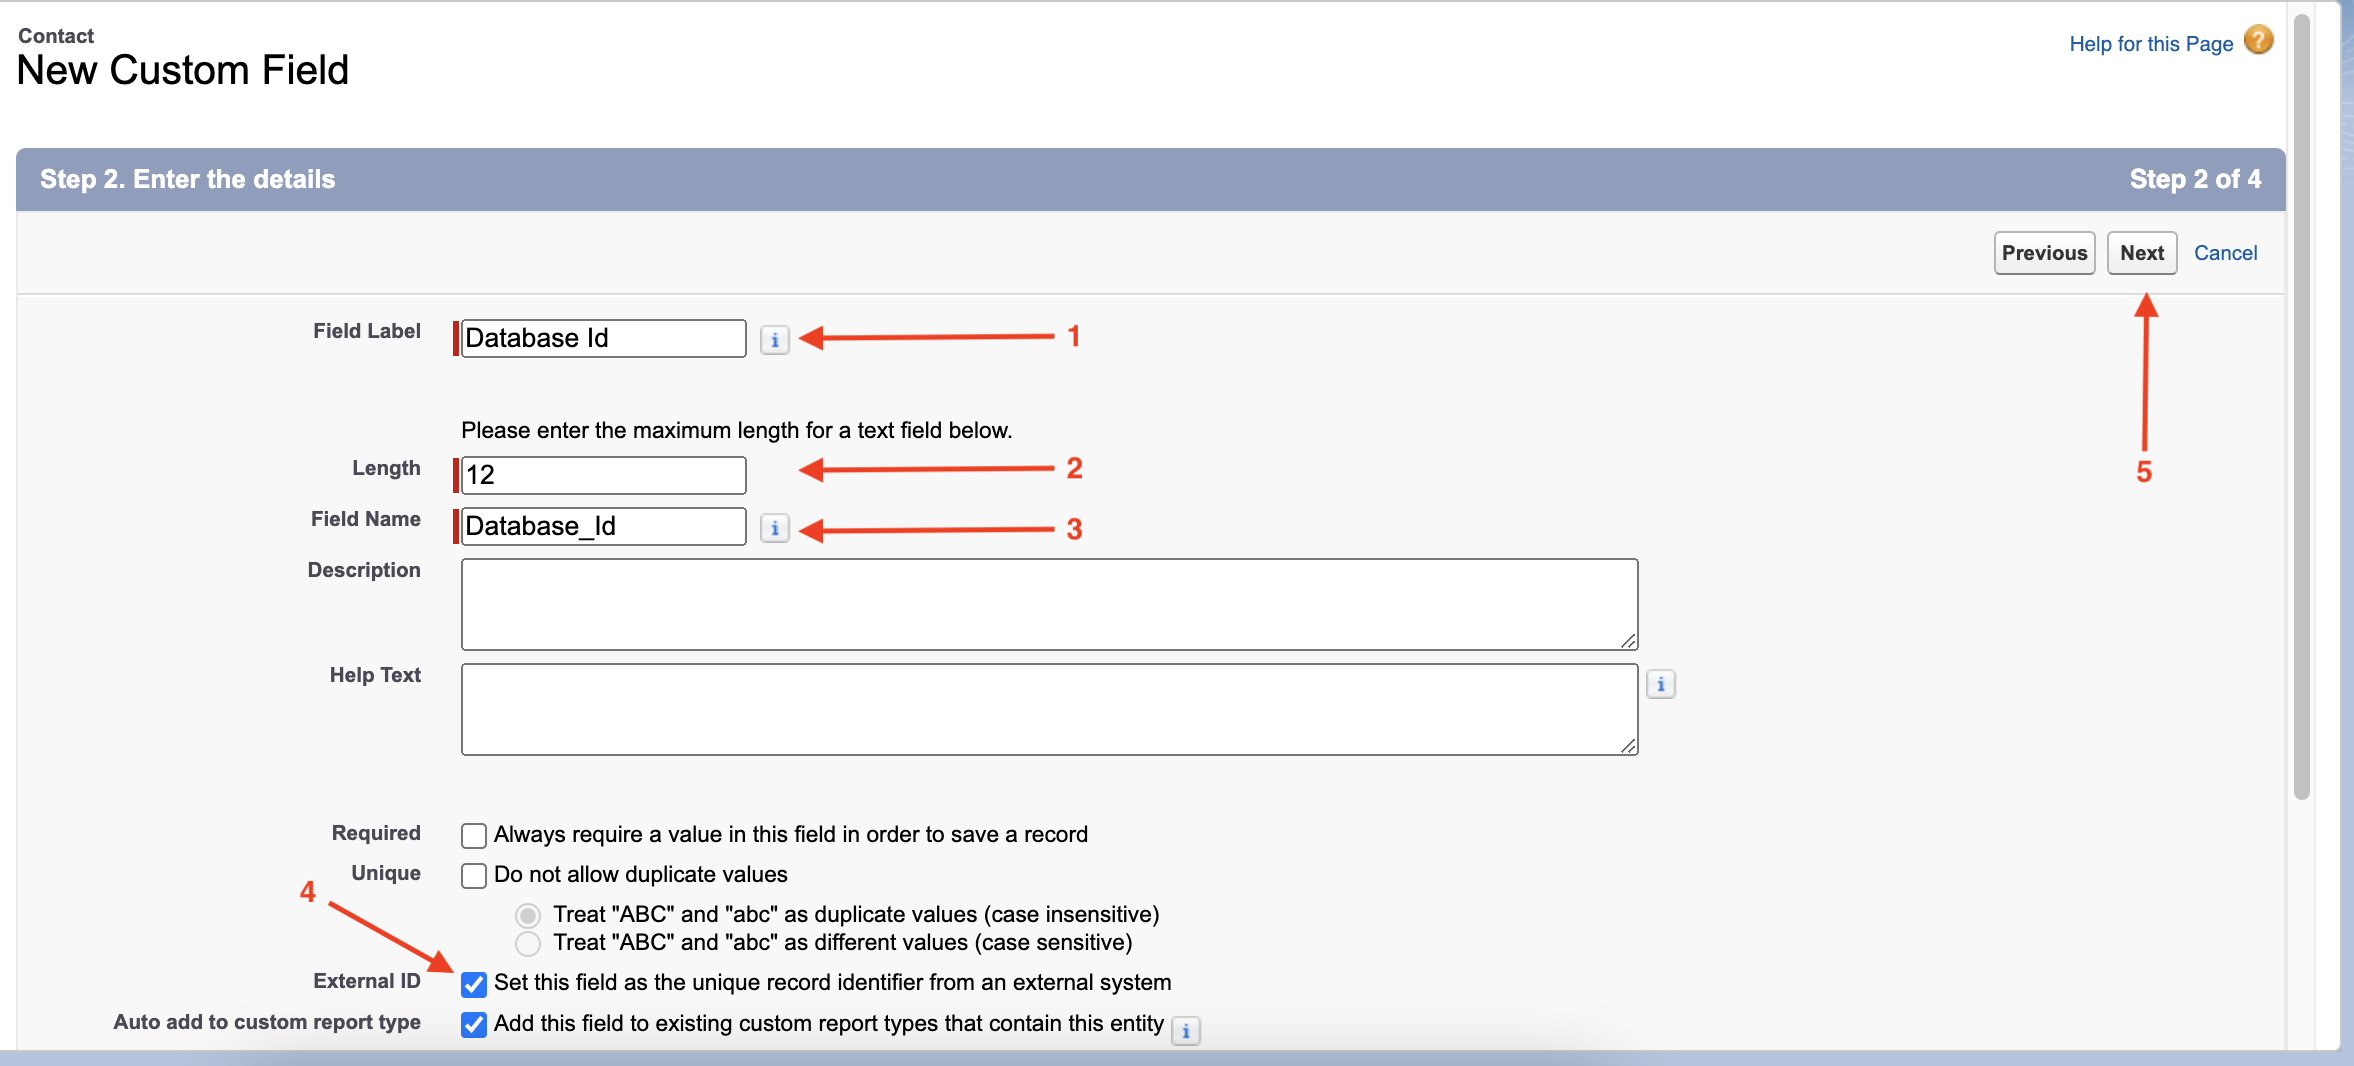
Enter the following details
-
Field Label: Database Id
-
Length: 12
-
Field Name: Database_Id
-
Ensure the External ID field is set to true.
-
-
Click "Next", "Next", "Save"
3. Obtain a REST Client
Download and install any REST Client of your choice. There are plenty of options out there for you to use, you can download MuleSoft’s Advanced REST Client (https://install.advancedrestclient.com/install?target="_blank"), or you can use the popular REST Client Postman (https://www.postman.com/downloads/?mulesoft&target="_blank"). We’ll be using Postman throughout these tutorials.
Let’s now proceed to our first module Module 1.