Lab 1: How to Design an API
Overview
APIs are the reusable assets that simplify and accelerate the creation of modern software applications.
A "design first" approach is used to enable API consumers the ability to understand, interact, and solicit feedback on the proposed API contract prior to the development effort. Anypoint Platform provides first-class tooling to support the needs of the API Designer. Anypoint Design Center provides a robust RAML editor for designing the specifications of the API and standing up a "mock" service to accelerate development efforts. It is also tightly integrated with Anypoint Exchange to simplify the process of discovering and referencing other API design-oriented assets like common data types, traits, schemas, and data examples.
For the purposes of this workshop we will design new APIs using REST. RESTful APIs support a variety of patterns that help solve many reliability, scalability and integration challenges you might face. In this lab, we will start designing a new REST API and test it before implementing it. We will:
-
Use Anypoint Platform’s Design Center to design the API.
-
We will then use Anypoint Exchange to search and find data definitions and examples published across the organization that enable us to standardize on common data elements.
-
Lastly, we will utilize the Mocking Service to unlock resource dependencies of your API design. This significantly cuts down the time spent building the application by turning the RAML design over to the developers immediately and adopting a rapid prototyping style. Developers can utilize the mocked up API capabilities to produce a "working" application that calls the Mocking Service.
Step 1: Login to Anypoint Platform
-
Go to http://anypoint.mulesoft.com
-
Enter your credentials into the Username and Password fields.
-
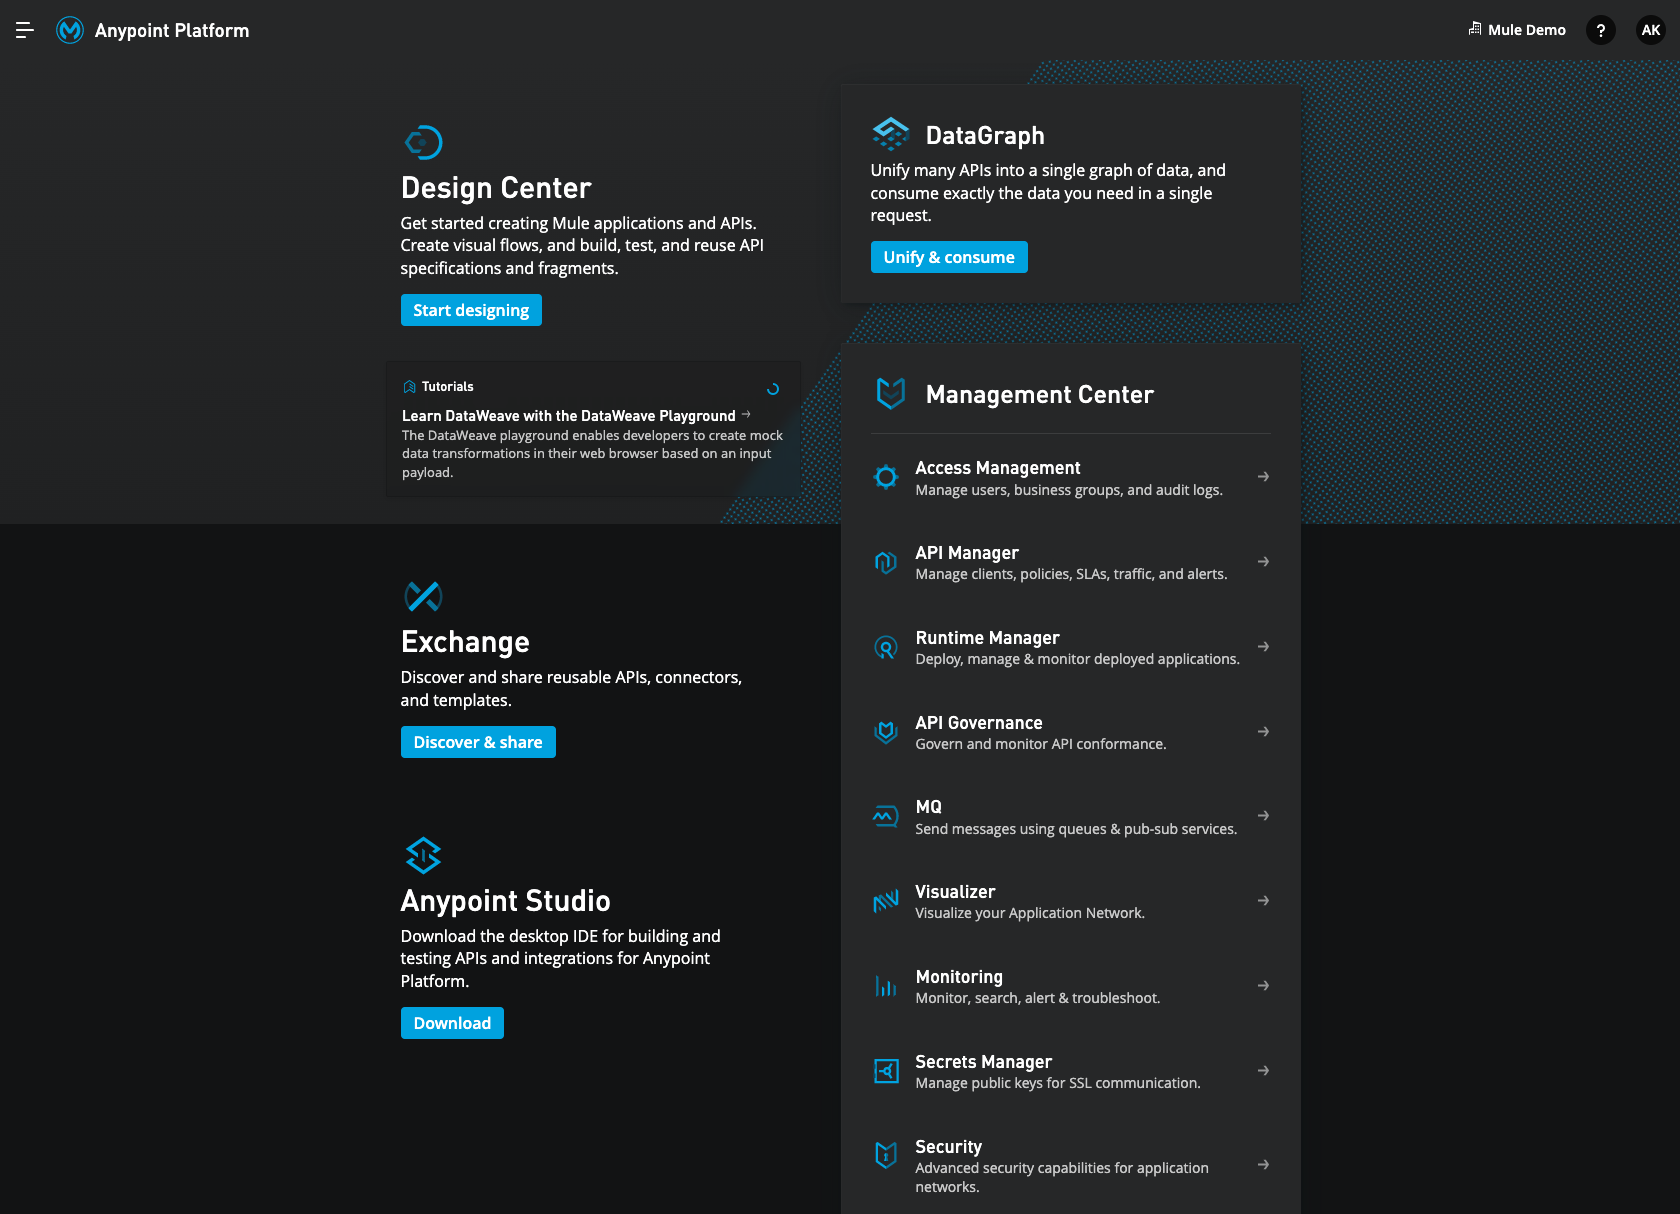
You should see the following landing page once you are logged in to Anypoint Platform.
Step 2: Create the Database System API
-
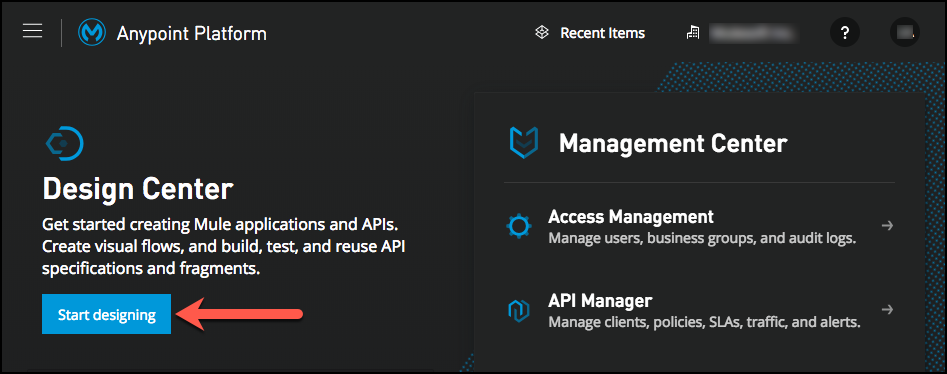
Click on the icon labeled "Start Designing".
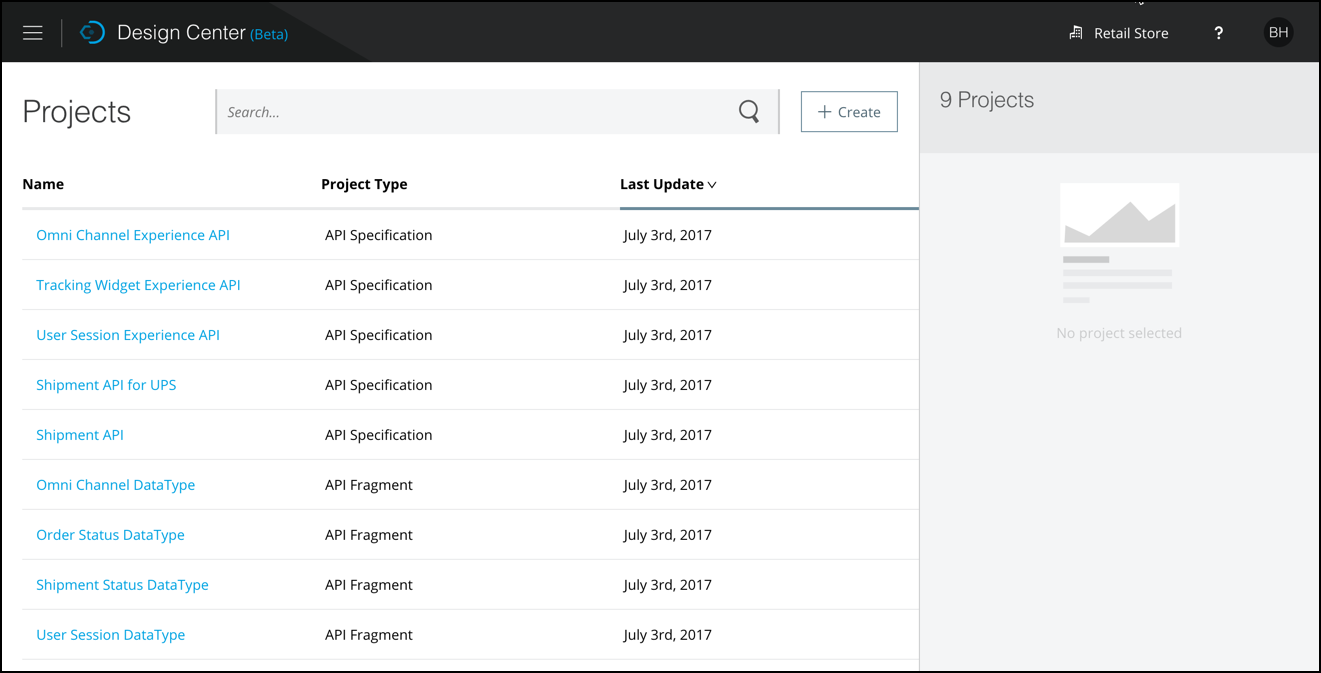
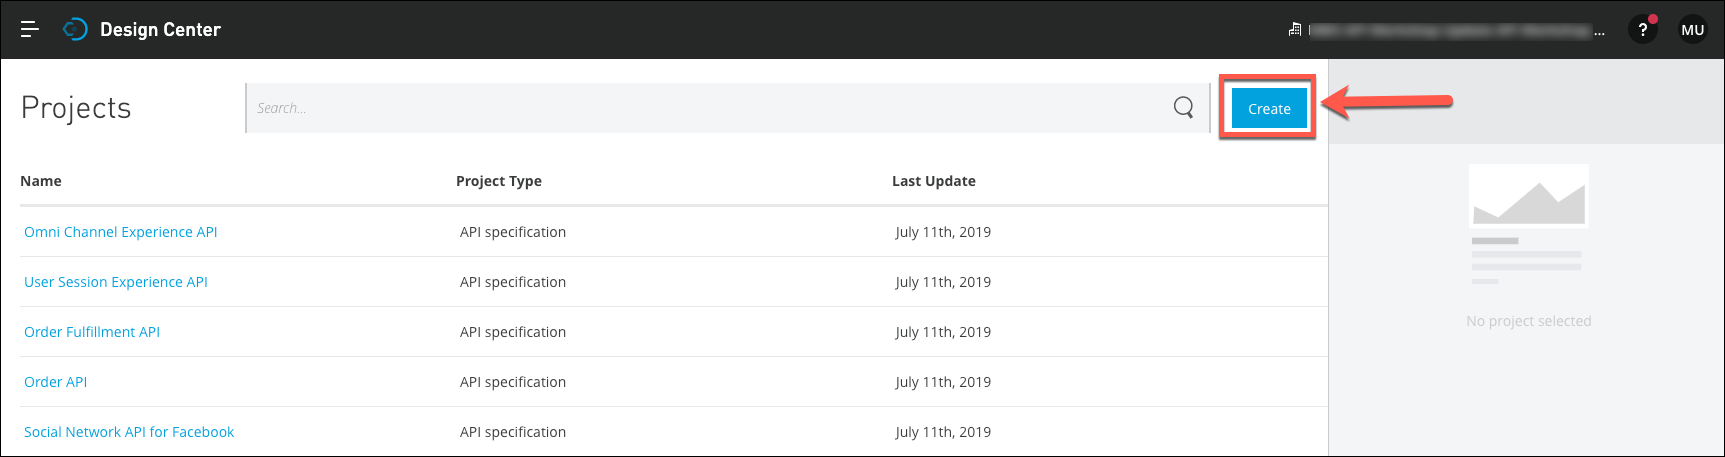
Anypoint Design Center is used to design your APIs. When you arrive at the Design Center landing page you will see a list of APIs that have already been designed by your organization.
-
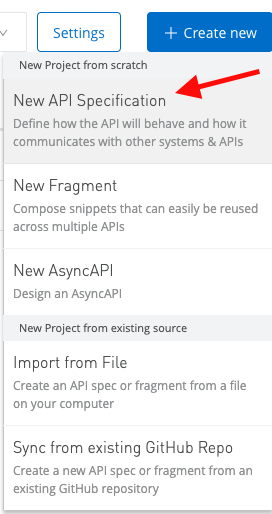
To create a new API, Click on the + Create new button. Select "API Specification".
-
Select "New API Specification".
-
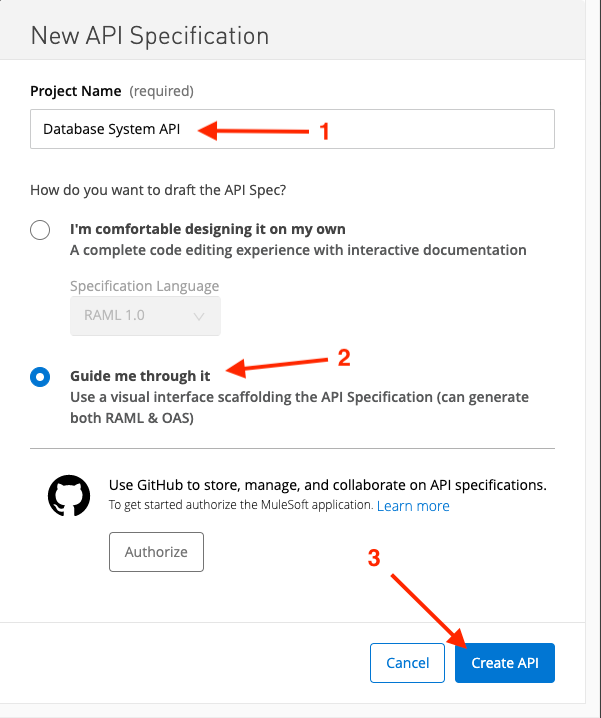
Set the following values in the New API Specification form:
-
Project name: Database System API.
-
Visual Editor: Select the Guide me through it radio button.
-
-
Click Create API. This will create the basic structure of your RAML-based API specification and take you to the Visual Editor, which is an intuitive visual interface for creating your API specification without needing to code anything.
Note that for full RAML support, you should start with the first option ("I’m comfortable designing it on my own"), which is the standard RAML-based API Designer.
Step 3: Create the Contact Resource
-
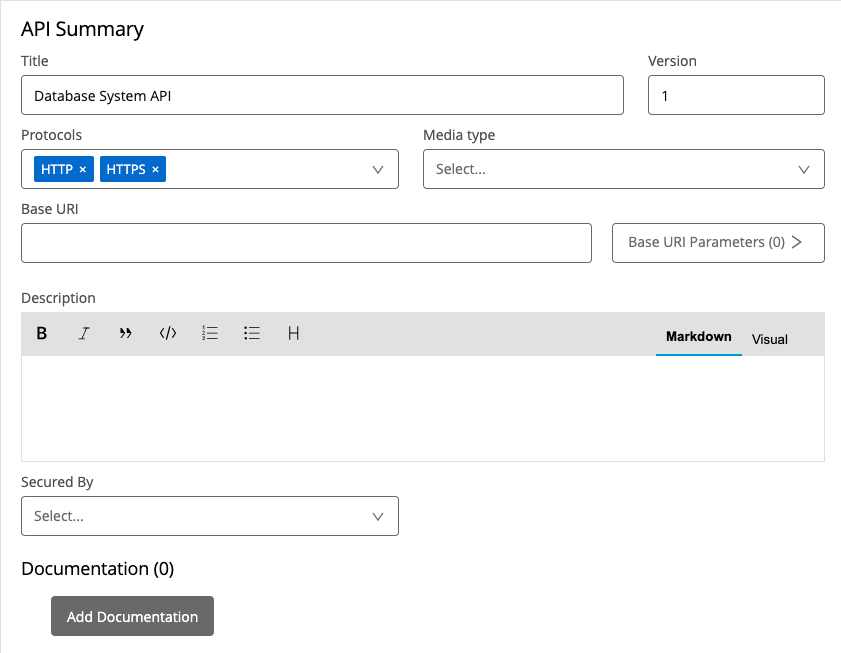
For our first API, insert a Title, Version, Protocols. Make sure to accept both HTTP and HTTPS requests and set our API to version 1.
-
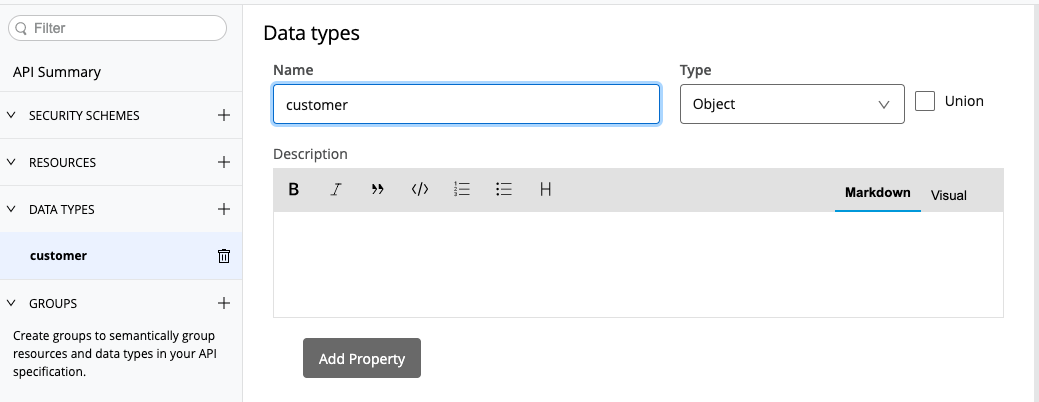
Now you need to create a data-type. Click the + to the right of DATA TYPES. Rename the data type to customer.
-
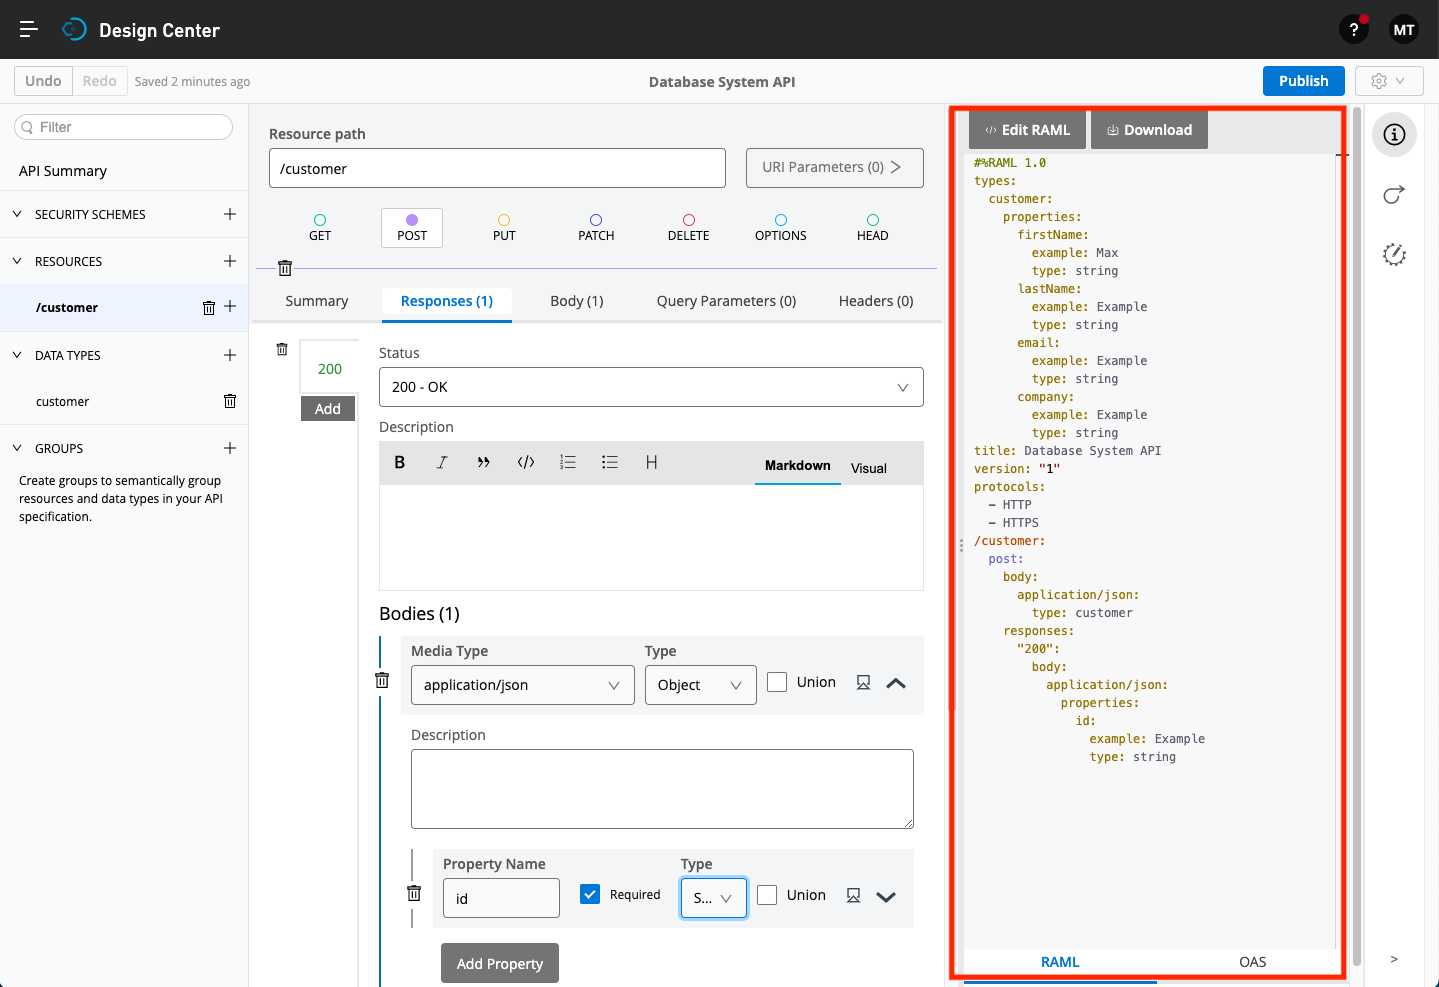
Next, let’s add properties. Click Add Property and follow the screenshot below and add four properties to our data type: firstName, lastName, email and company.
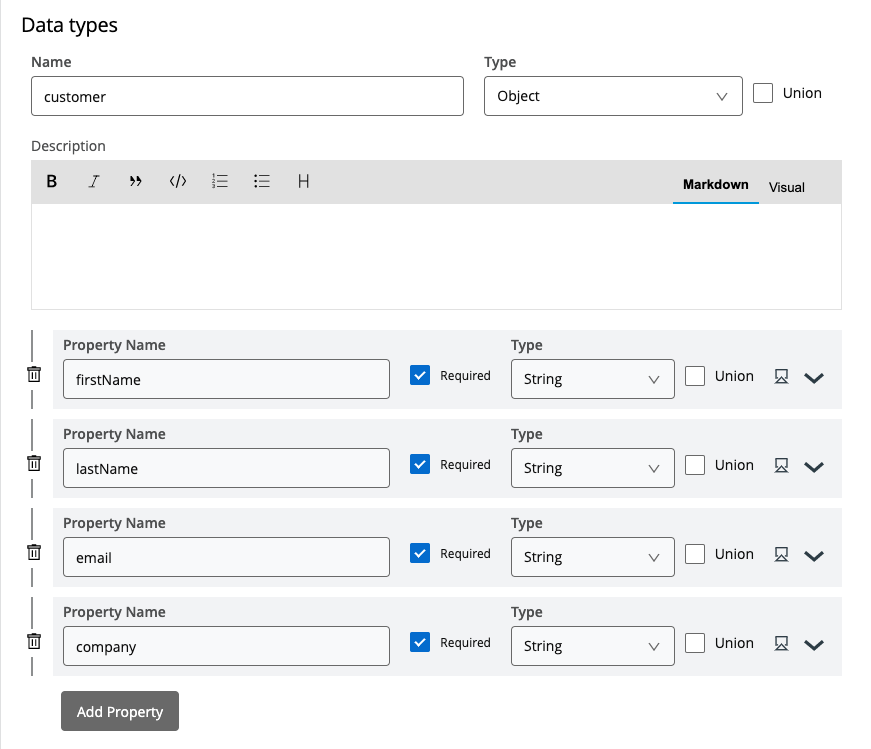
Make sure each attribute is defined as a string, then go to the Example window and define the JSON payload with some sample data as shown below.
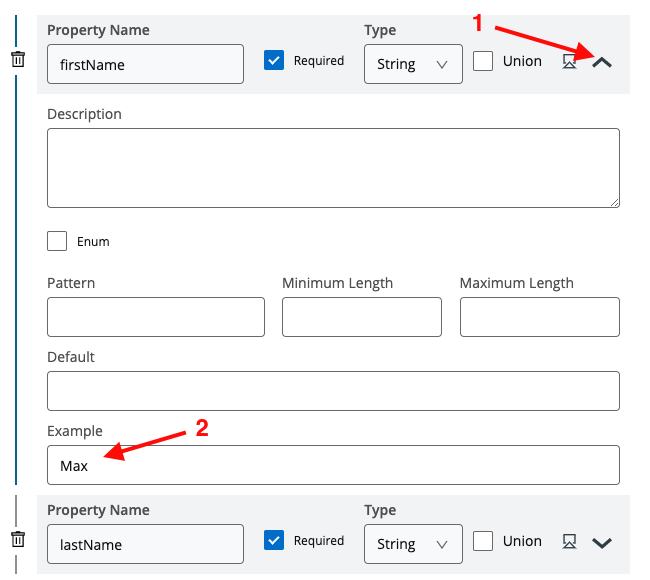 You can have an example like following:
Make sure each attribute is defined as a string, then go to the Example window and define the JSON payload with some sample data as shown below.
You can have an example like following:
You can have an example like following:
Make sure each attribute is defined as a string, then go to the Example window and define the JSON payload with some sample data as shown below.
You can have an example like following:firstName: Max lastName: Mule email: maxthemule@example.com company: MuleSoft
-
Now you need to add a resource. A resource is the definition of an entity that your API will manage. Click the + to the right of RESOURCES. Name our new resource /customer which will define our endpoint URL for our application to send HTTP requests too.
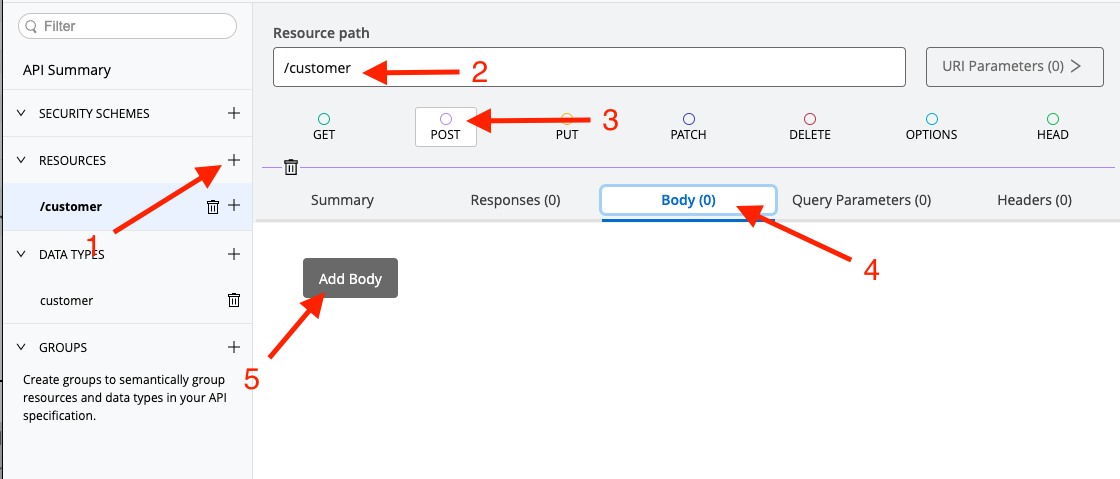
-
For this specific API, we only want to allow HTTP POST requests to be accepted by our endpoint. To achieve this, simply click on the POST button and click Add Body.
-
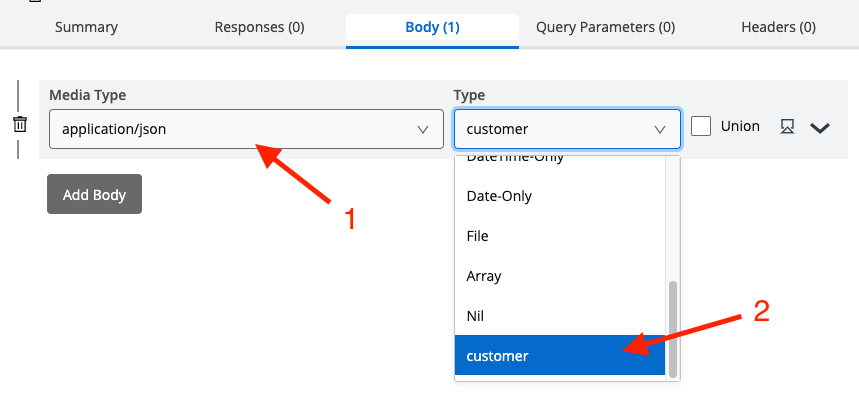
To add body, select application/json under Media Type and customer (the data type we created earlier) under Type.
-
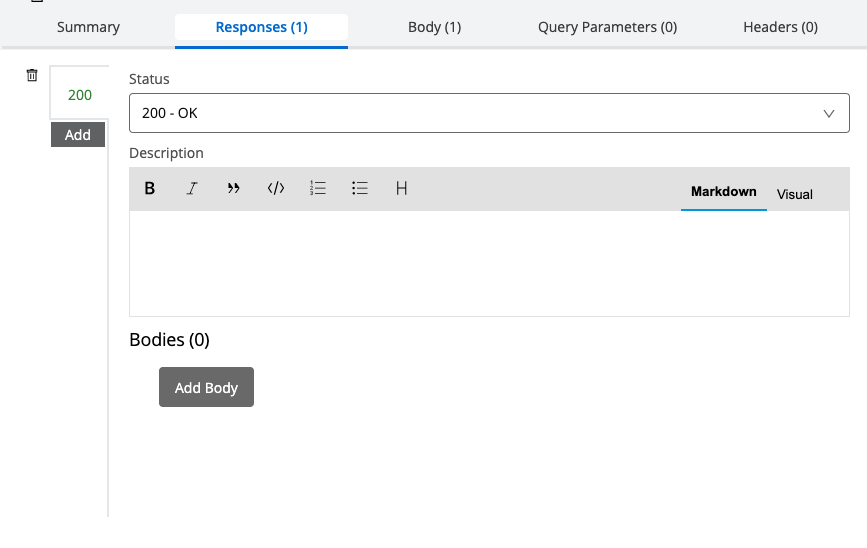
Now switch to the Responses tab to add the response back from the API → Click Add New Response

-
Click Add Body.
-
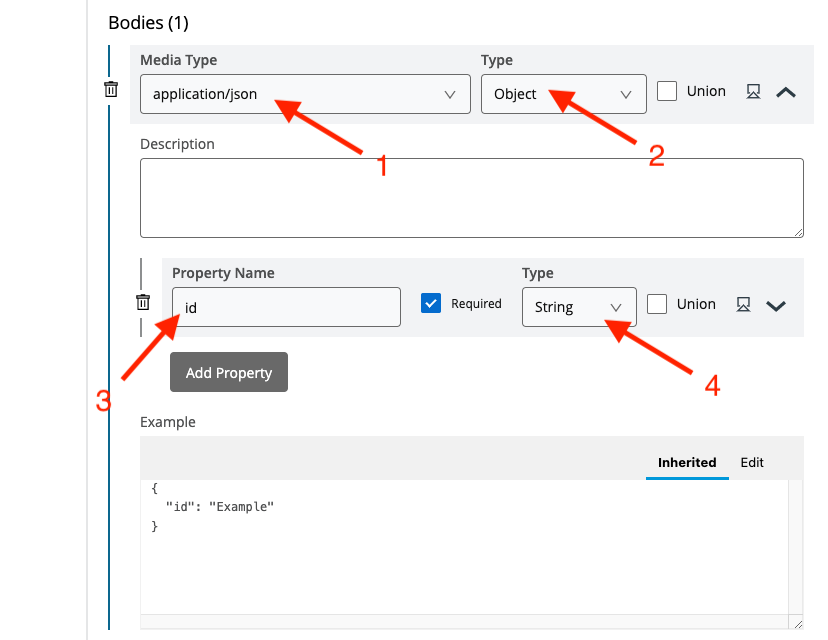
Specify the Media Type is application/json and the Type is Object.
-
Expand the segment and click Add Property.
-
Add id as Property Name and String as type.
-
-
You may have noticed the RAML specification on the right-hand side of the screen has been automatically updating as we have been defining different elements. You should be able to see the data type, body and response in the specification, as we defined them in the guided wizard.
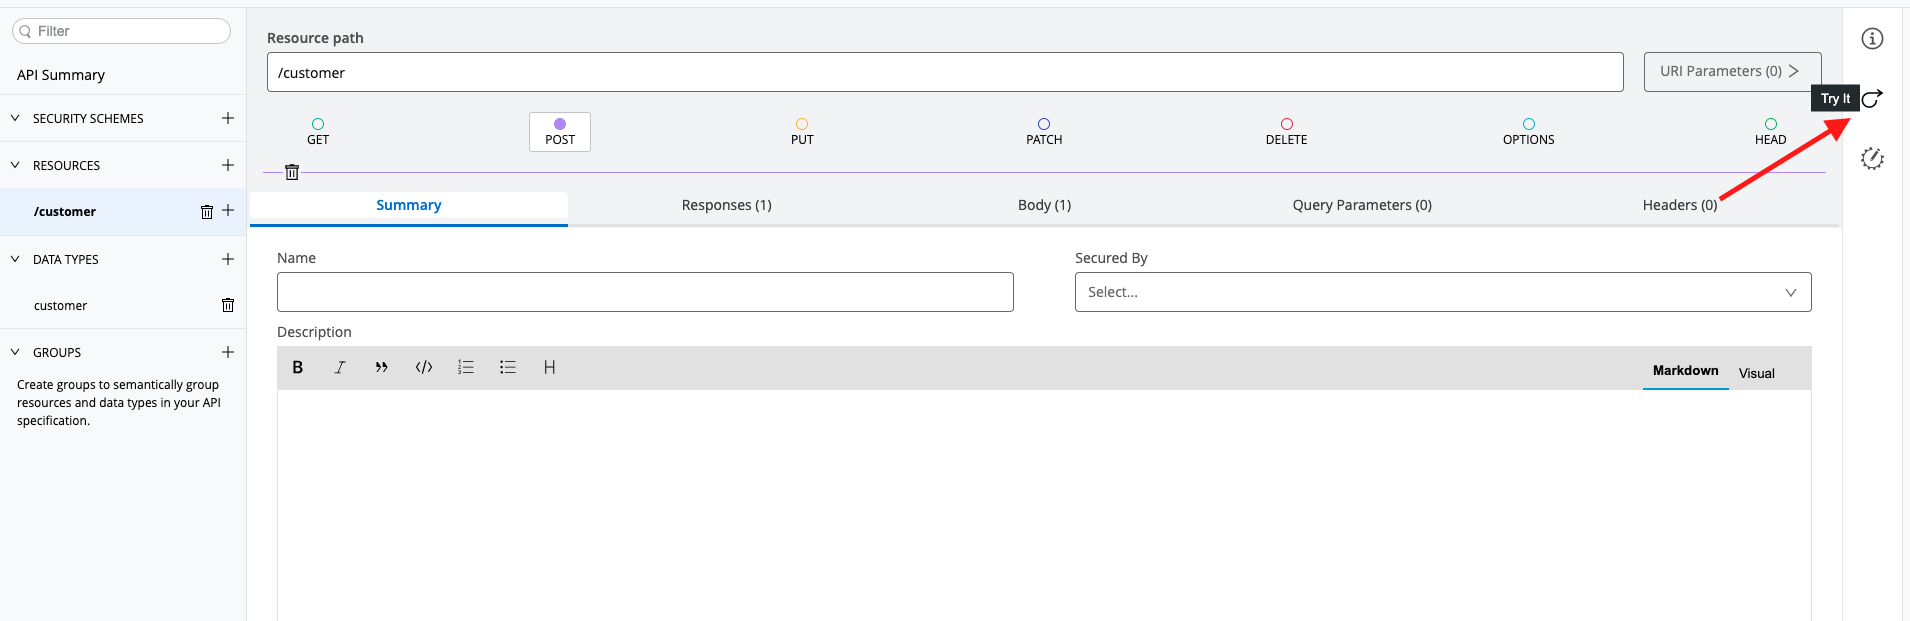
Step 4: Enable the Mocking Service
A very useful feature during the design phase is having the ability for your consumers to interact with your API without having to code anything. The API editor provides a Mocking Service that will read the RAML file, create the API/service and return example data responses. The mocking service allows users to interact with the API as if it was built and deployed. This feature allows you to rapidly iterate the API design with its consumer to finalize the contract.
-
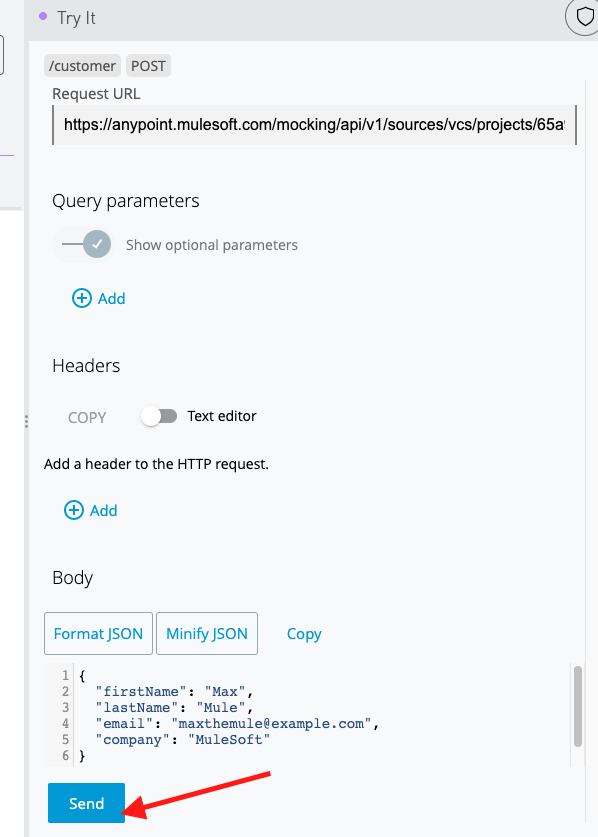
Click Try it.
-
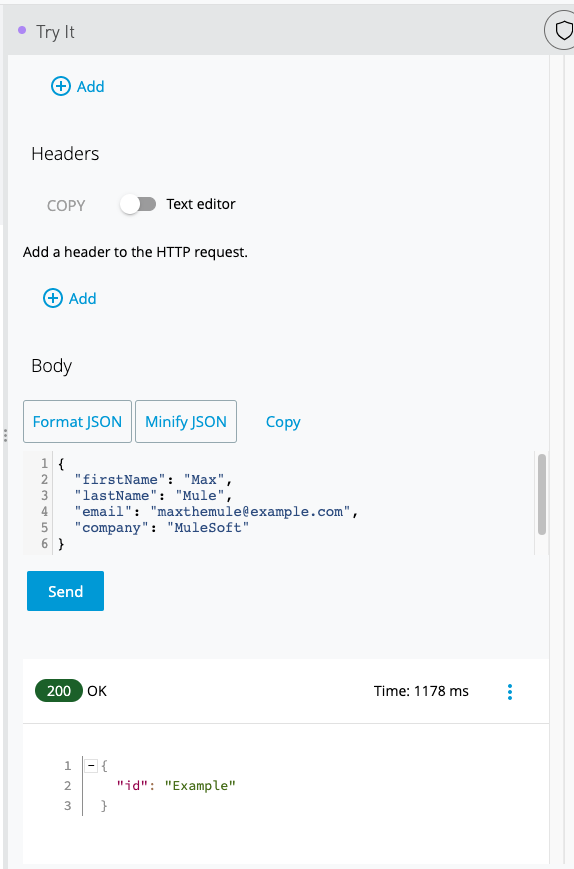
Click "Send"
-
Scroll down and you should see a 200 response with the customer id record in a JSON format that adheres to the example you set in the API definition.
-
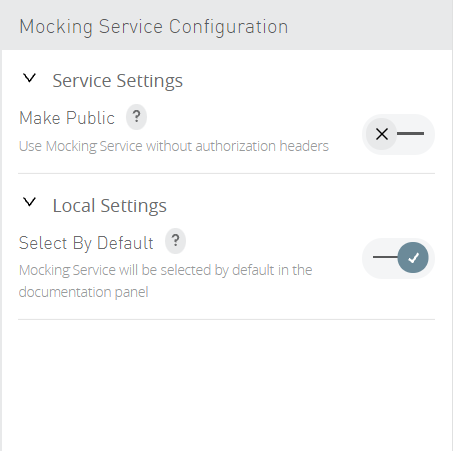
You can also set the mocking service as the default value in the documentation. Go to Mocking Service Configuration.
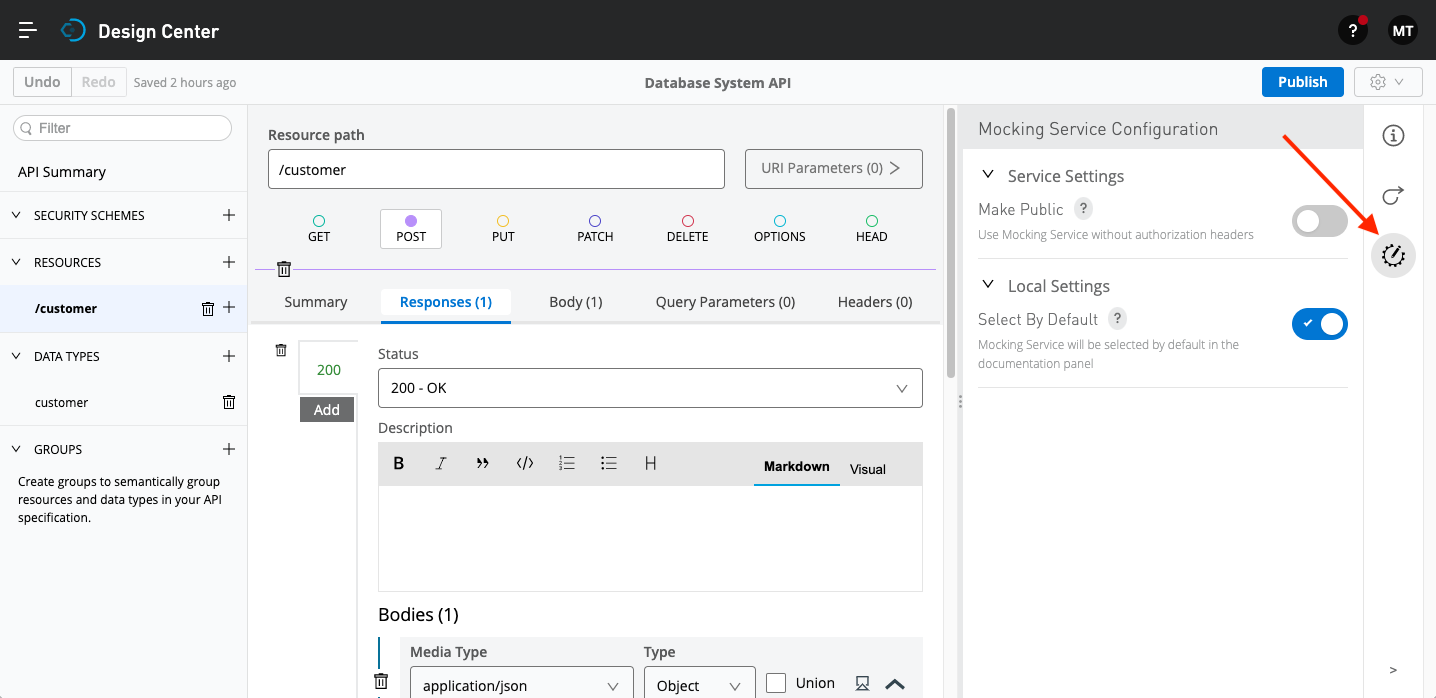
You can toggle Select By Default to make the mocking service url, the default one. You can also toggle Make Public to use a public URL. It will enable you to test calls to your API without having to provide an authorization header. This is useful when you want to share the API with someone outside of Anypoint Platform.
Step 5: Publish the API Specification to Exchange
We are now ready to publish our Database System API to Exchange. Exchange is a marketplace for connectors, APIs and templates that can be reused and shared across your organization.
-
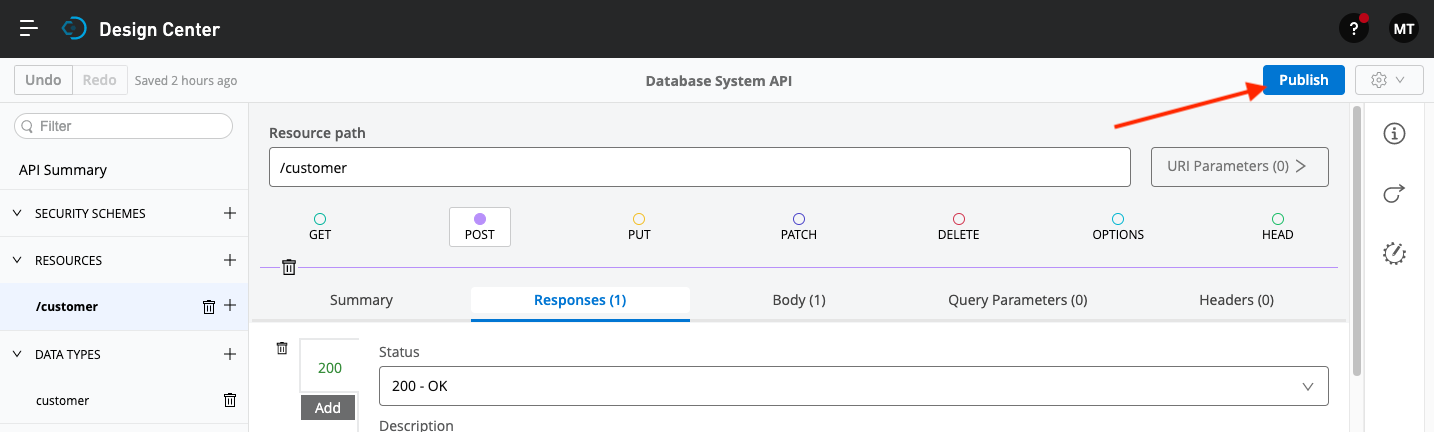
To publish your API, click Publish at the top right of the screen in the Design Center.
-
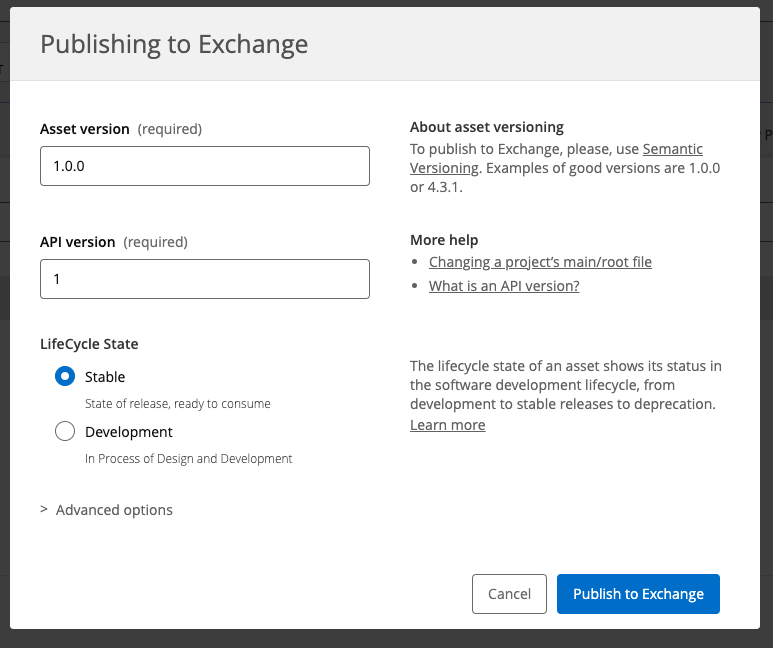
Enter an Asset version of 1.0.0 and then click Publish to Exchange.
-
Click on the Exchange link to be taken directly to the asset in Exchange.

Note: If you clicked on Done you can use the hamburger menu to go to Exchange to see your published API specification.
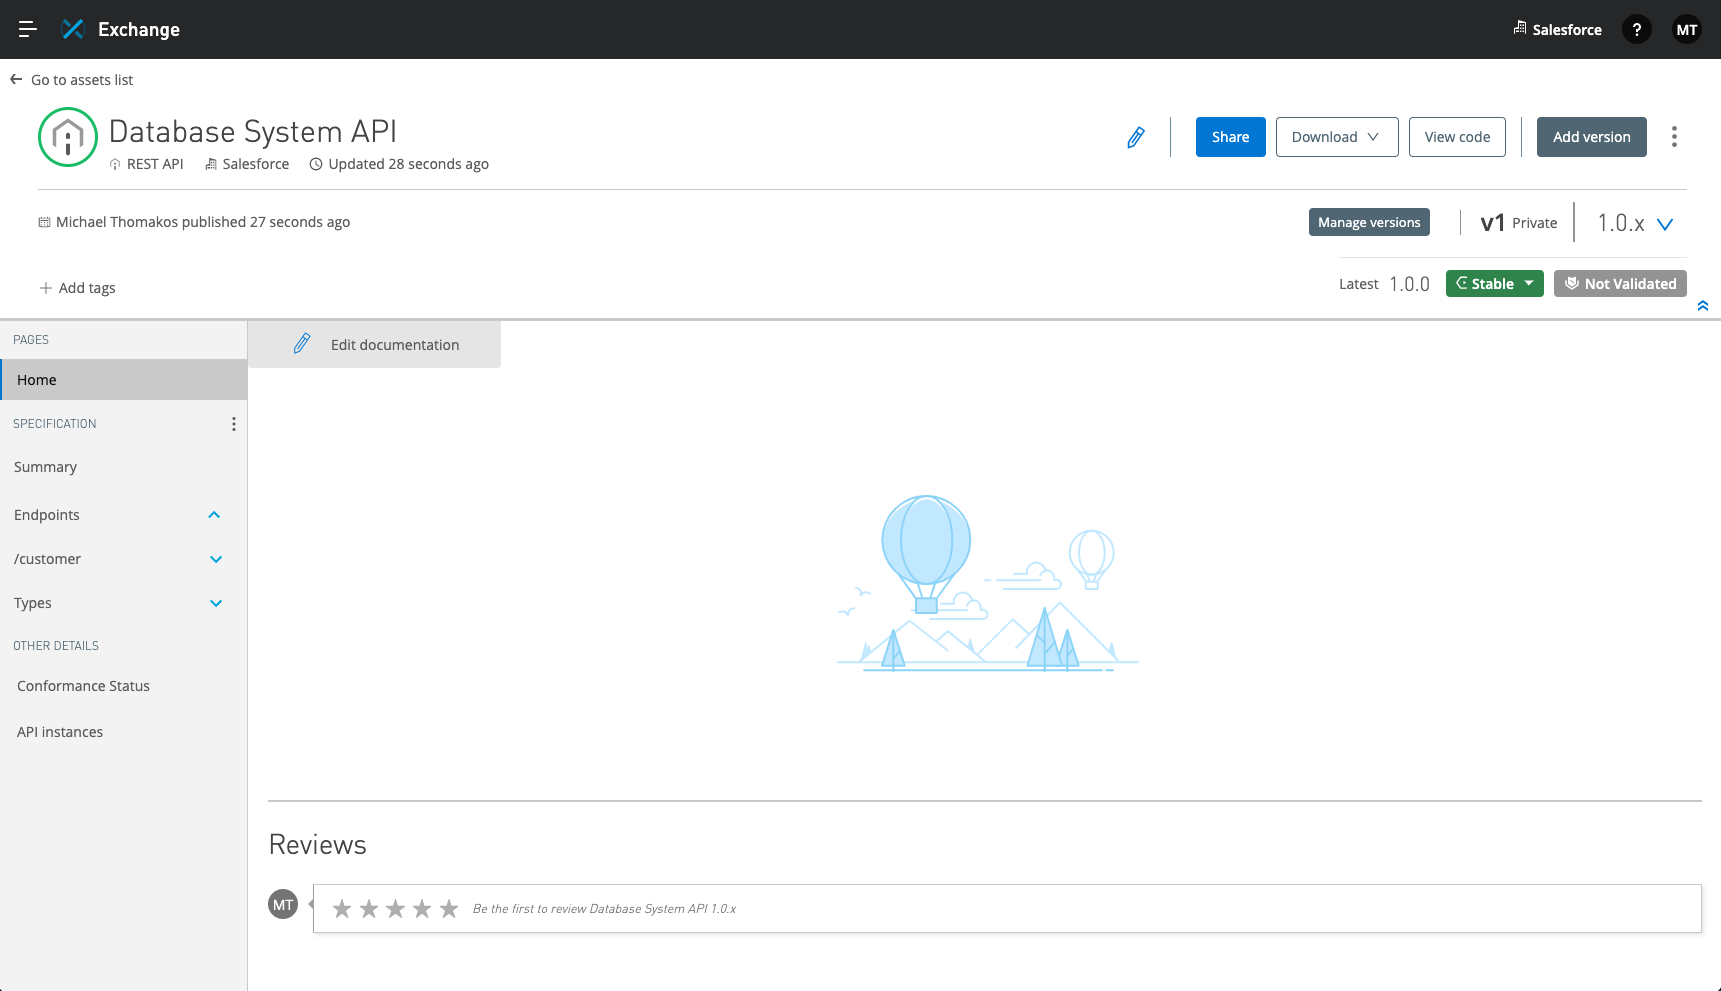
In Exchange, you can add a photo, edit the title, description and even rate and comment on your published API. Now that the API specification has been published and is available in Exchange, your API can be downloaded and reused in any of your future integrations or projects.
Summary
In this lab, you completed the following steps:
We easily created and designed a new system API leveraging RAML for a design first approach.
We saw how the mocking service can be utilized by application developers to try out a new API before development has even been started. This significantly speeds up development and time to delivery.
In the next lab, we will import our new API specification into Anypoint Studio to build our first integration.
Please proceed to Lab 2.