Lab 1: Connecting Anypoint Platform and Salesforce Environments
Overview
Now that we have designed, built and implemented an API using Anypoint Platform, we will shift our focus to look at how a Salesforce devleoper is able to leverage native tools in their Salesforce environment to make use of Mule Applications in Salesforce Flow.
In this module, we will use the MuleSoft Services wizard in Salesforce setup to connect to our Anypoint Platform environment. Next we will configure a named credential for the Cloudhub URL where our Mule Application is running. Finally, we will import an API specification as an External Service in Salesforce and configure the service to enable interaction with our Mule Application within Salesforce Flow.
Step 1: Login to Salesforce
-
In a new tab, navigate to https://login.salesforce.com/
-
Enter the credentials for your developer edition trial account into the Username and Password fields
-
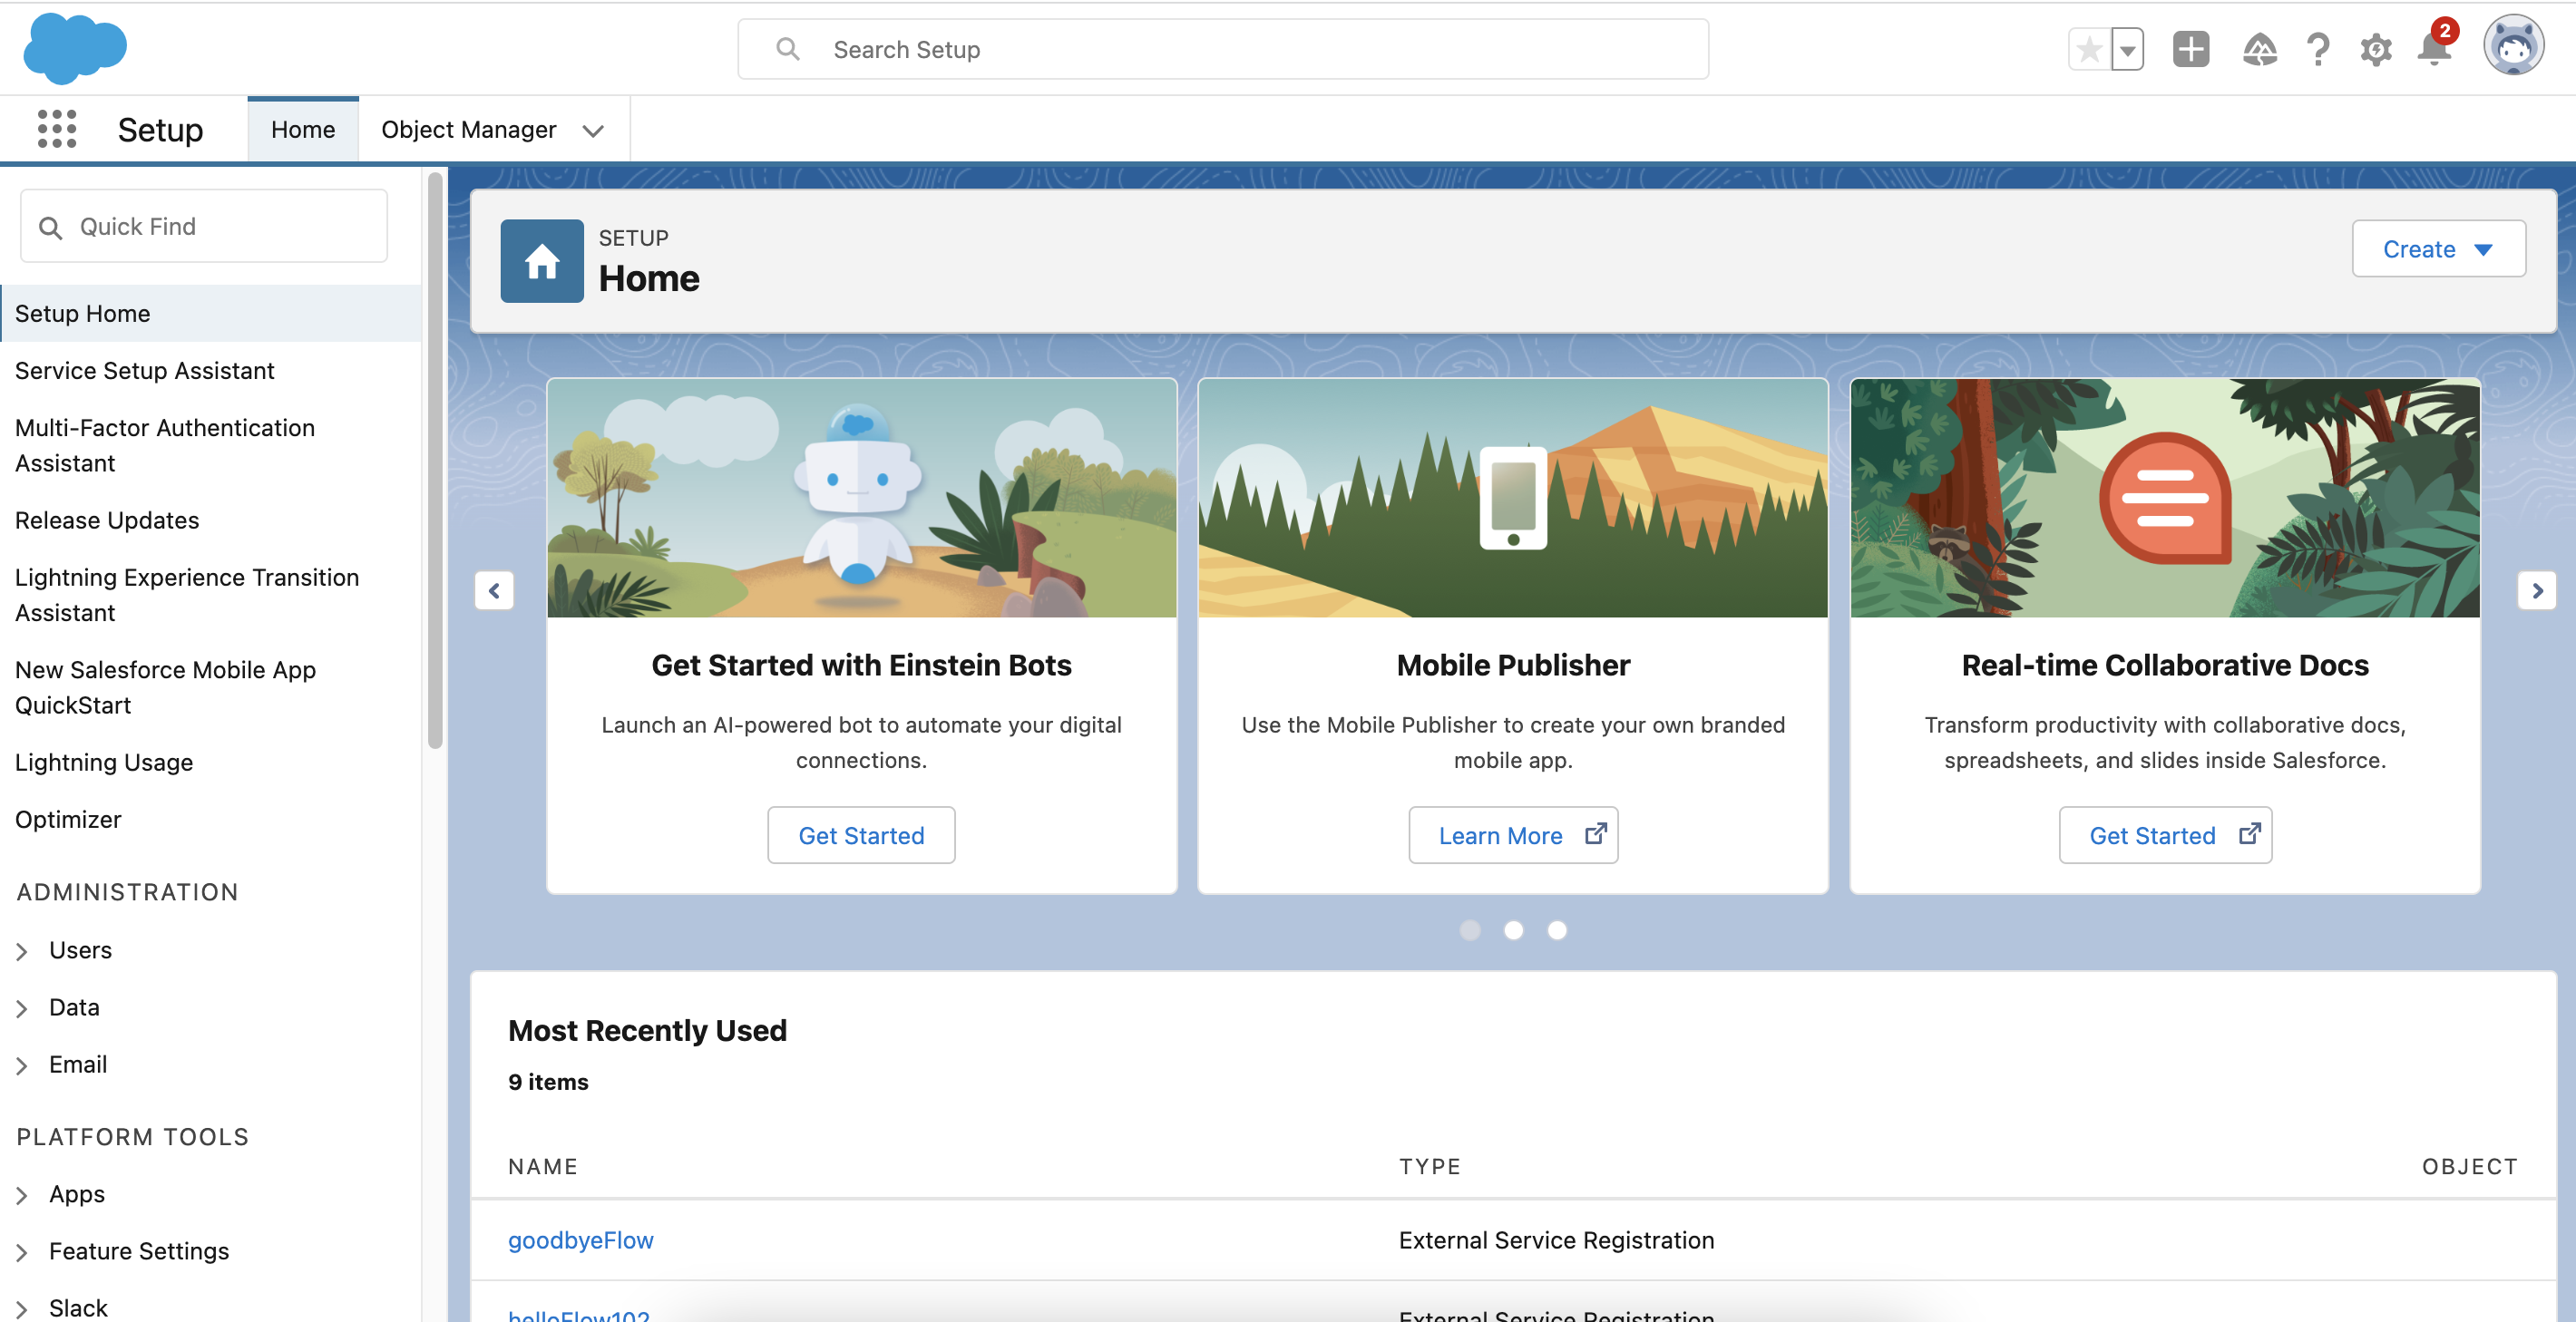
Once you are logged in, you should see the following Setup landing page.
Note: If you are not automatically directed to the Setup page on login, you can navigate there by clicking the cog in the upper-right corner of the screen and clicking the icon labelled "Setup".

Step 2: Connect Anypoint Platform Account
-
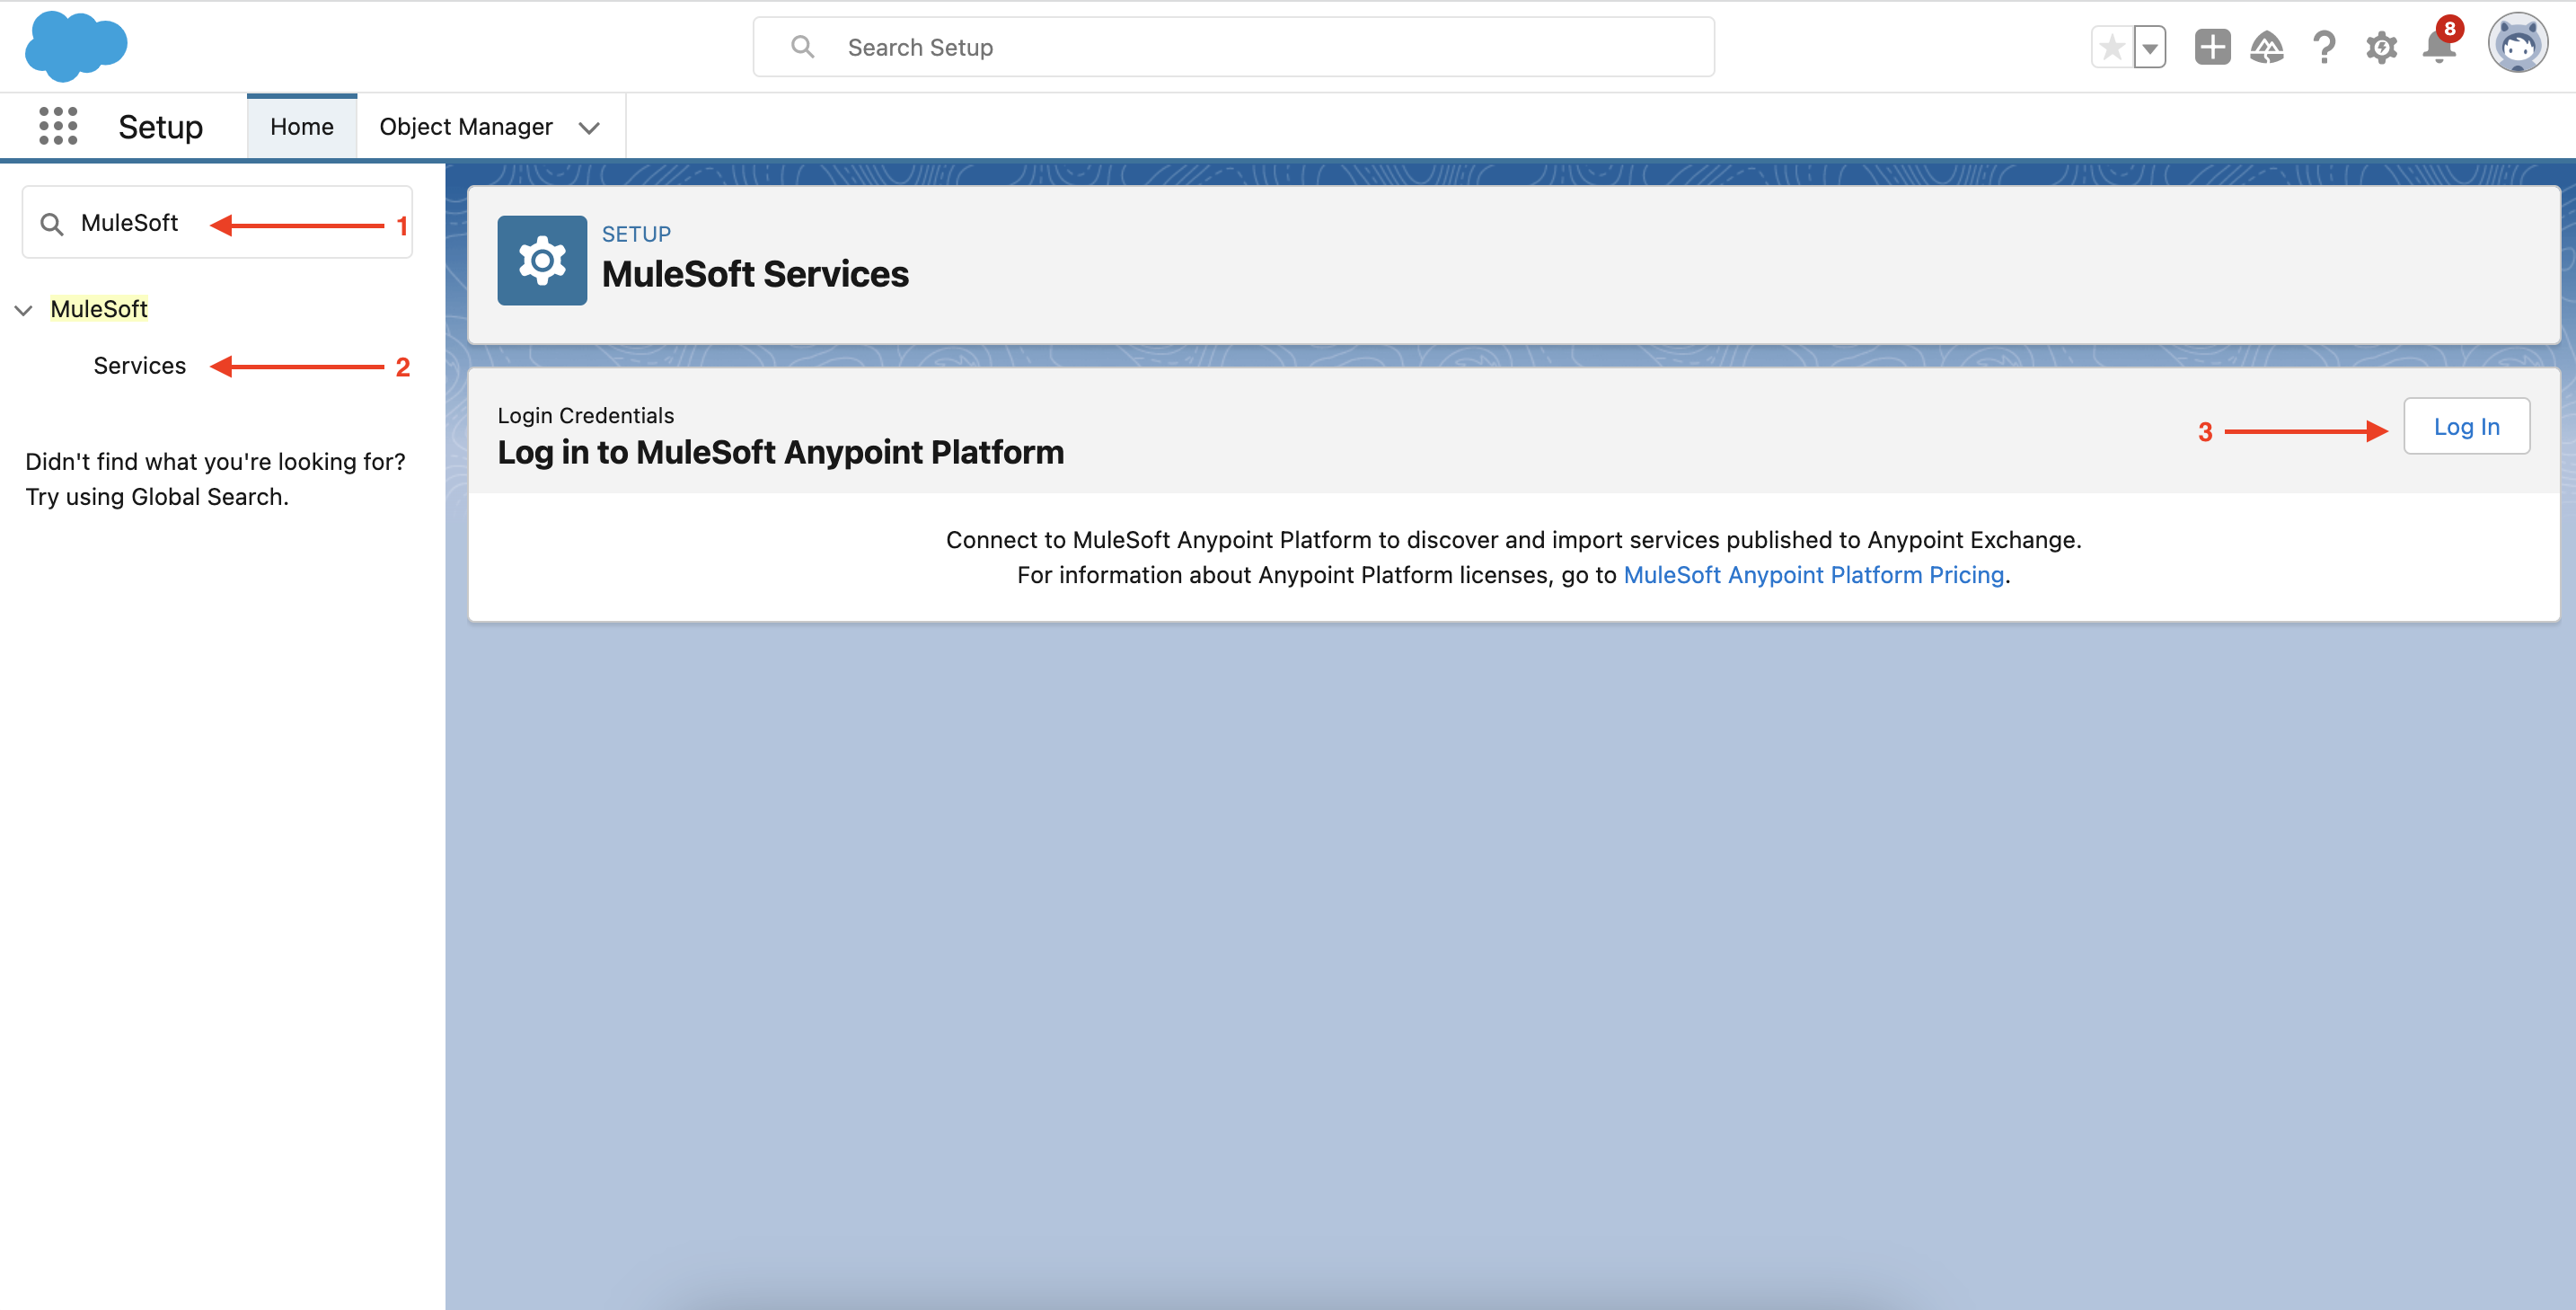
Enter MuleSoft in the Quick Find search box
-
Under MuleSoft, click Services
-
Click Log In
-
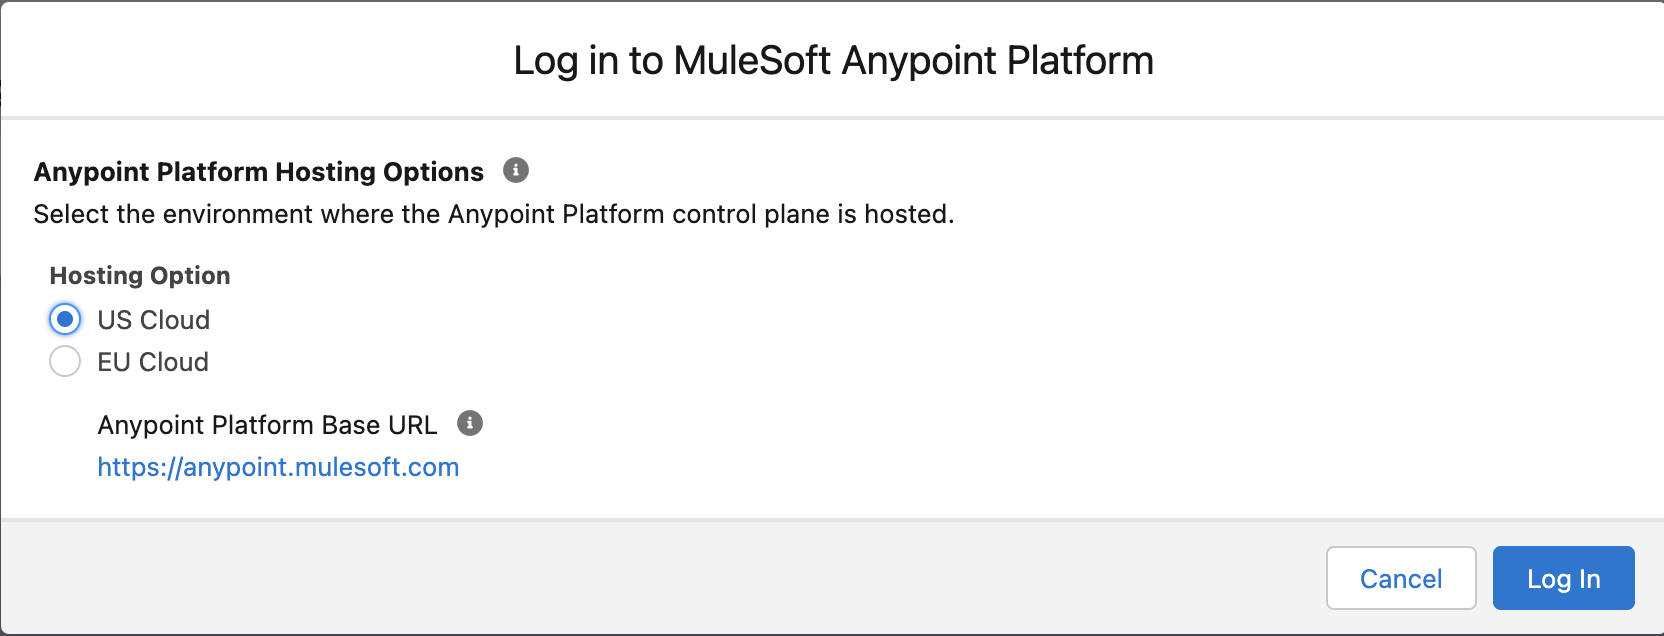
Select the US Cloud hosting option
-
You will be redirected to a login screen for Anypoint Platform. Enter your Anypoint Platform credentials and log in.
Note: If you are already logged in to your Anypoint Platform account in this browser, Salesforce may perform the login automatically.
-
Once you have successfully logged in to your Anypoint Platform account, you will see your user details on the Services page and an option to Import Services.
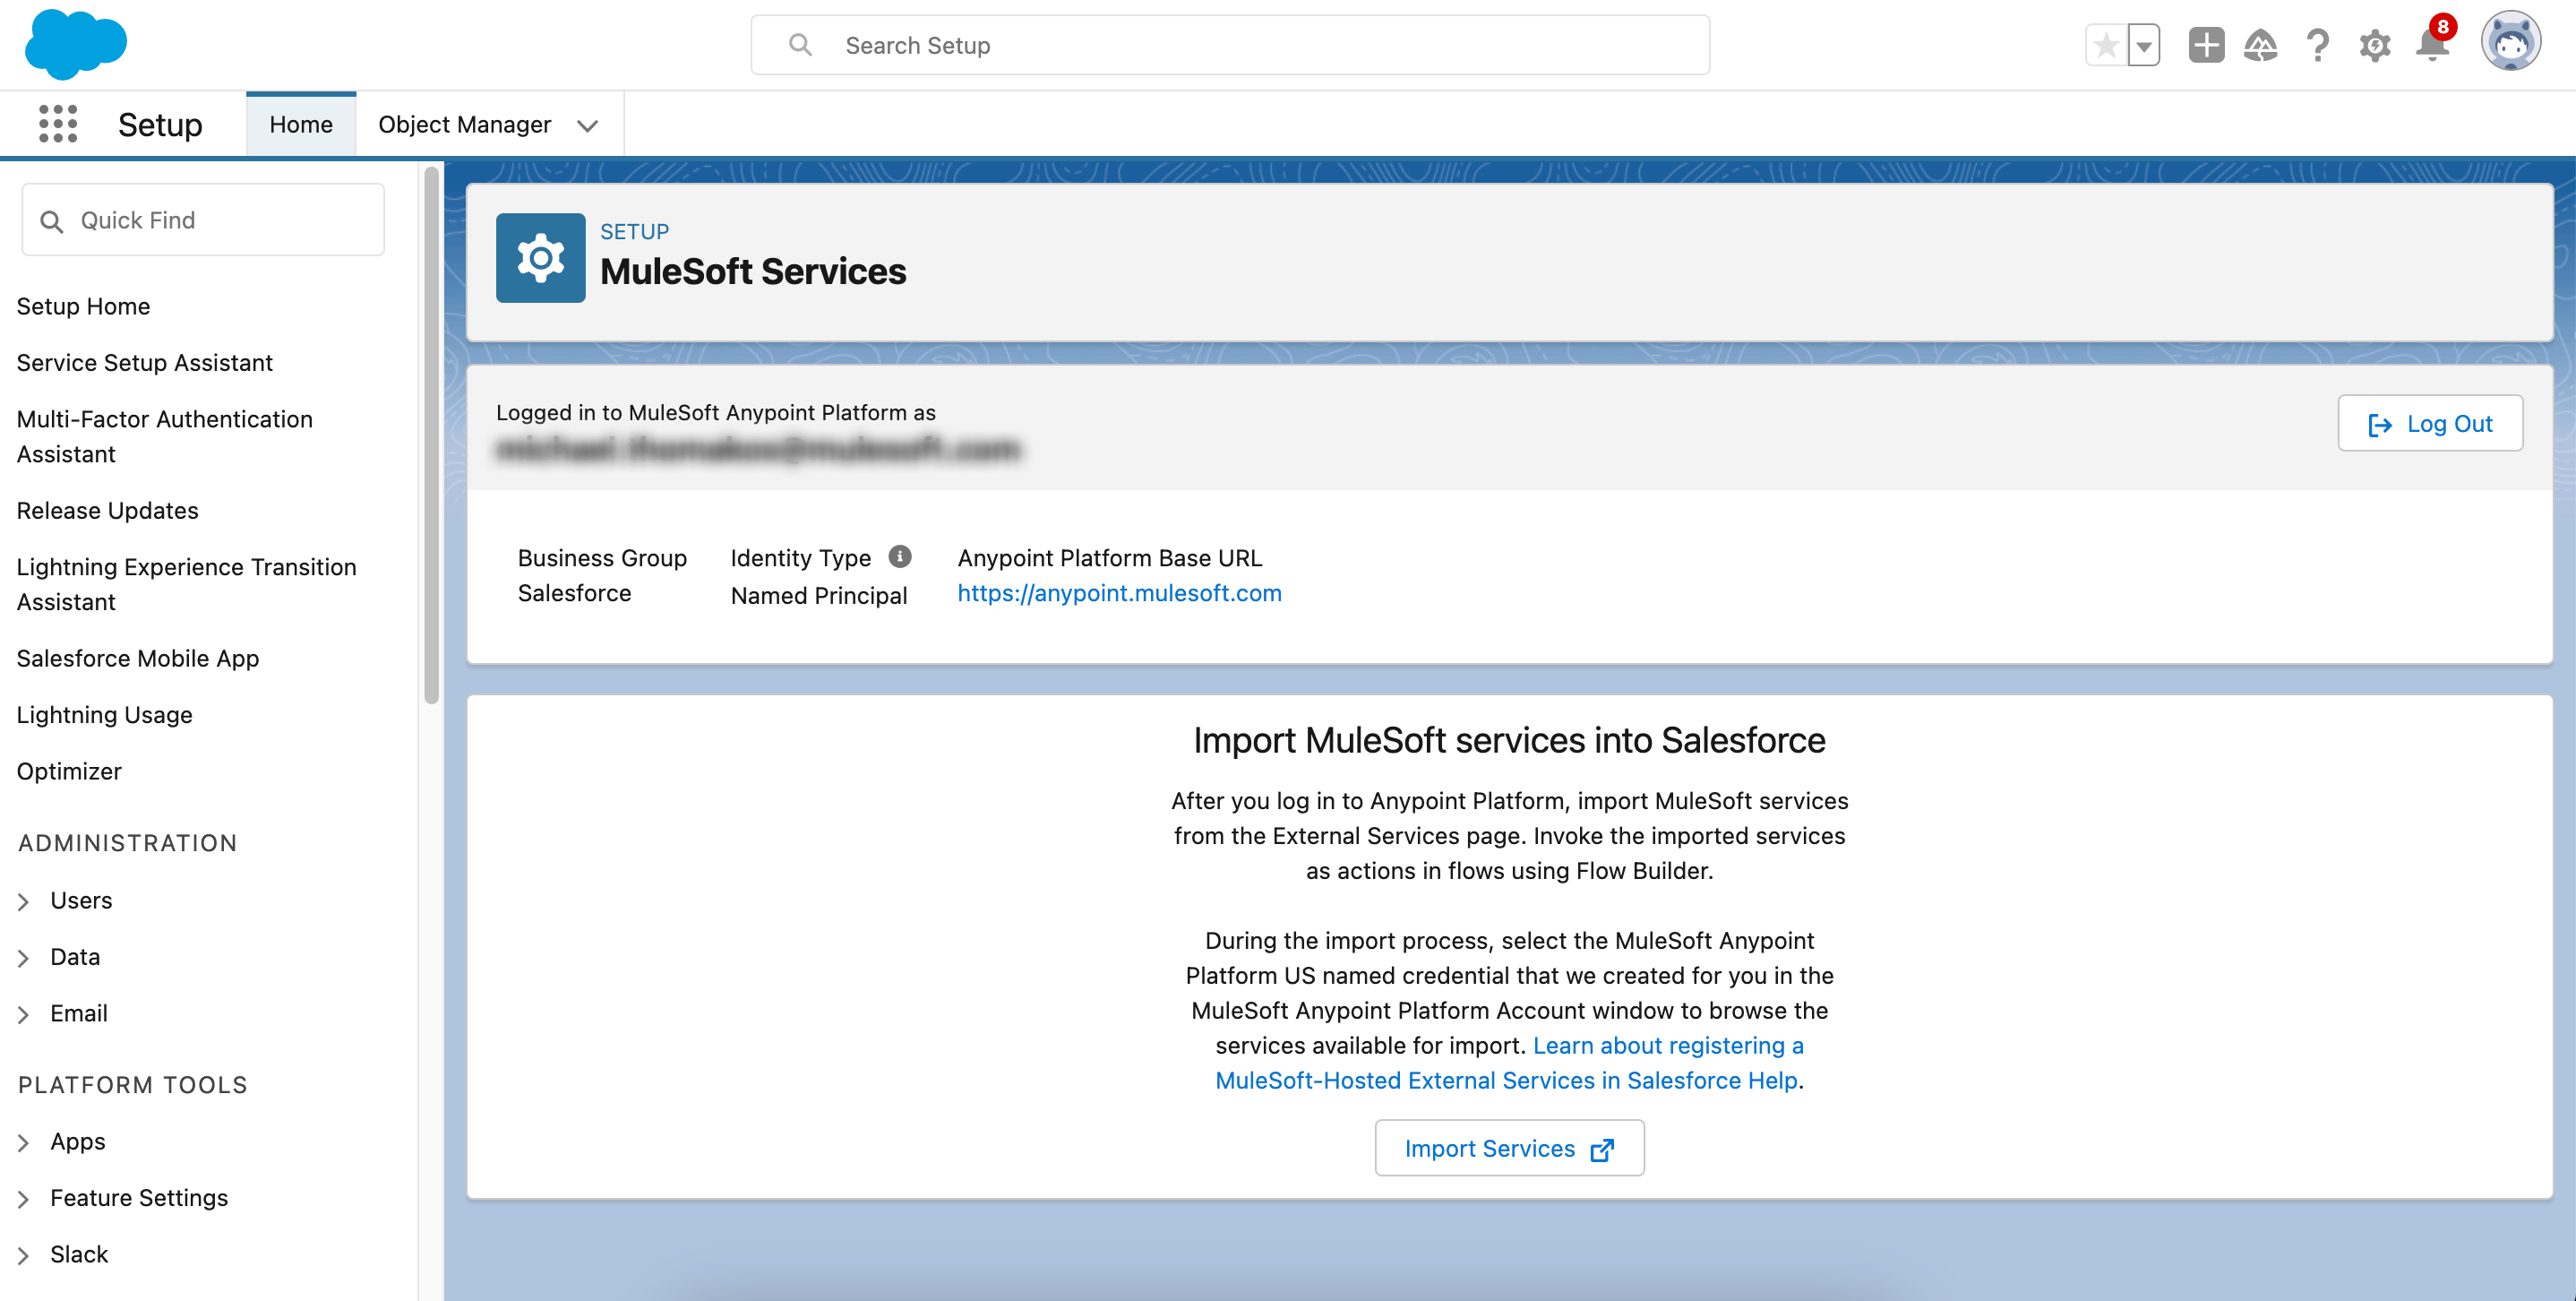
In the background, Salesforce has authenticated your credentials with Anypoint Platform, created a new connected app in Anypoint Platform and configured a set of Named Credentials that we will use in Salesforce to provide authorisation when retrieving details about our Mule Applications from Anypoint Platform. In the next step, we need to configure a set of Named Credentials for the Applications Cloudhub URL, which is the link we use to make integration callouts.
Step 3: Configuring Named Credentials for Cloudhub in Salesforce
-
Return to the tab or window where you are logged into Anypoint Platform.
Note: Anypoint Platform will automatically log out users who have been inactive for a period of time. If this has happened, use your credentials to log back in
-
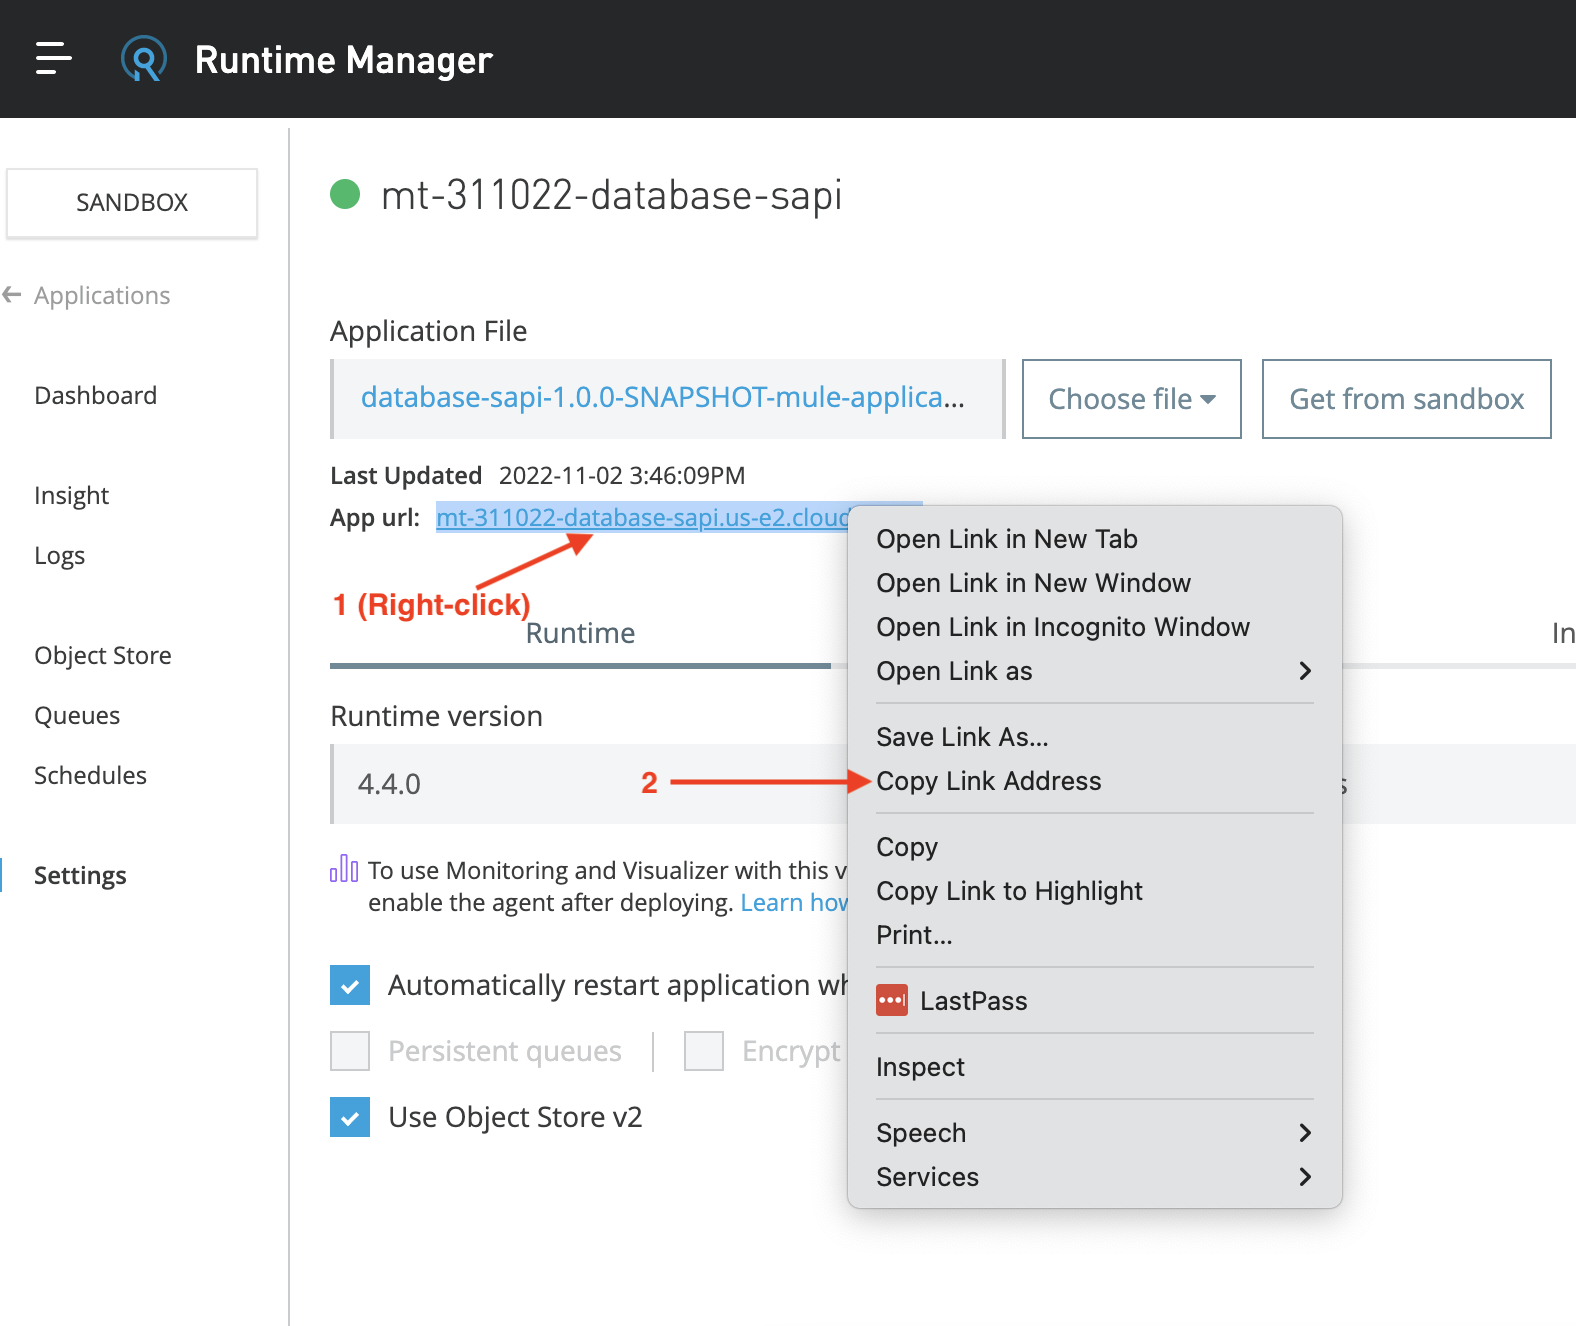
Navigate back the Settings page of your deployed app in Runtime Manager.
-
Right-click the app url and click Copy Link Address.
-
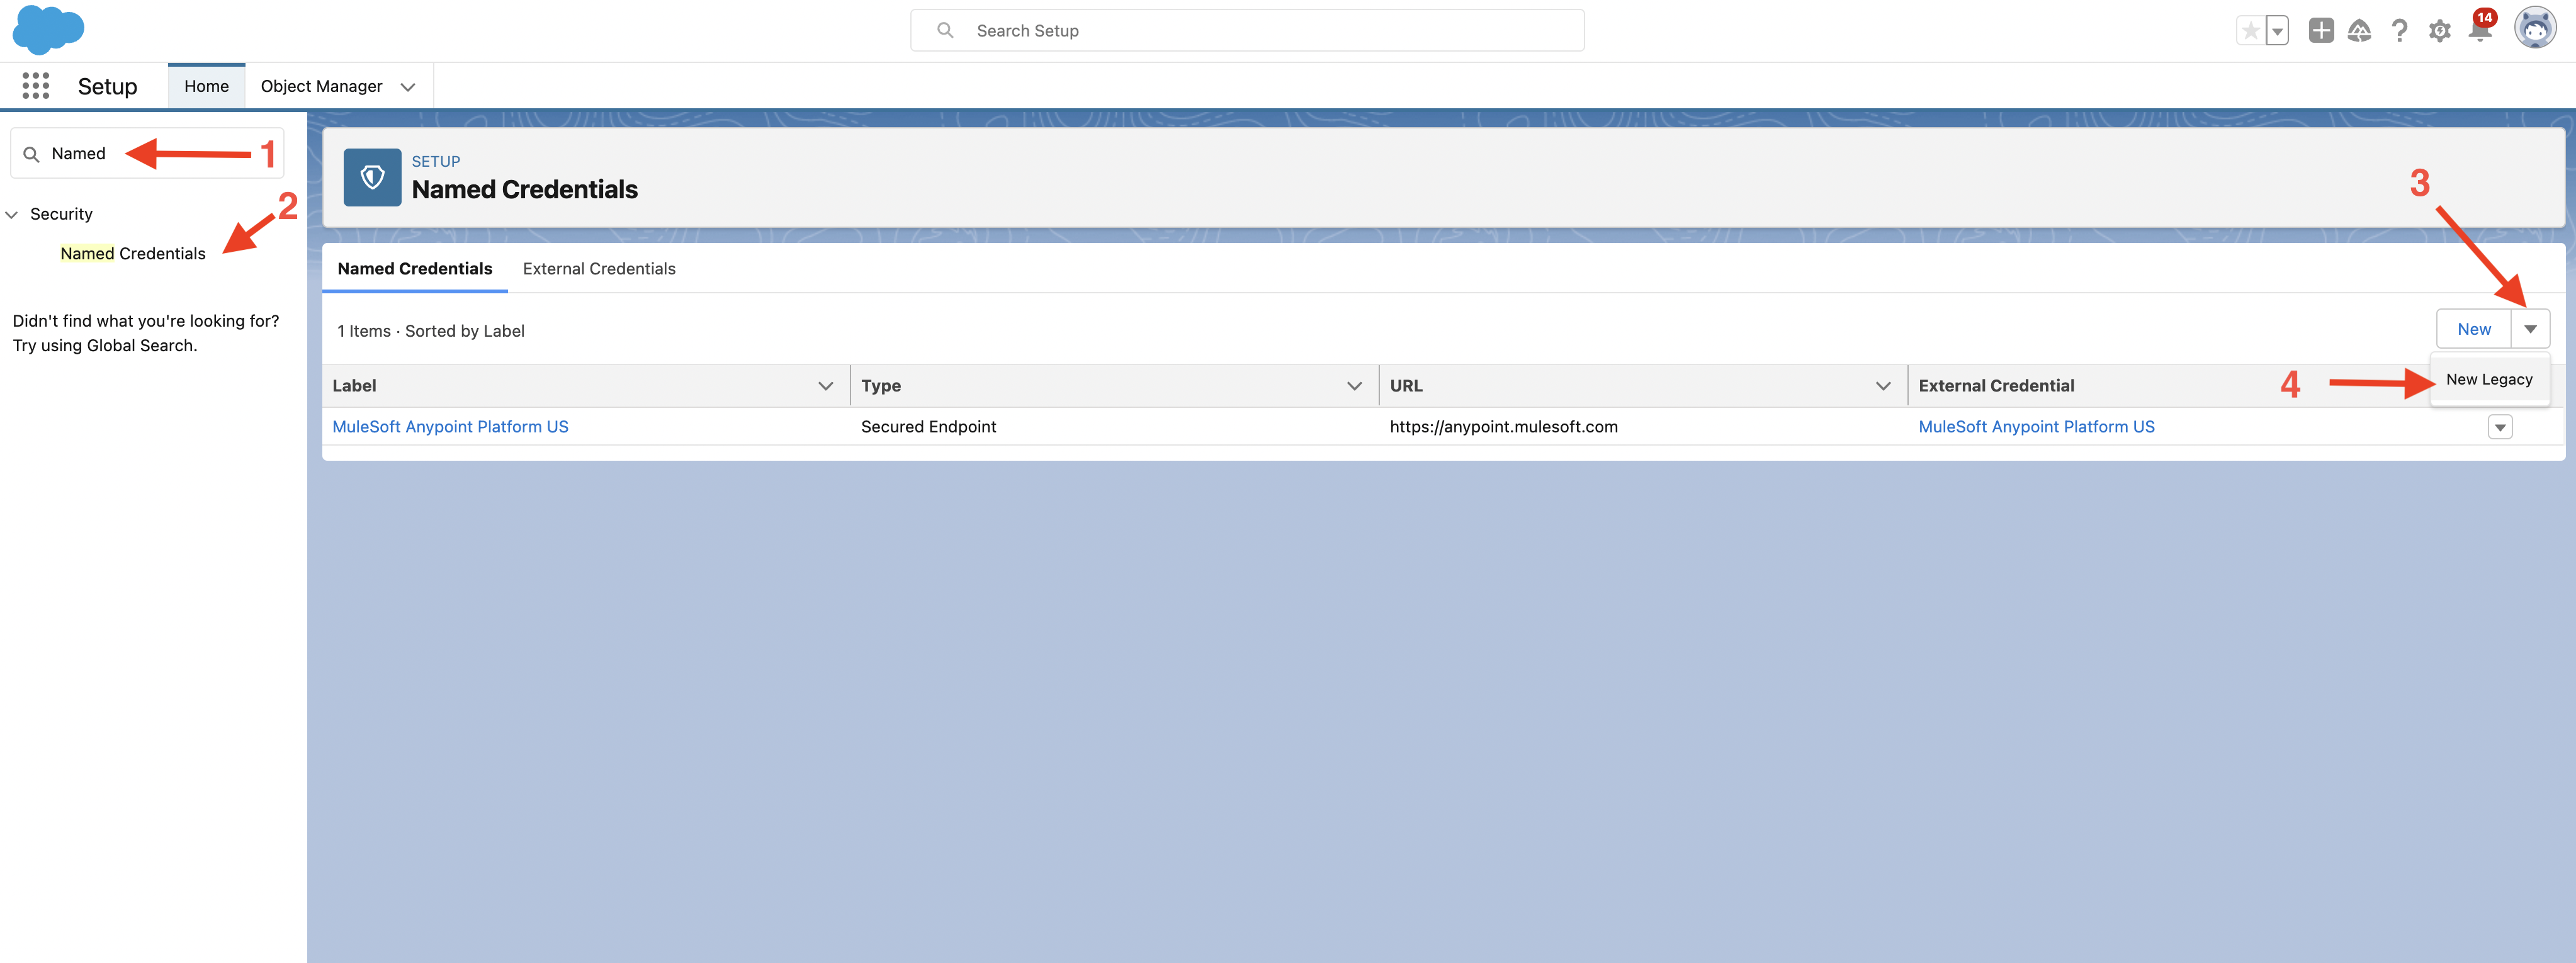
Return to your Saleforce environments Setup page.
-
Enter Named into the Quick Find search box
-
Under Security, click Named Credentials. Now you can see the credentials used by Salesforce to browse through the Anypoint Platform Exchange catalog.
These are not the credentials used to invoke our API. We are going to create these next. -
Click the dropdown box next to the New button
-
Click New Legacy
-
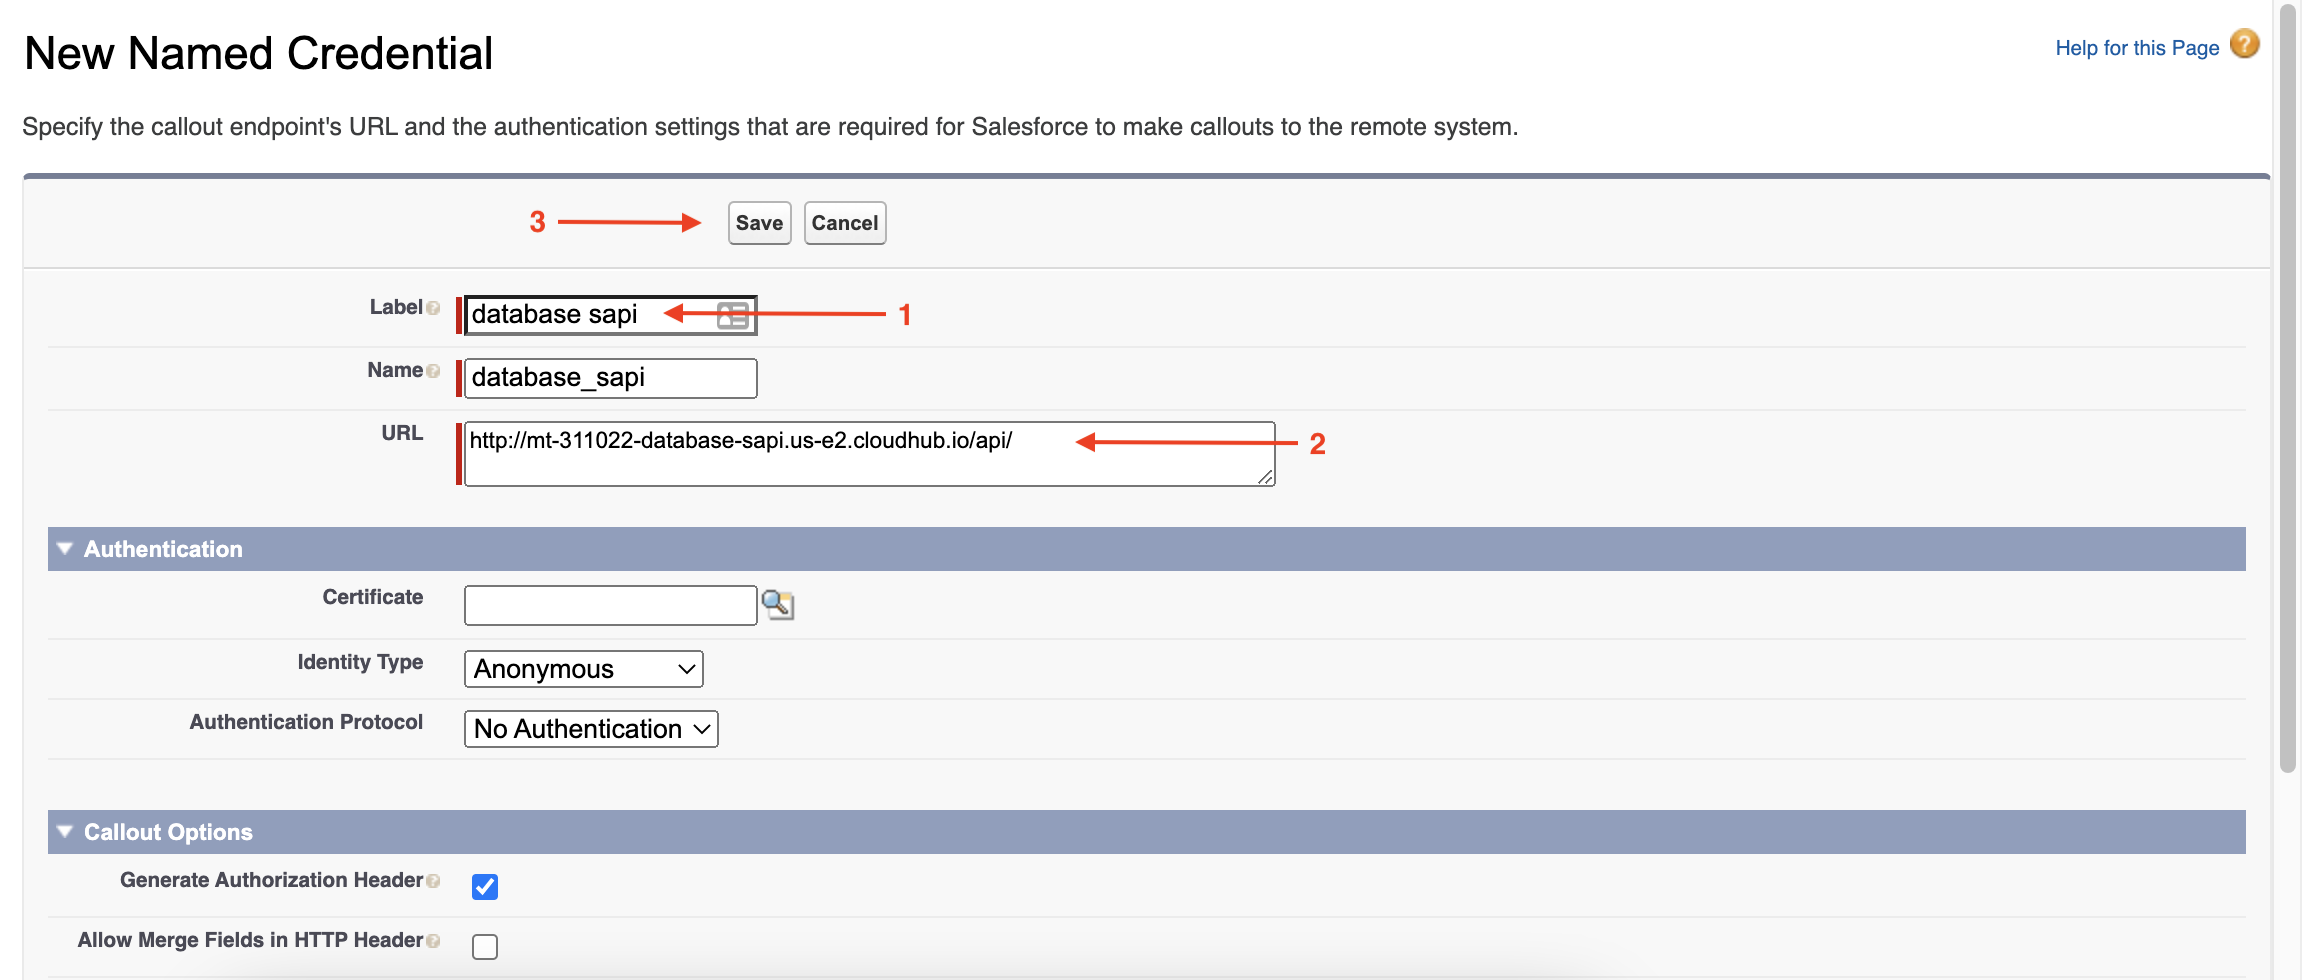
Enter the following details:
-
Name: database sapi
-
Label: database_sapi Auto-populated based on Name field
-
URL: Paste the URL copied from Runtime Manager, and add api/ to the end.
Remember to add the suffix "api/" to the URL copied from Runtime Manager.
-
-
Click "Save"
Step 4: Configure External Service in Salesforce
In this step, we will be configuring an external service that allows us to use the Mule Application we built in Module 1 from a Flow in Salesforce.
-
Enter External in the Quick Find search box.
-
Under Integrations, click External Services.
-
Click New External Service
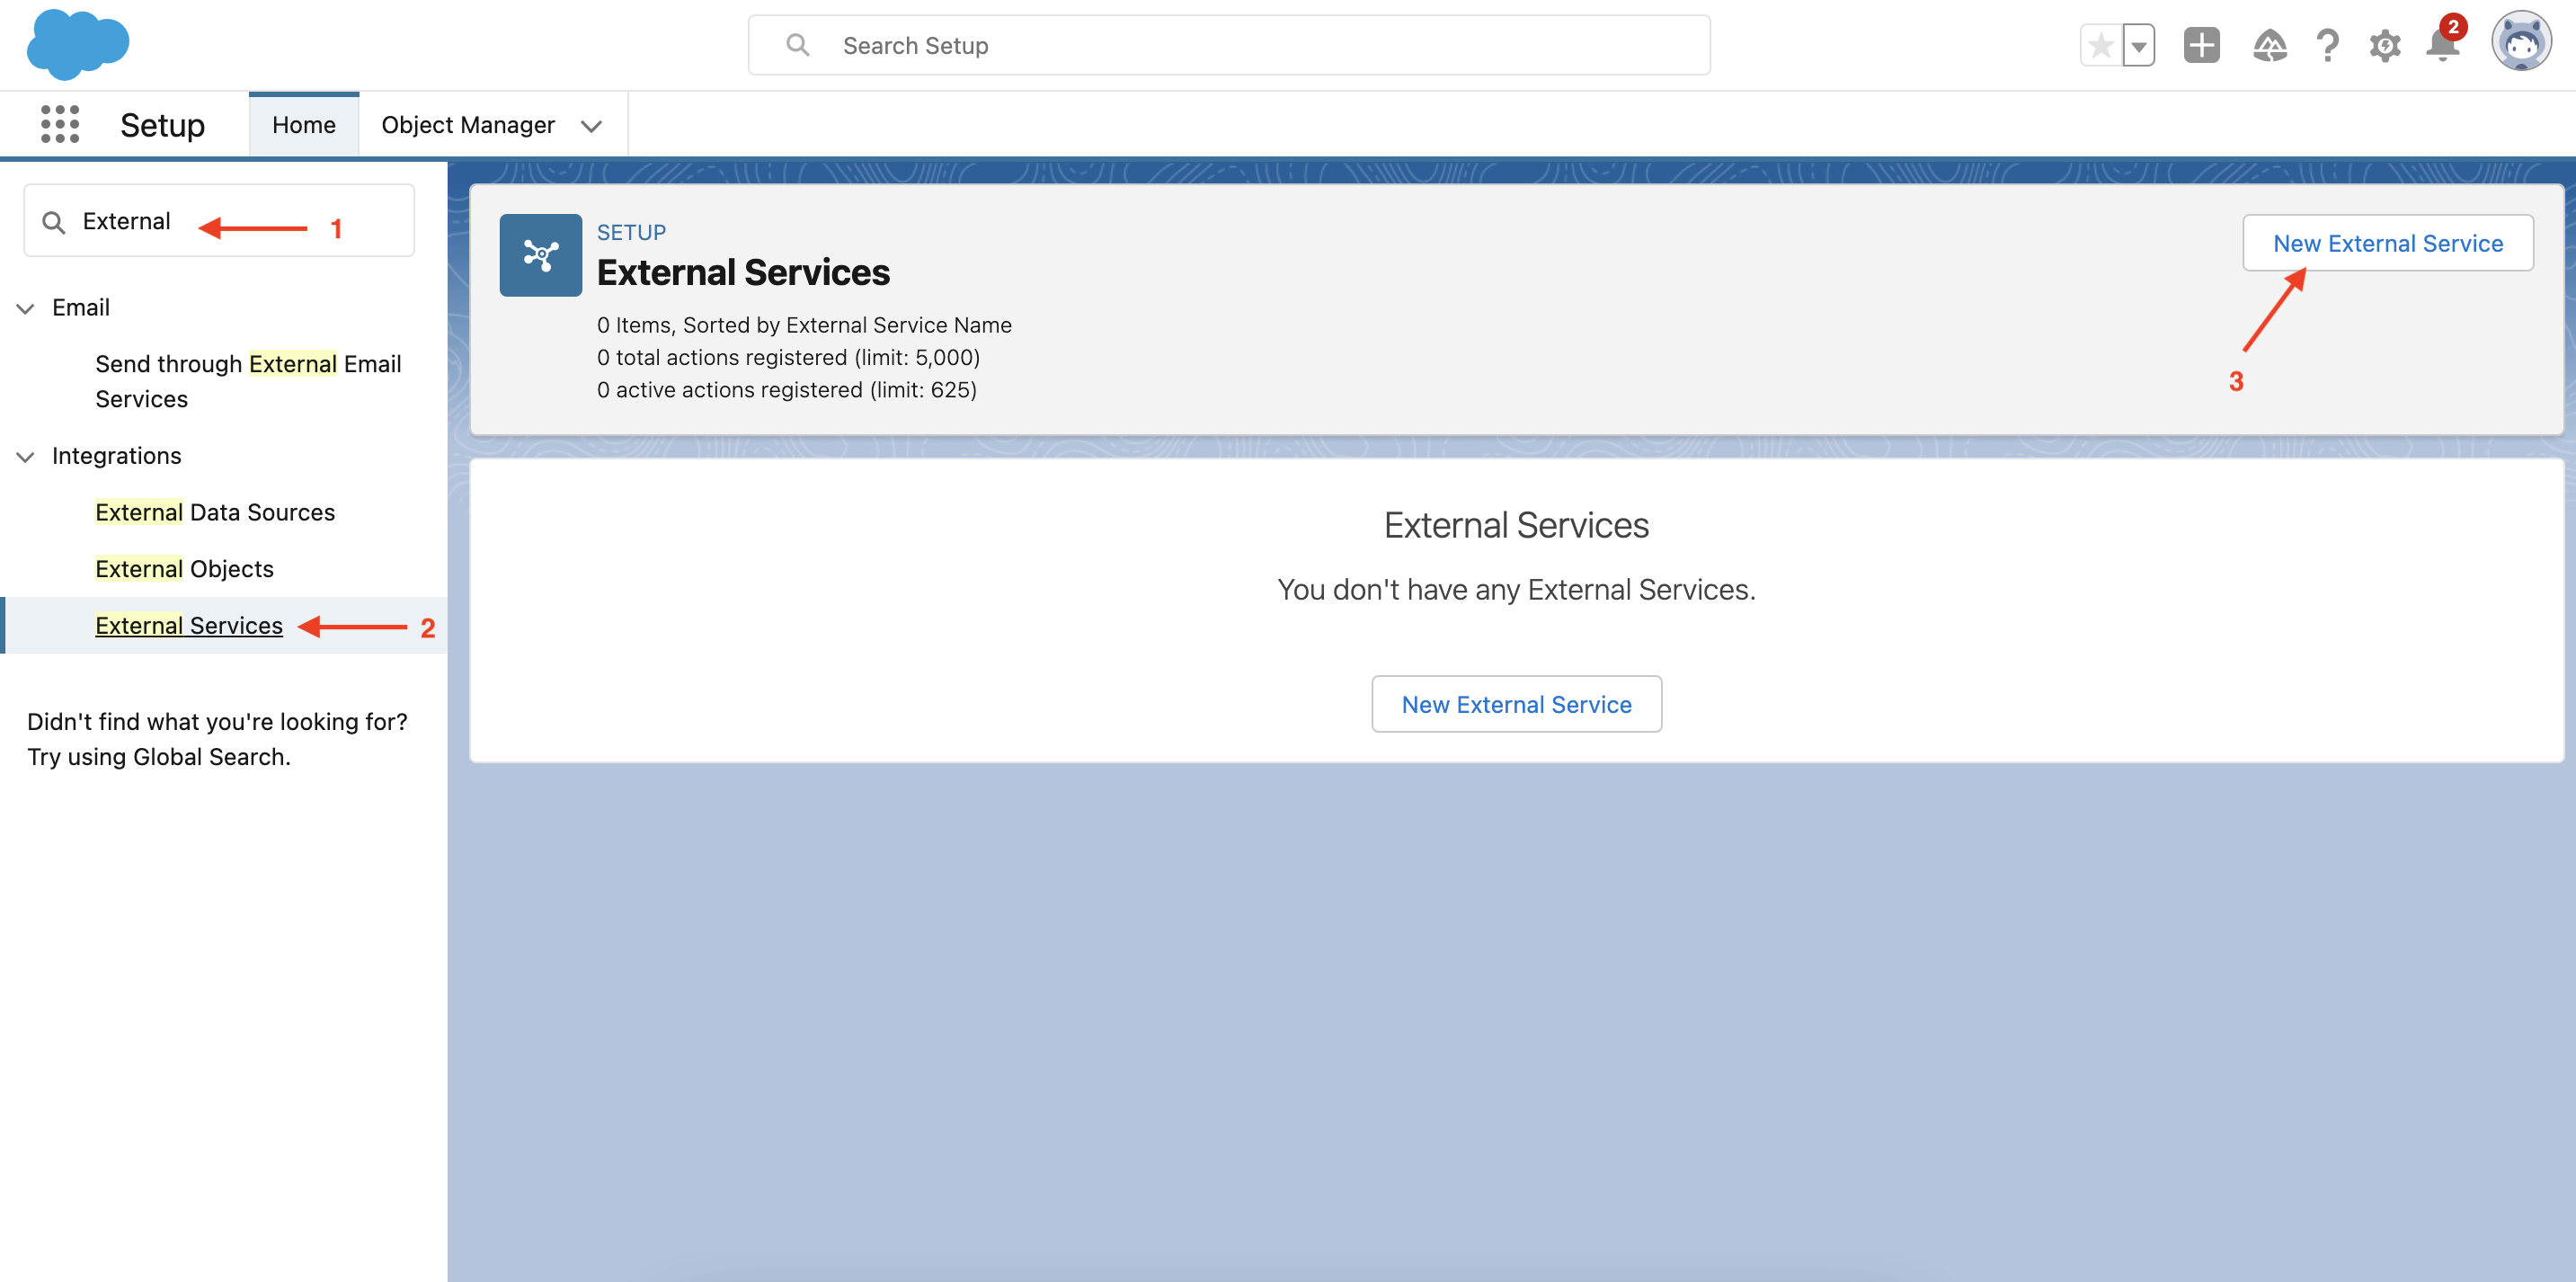
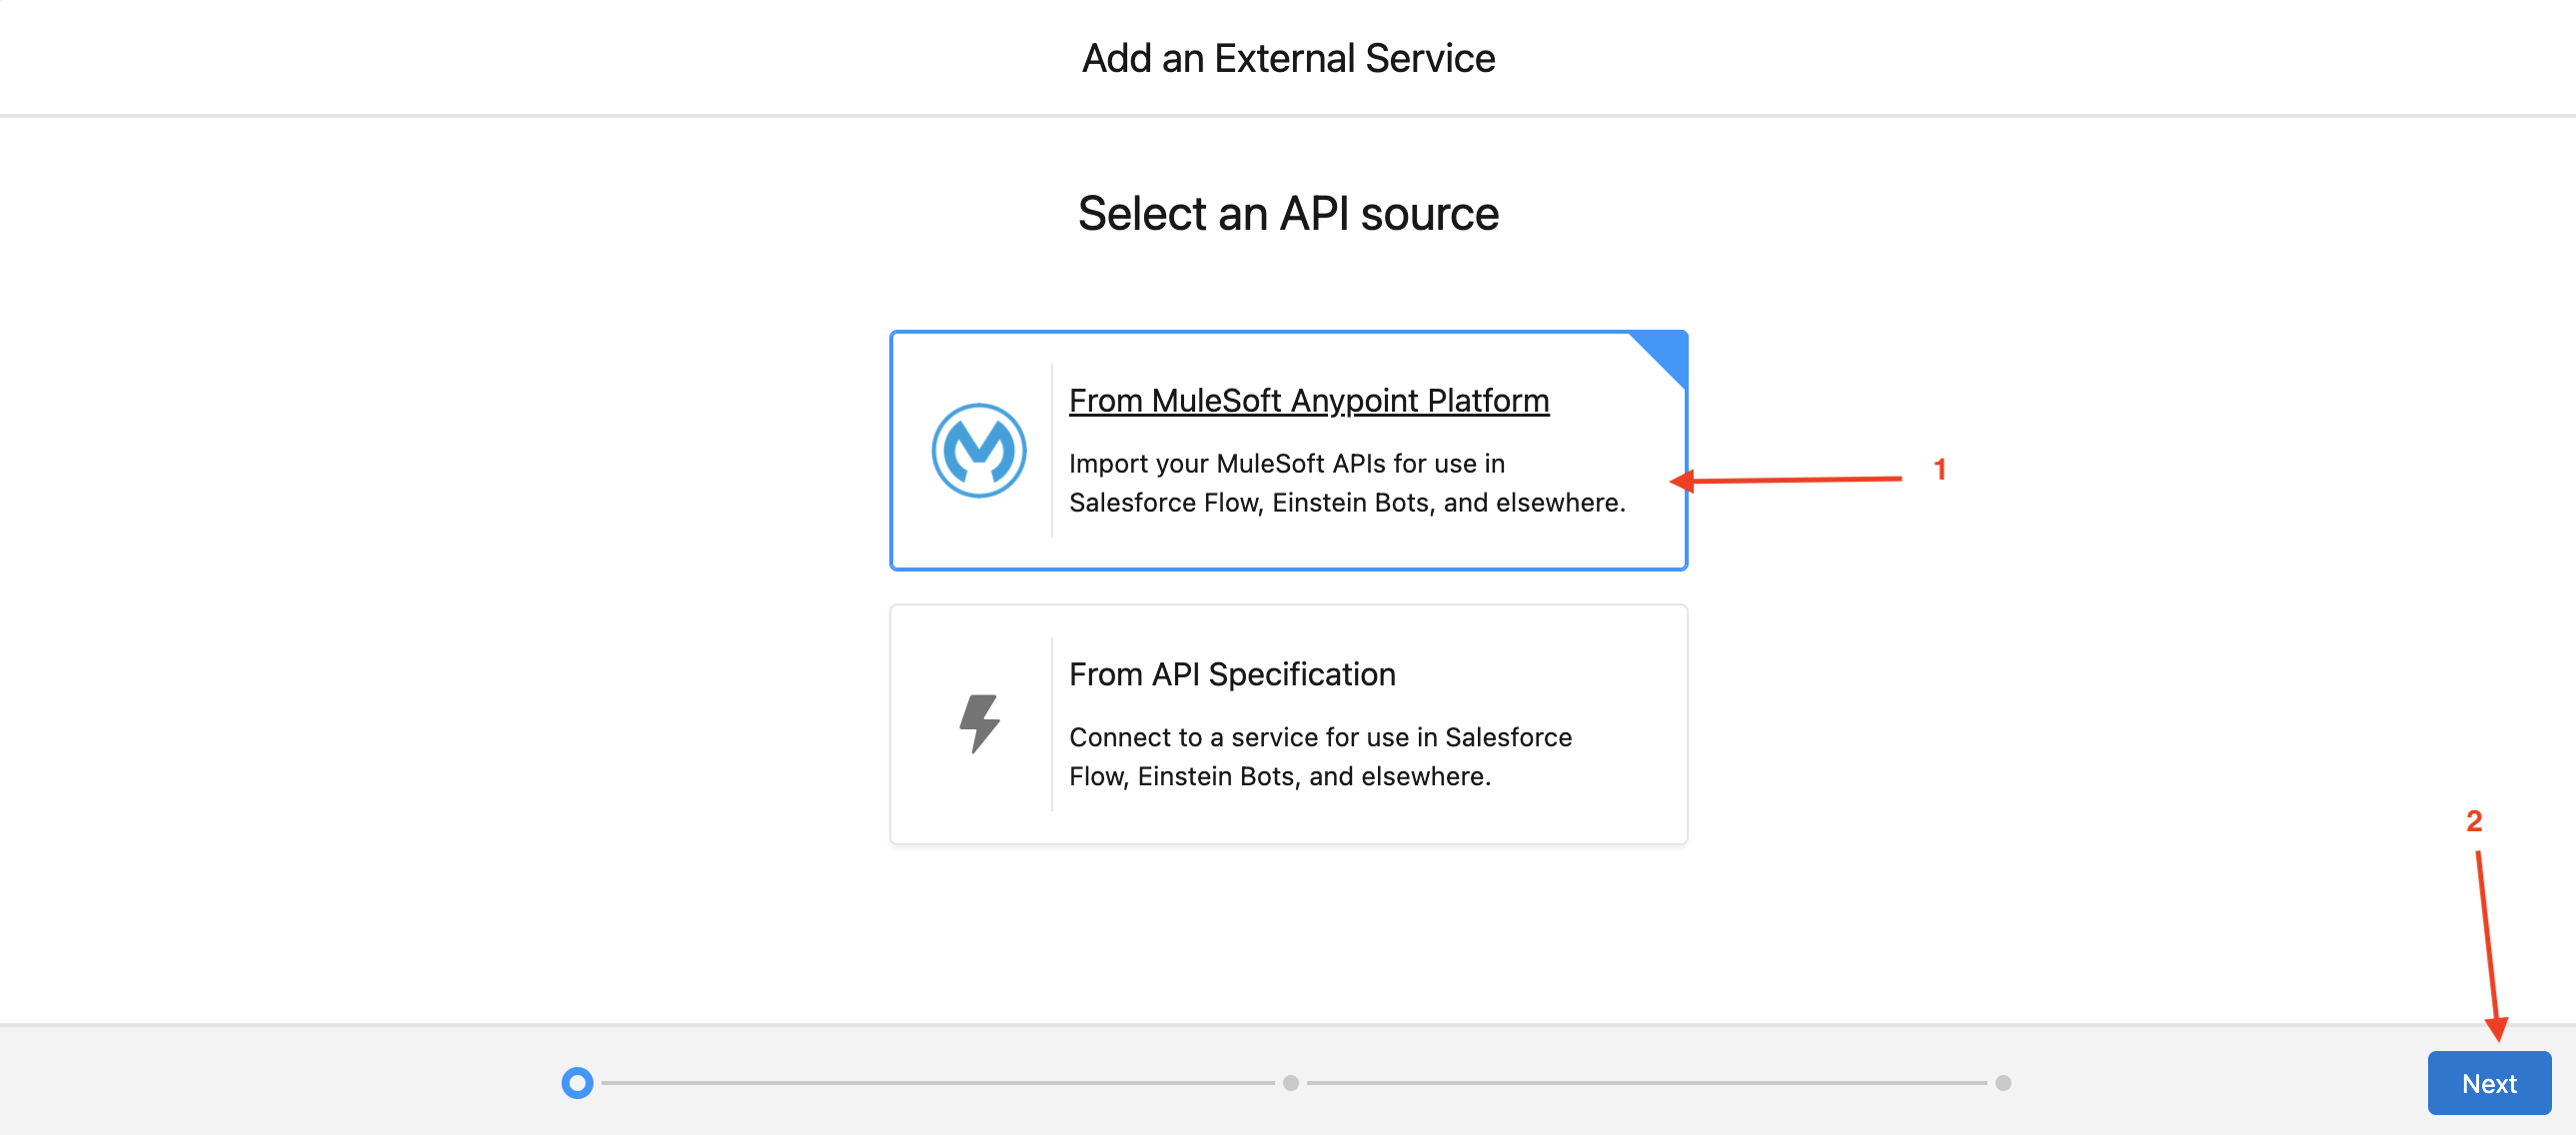
This triggers a screen flow to define a new external service. Enter the following details:
-
Select an API source: From MuleSoft Anypoint Platform and click Next
-
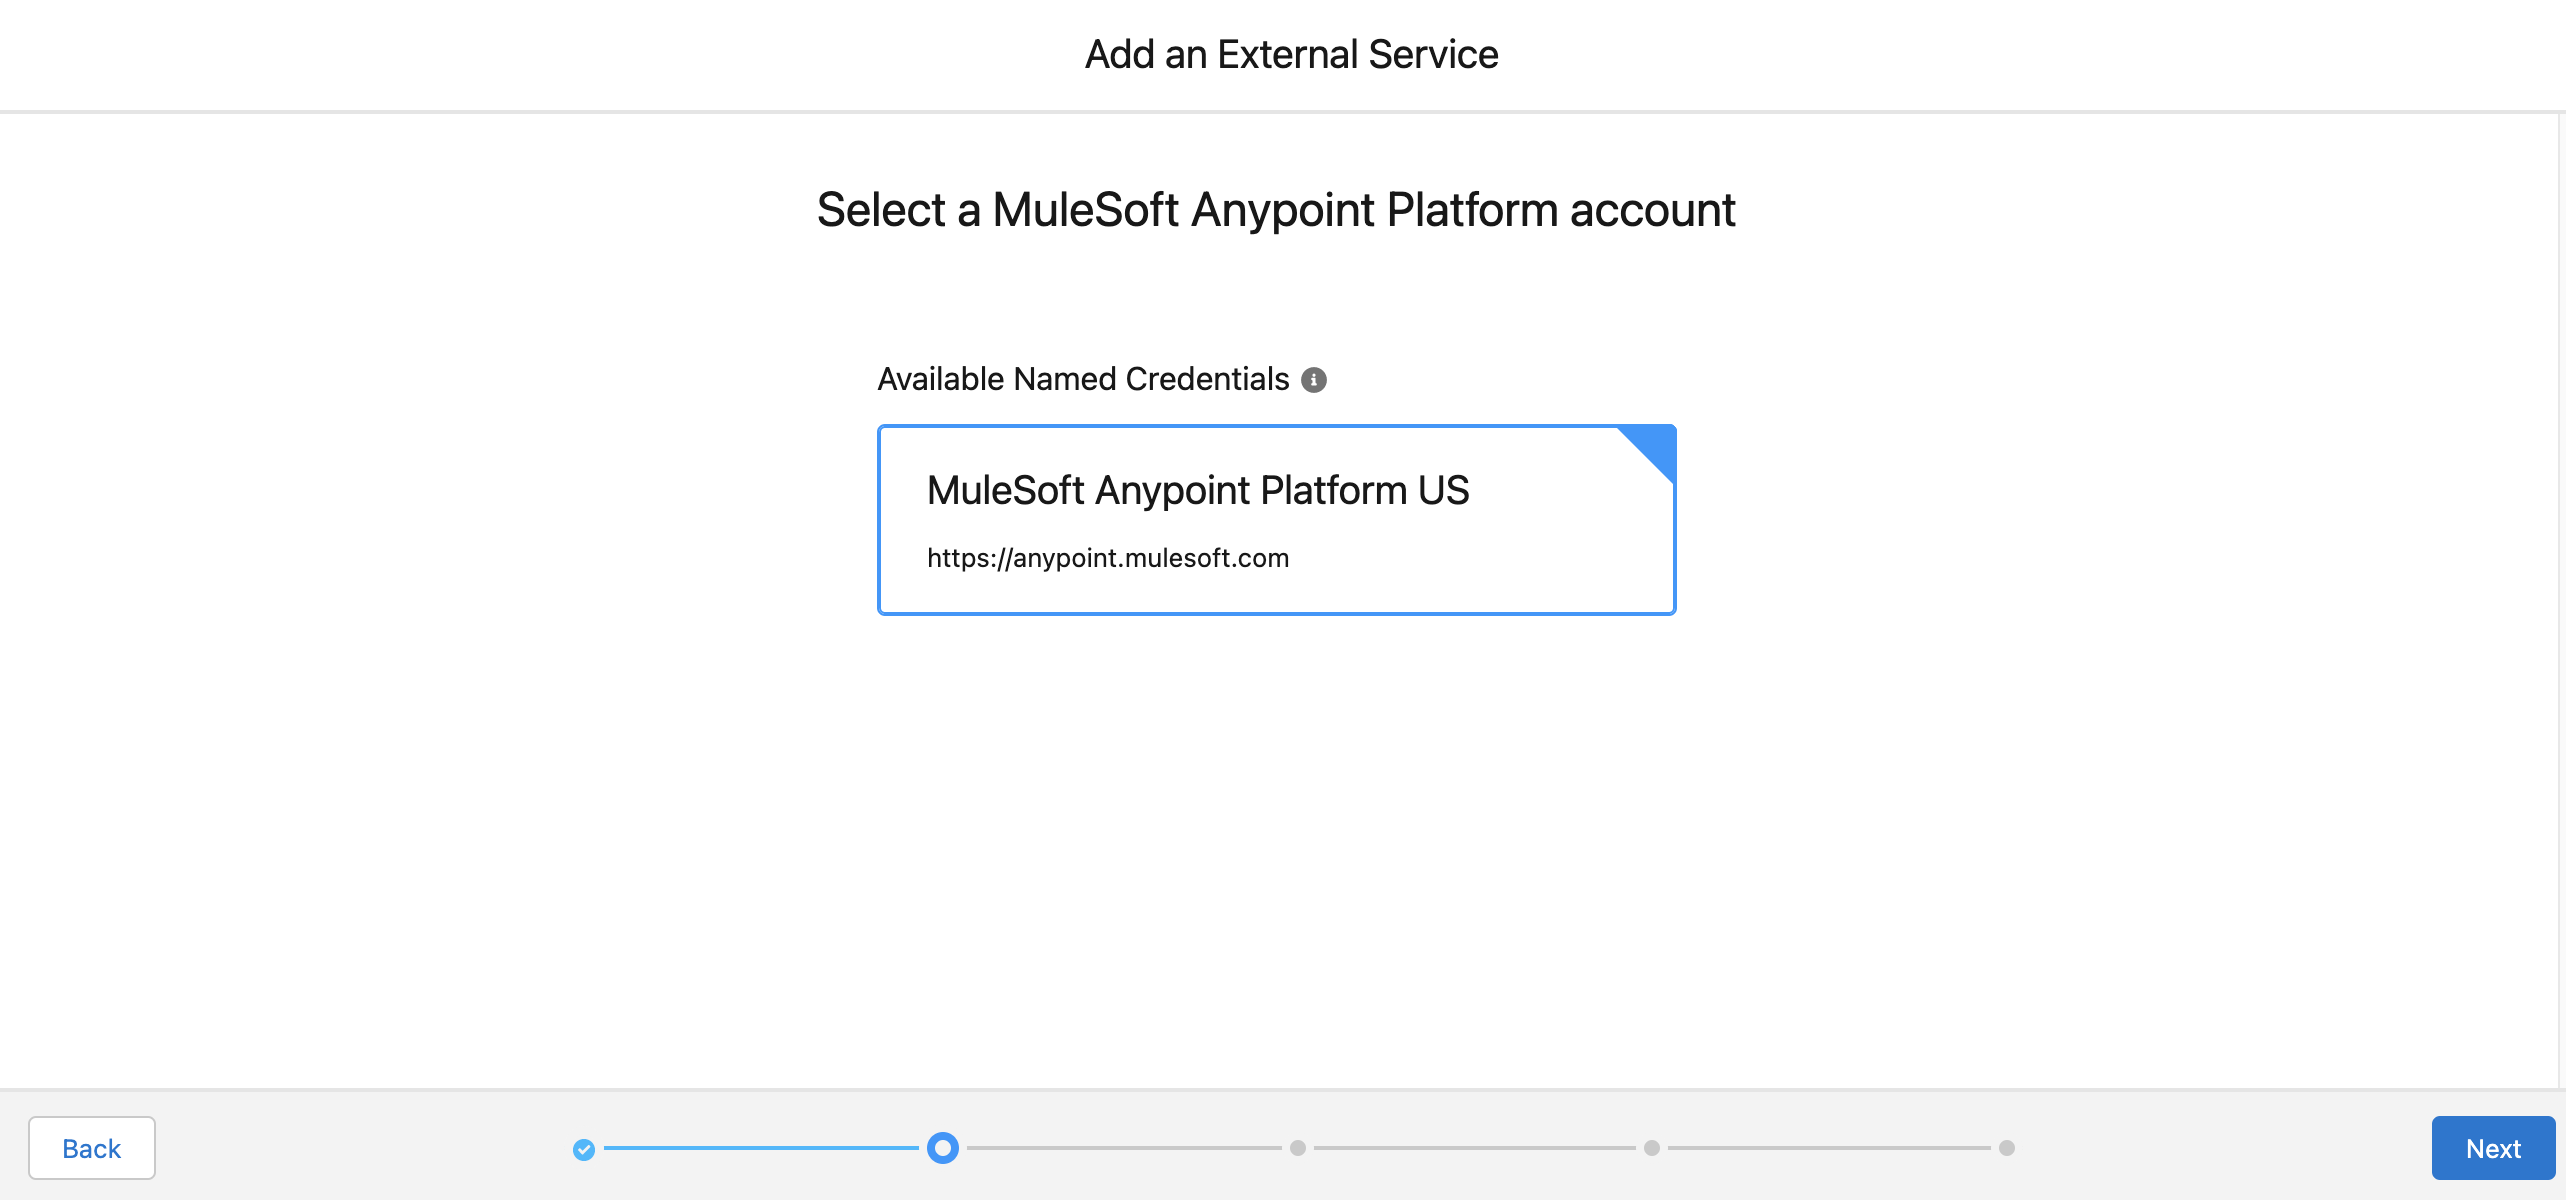
Select the Anypoint Platform Named Credential we created in the previous step and click Next.
Note: Only the first of the two Named Credentials we have configured should appear here.
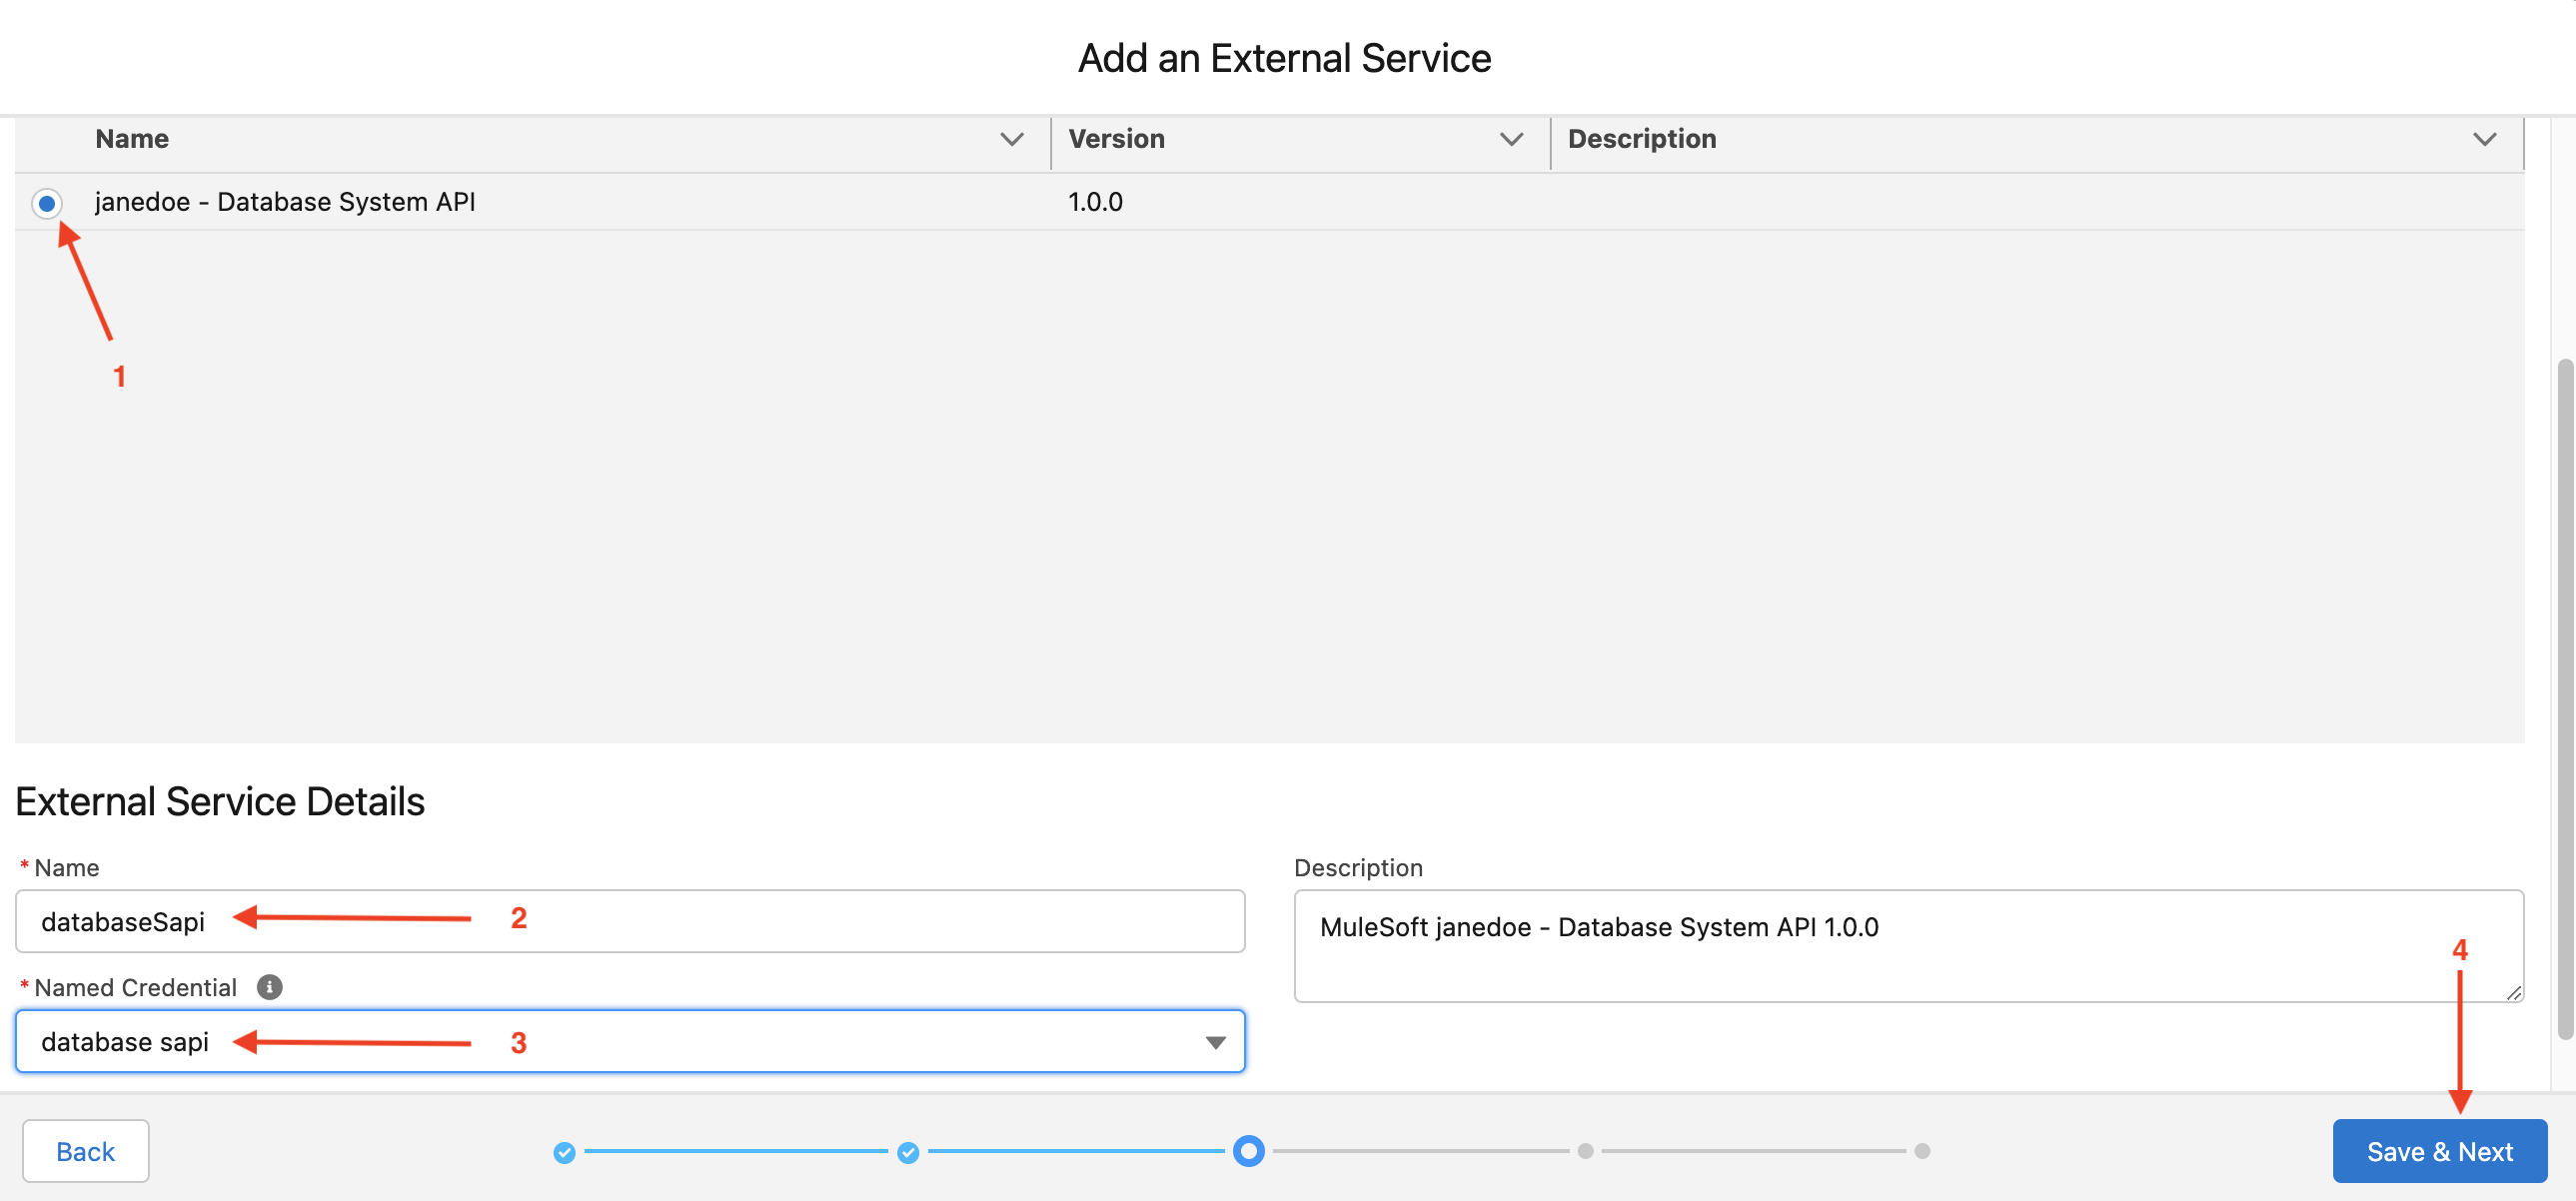
 At this stage, Salesforce makes a connection to the Anypoint Platform instance we connected in Step 1 and searches through Anypoint Exchange for available API specifications.
 -
Click the radio button next to the API we created in module 1.
-
Name: databaseSapi
Note: The name must only contain alphanumeric characters (no spaces or special characters).
This is the name that will be used when referencing the external service in Salesforce.
-
Named Credential: database sapi
-
-
Click Save & Next
-
Click the checkbox next to the Operation column heading then click Next.
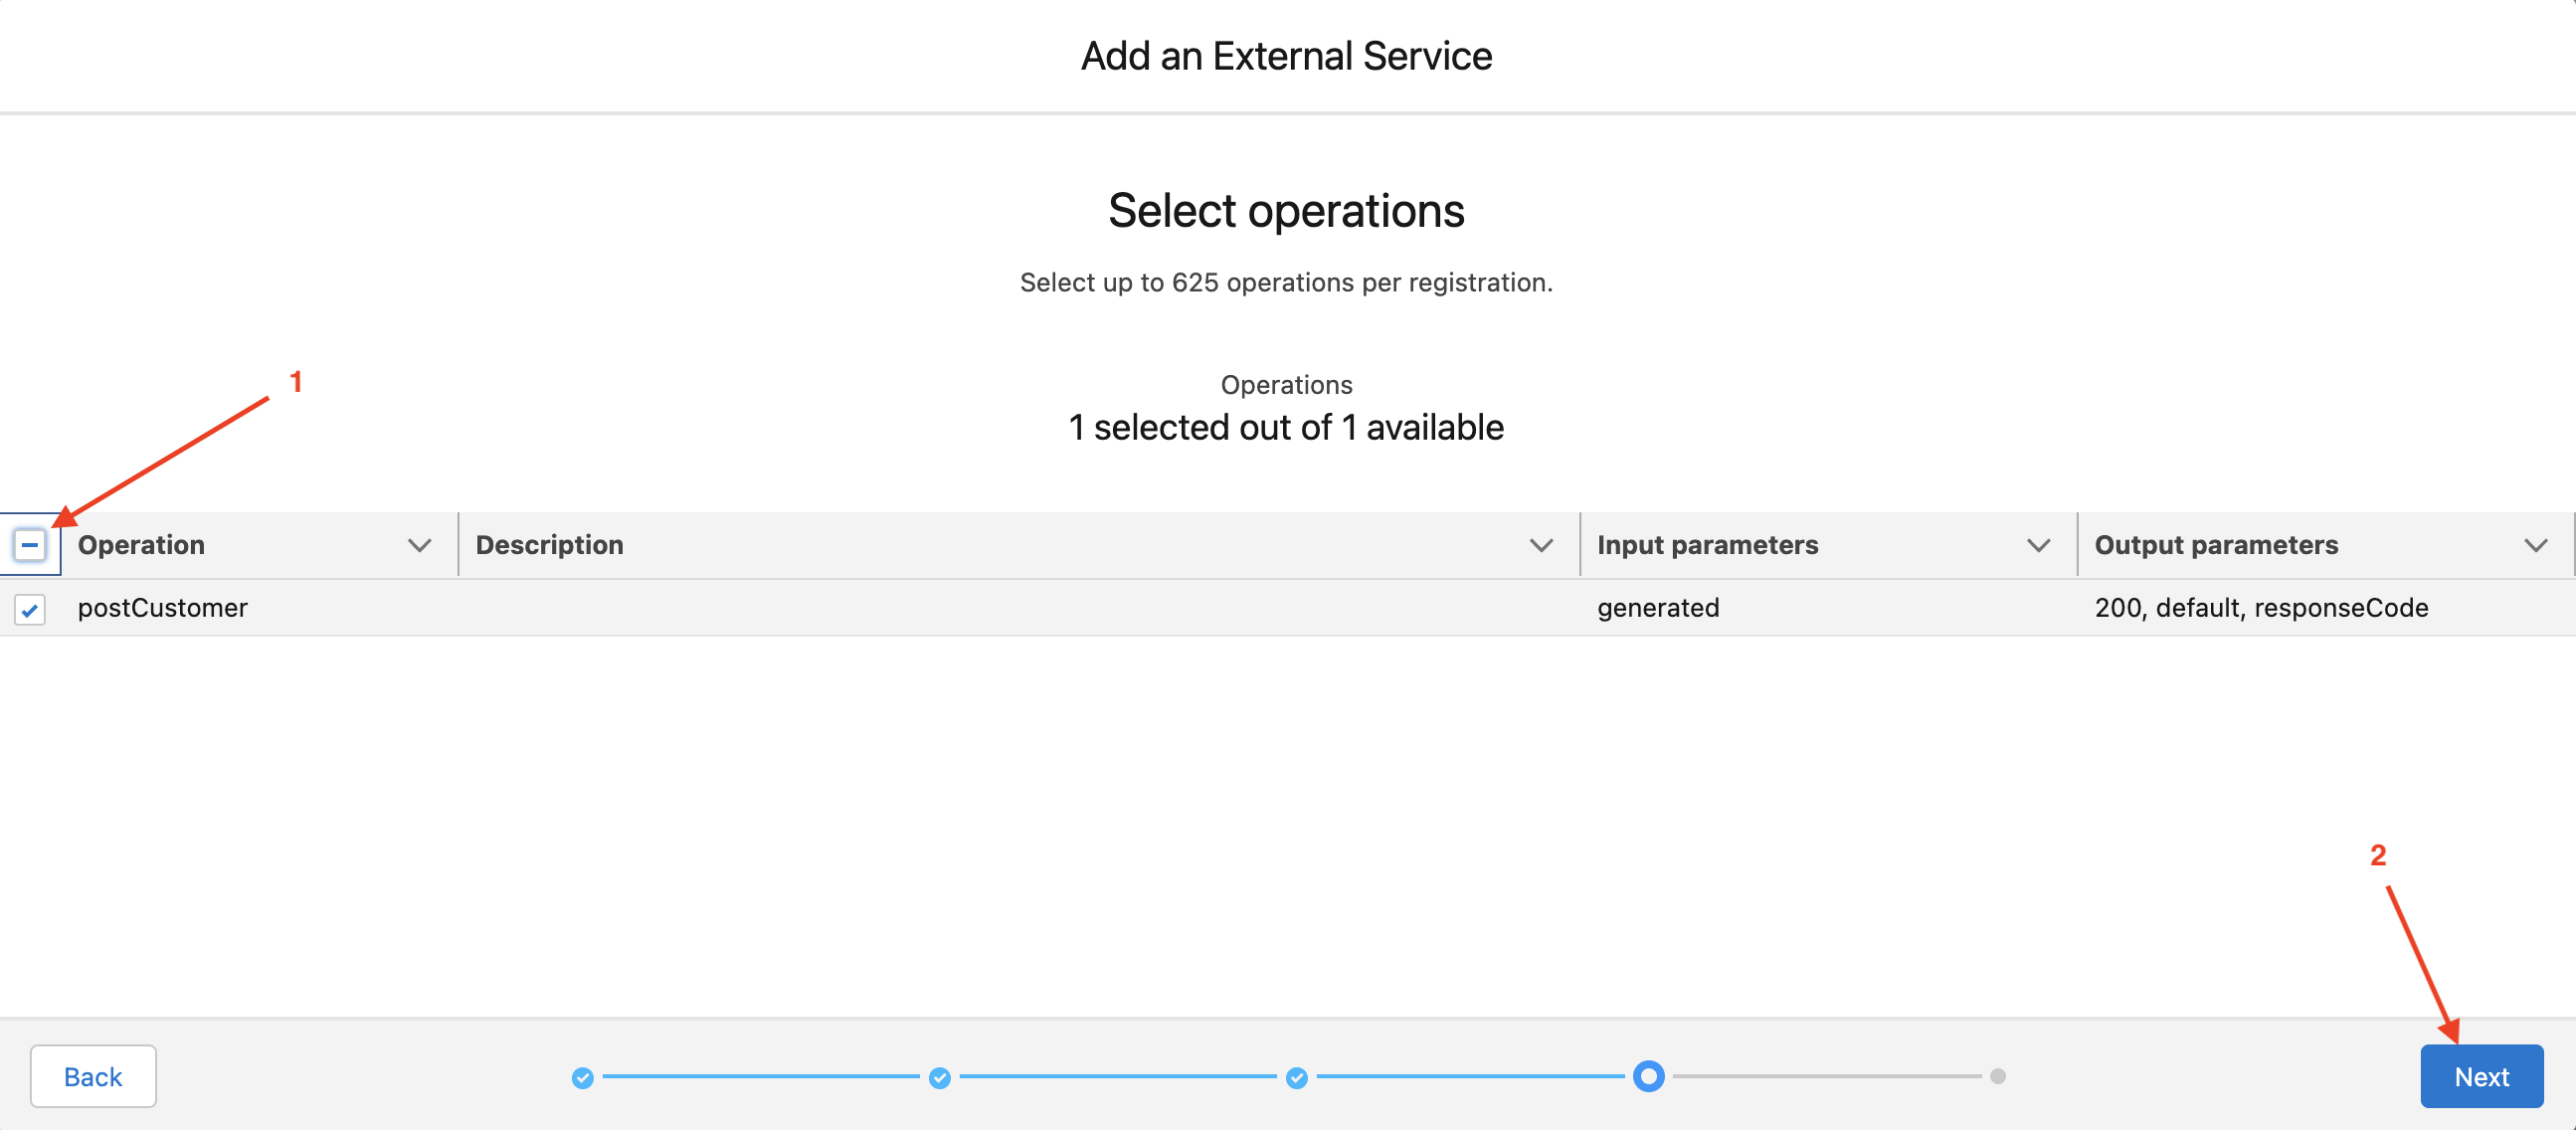 The checkbox in the column heading selects all available operations from the list. Individual operations can be selected by clicking the checkbox on the same row as the operation details if we only wanted to import specific operations.
The final page of this flow shows us an overview of the services being exposed. From here we are able to see details from the API specification including optional and required inputs, and expected responses and their datatypes.

-
Click Done to complete the external service definition.
Now that we have defined an external service based on the API specification we created and the application we deployed in module 1, we are now ready to call the MuleSoft API from Flow.
Summary
In this lab, you went through these steps to define an external service in Salesforce that allows you to make use of your MuleSoft APIs, directly in Salesforce, without writing any code at all.
In the next lab, you will build a flow that uses your Database API.
Please proceed to Lab 2