Lab 3: Deploy the Database System API
Now that we have successfully created our first mule application, let’s publish our mule application to CloudHub. CloudHub is MuleSoft’s is a fully managed, containerized managed cloud service, where you can deploy and run MuleSoft applications.
Deploy the Database System API
-
We are now ready to deploy our application. Right-click on the database-sapi project name at the top of the Package Explorer on the left-hand side of the screen and navigate down to Anypoint Platform and then across to Deploy to CloudHub.
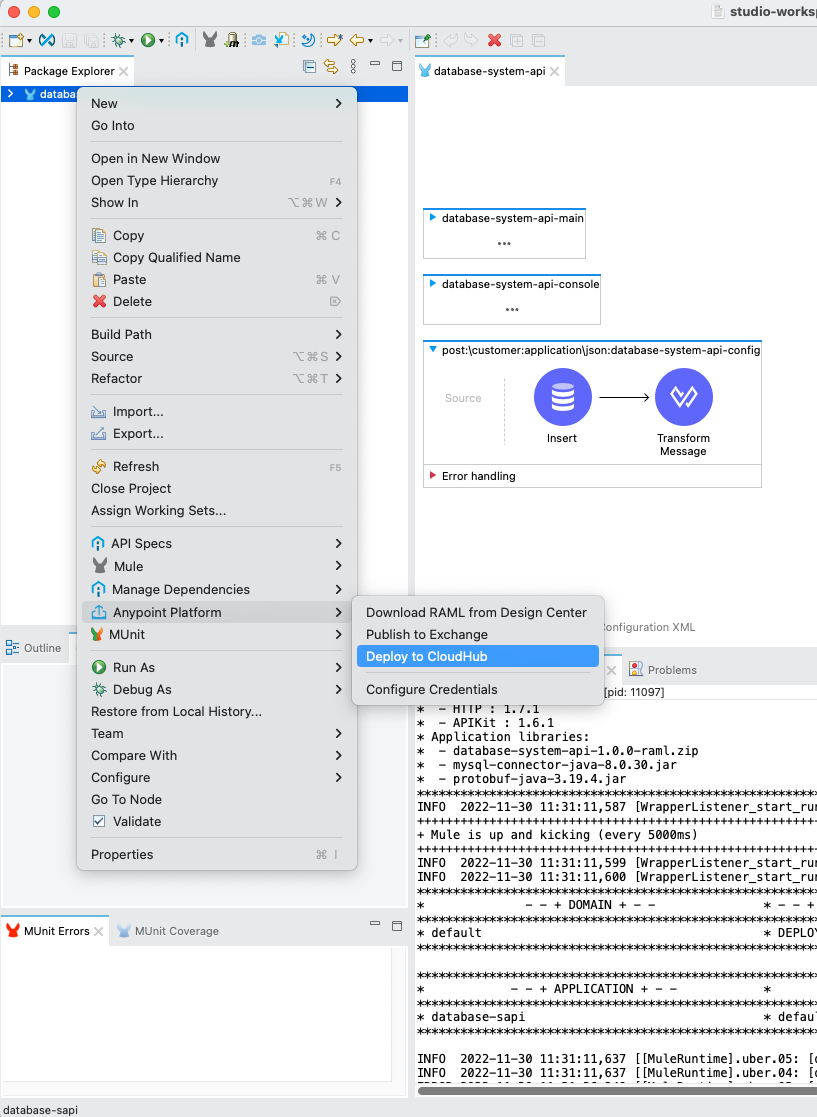
This capability allows developers to easily deploy their completed applications to CloudHub with one click!
-
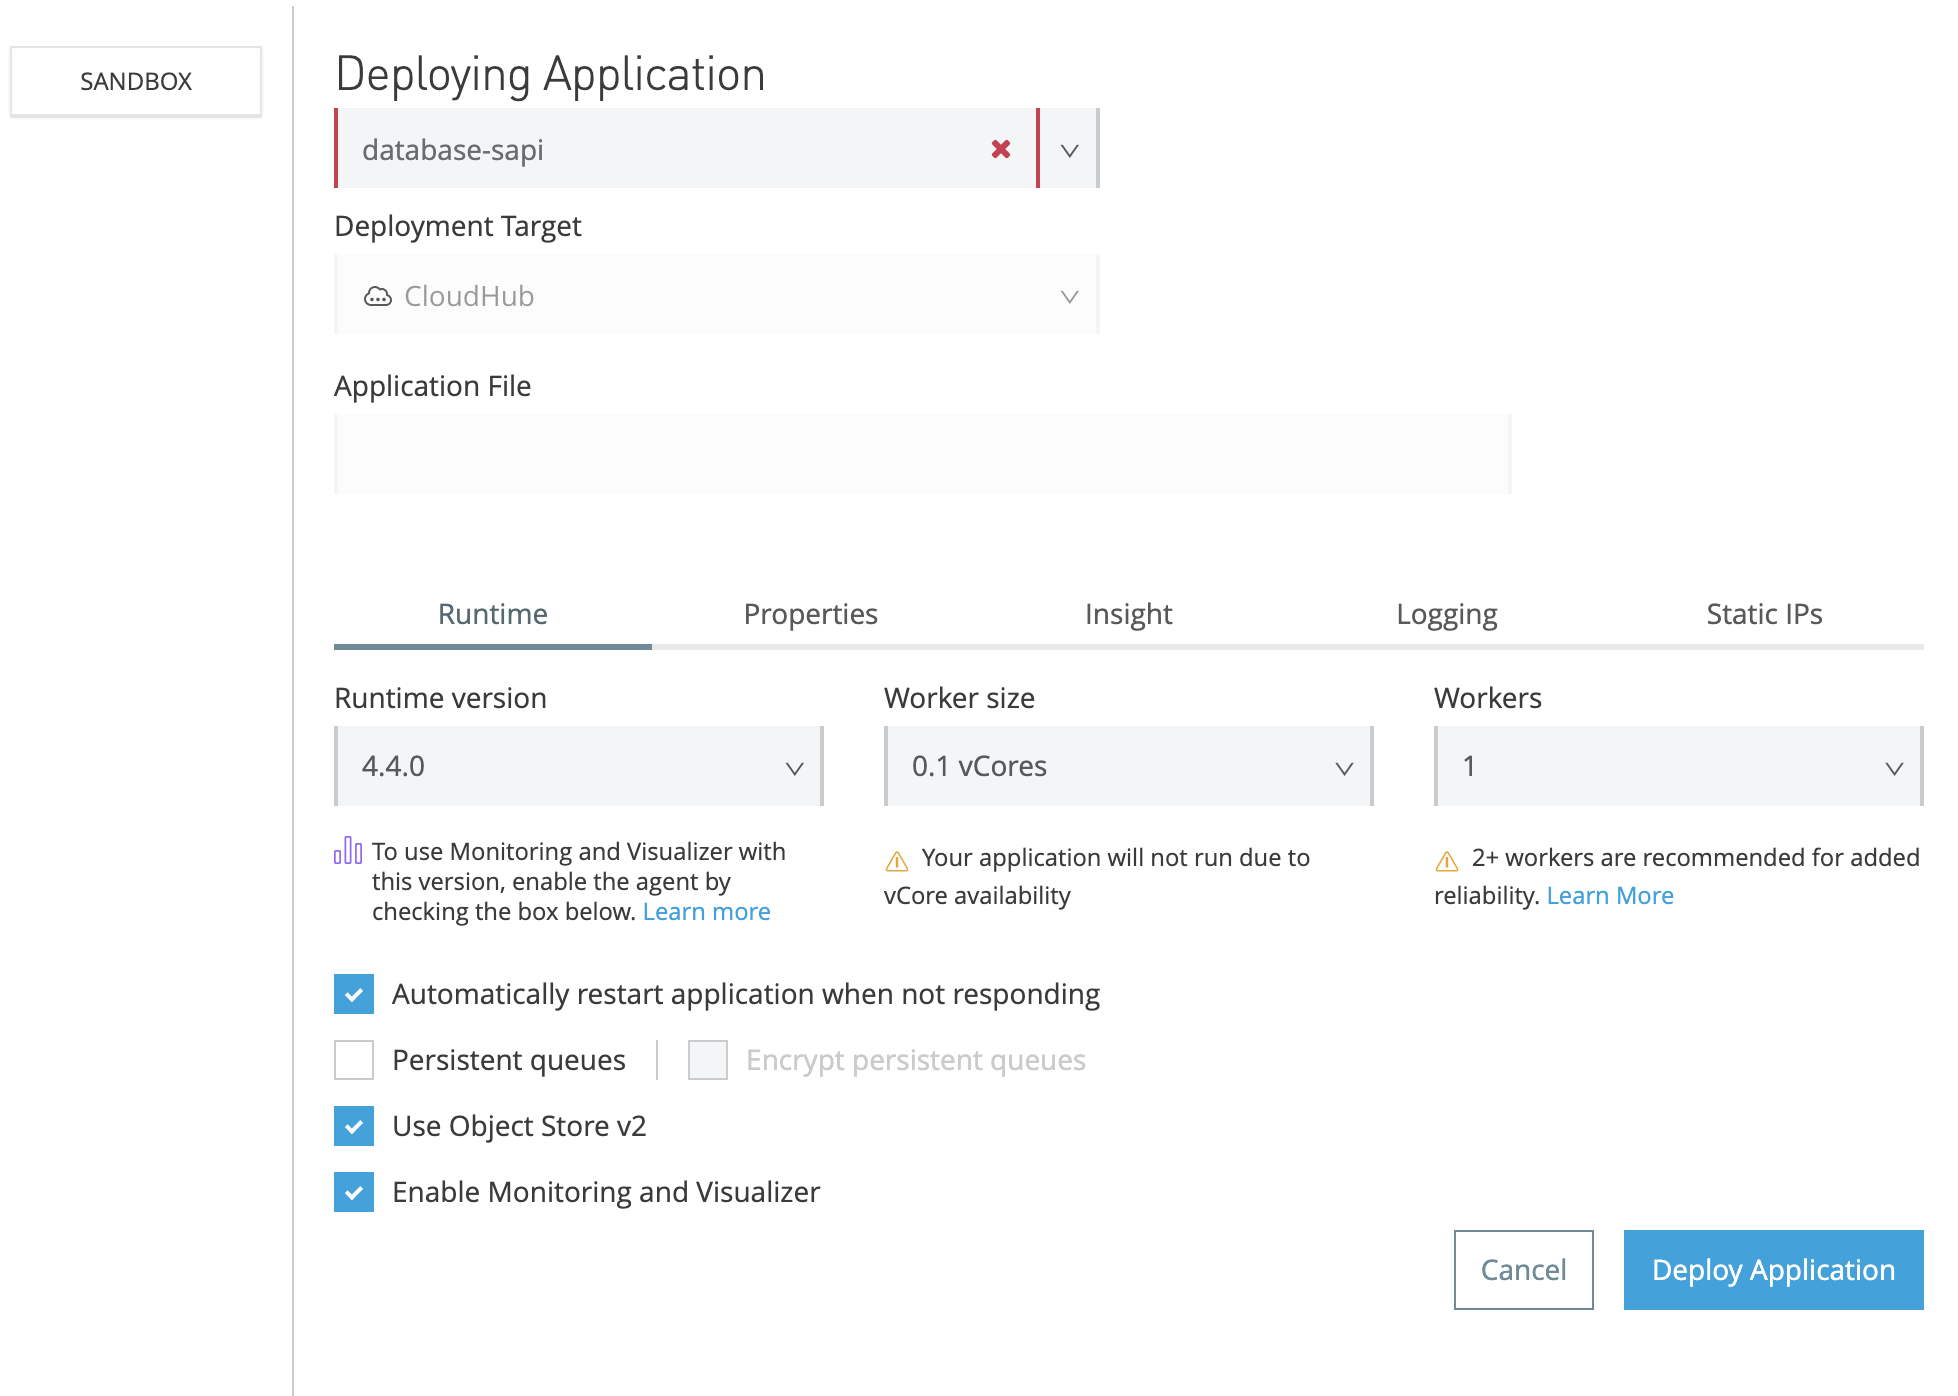
Expand the Deploying Application pop-up box so you can see all the properties by dragging out from the bottom-right corner.
Note:
-
Enter a unique application name by adding your initials and the date as a prefix to the default database*-sapi* application name.
-
If an Enable Multi-Factor Authentication pop-up box appears, click Not Now.
-
If you are asked to choose an Environment to deploy to, pick Sandbox.
-
-
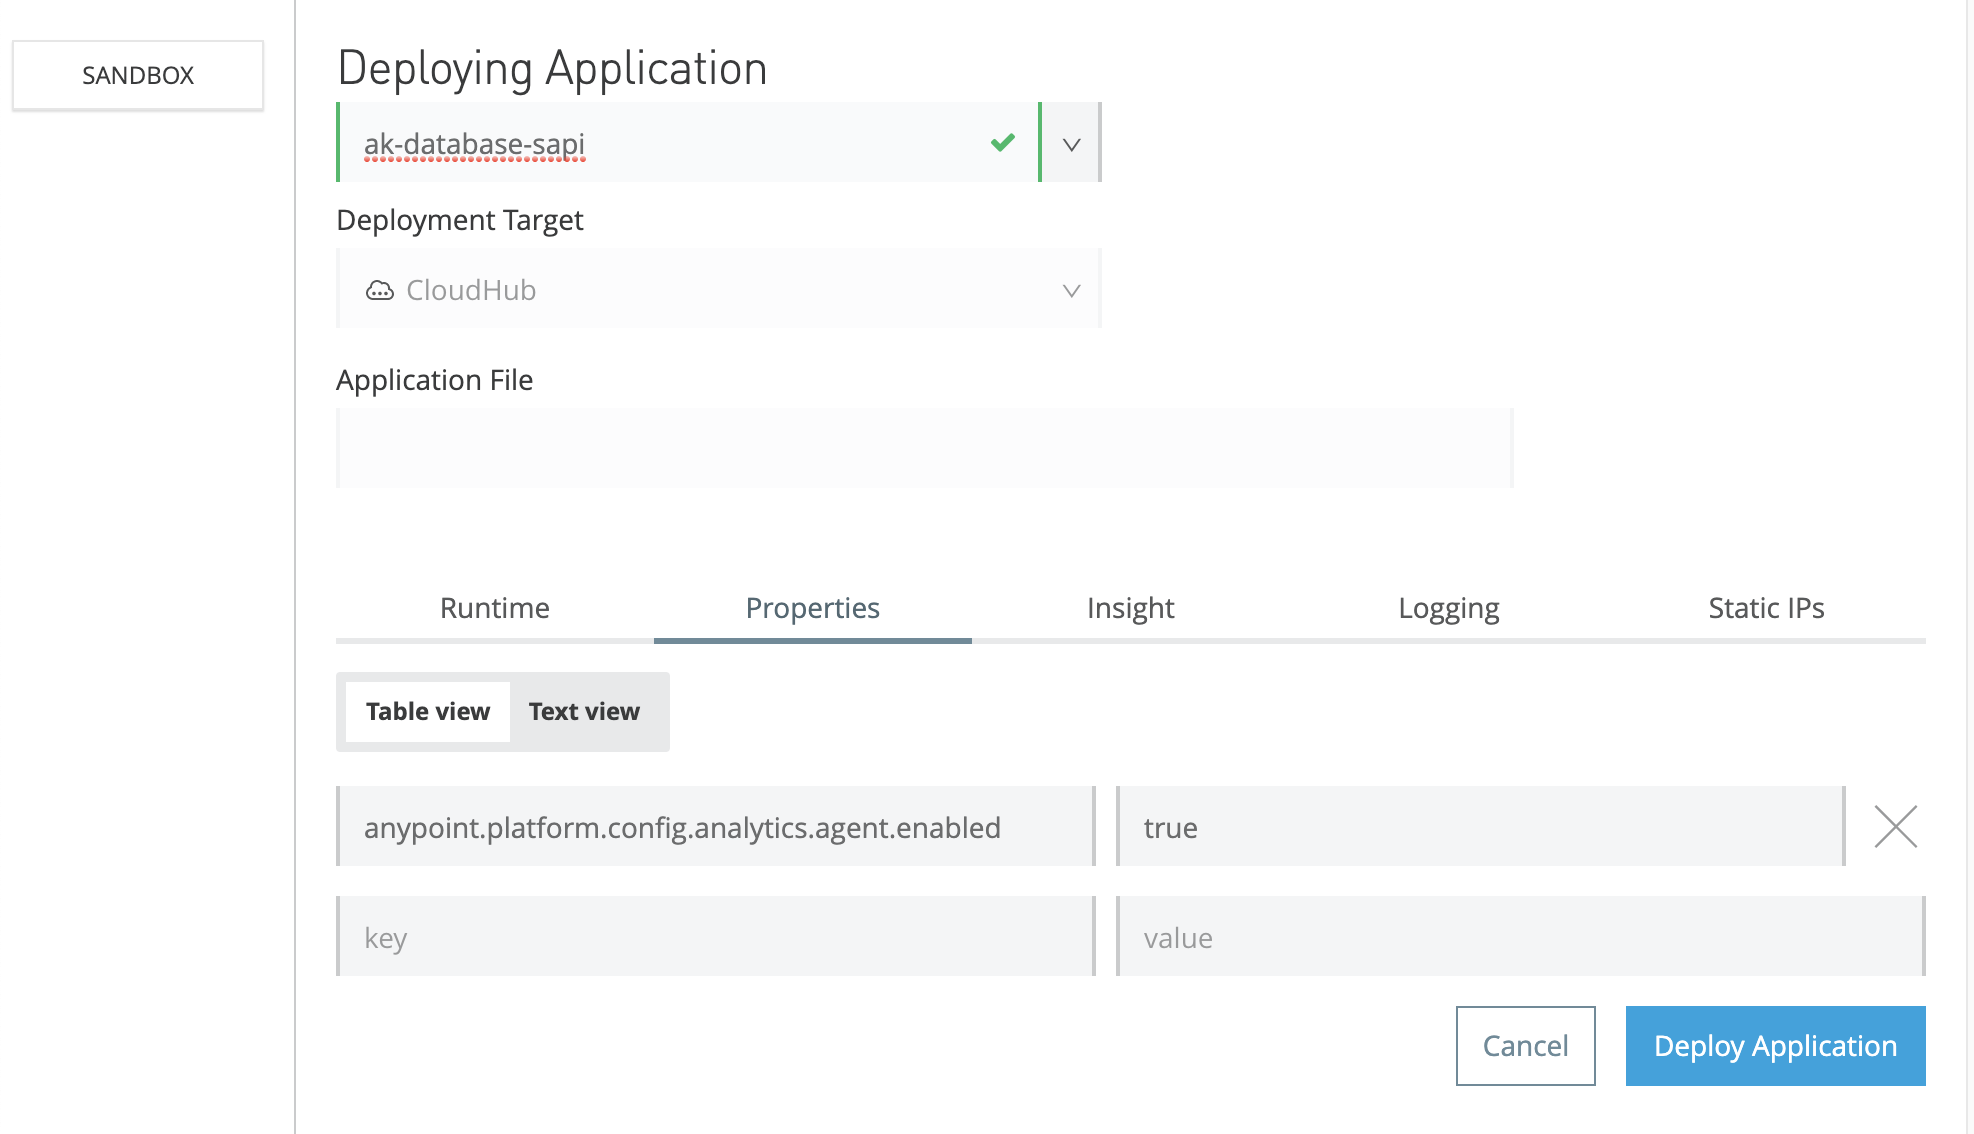
Switch to the Properties Tab and change the value for the Analytics Agent to true.
anypoint.platform.config.analytics.agent.enabled = true
-
Now click the Deploy Application button to deploy your application to CloudHub!
-
Leave the window open and wait a few minutes for the application to deploy. You will see a grey spinning circle next to the greyed out Deploy Application button whilst the application is being deployed.
-
Wait for the following pop-up window to appear and then click on Open in Browser.
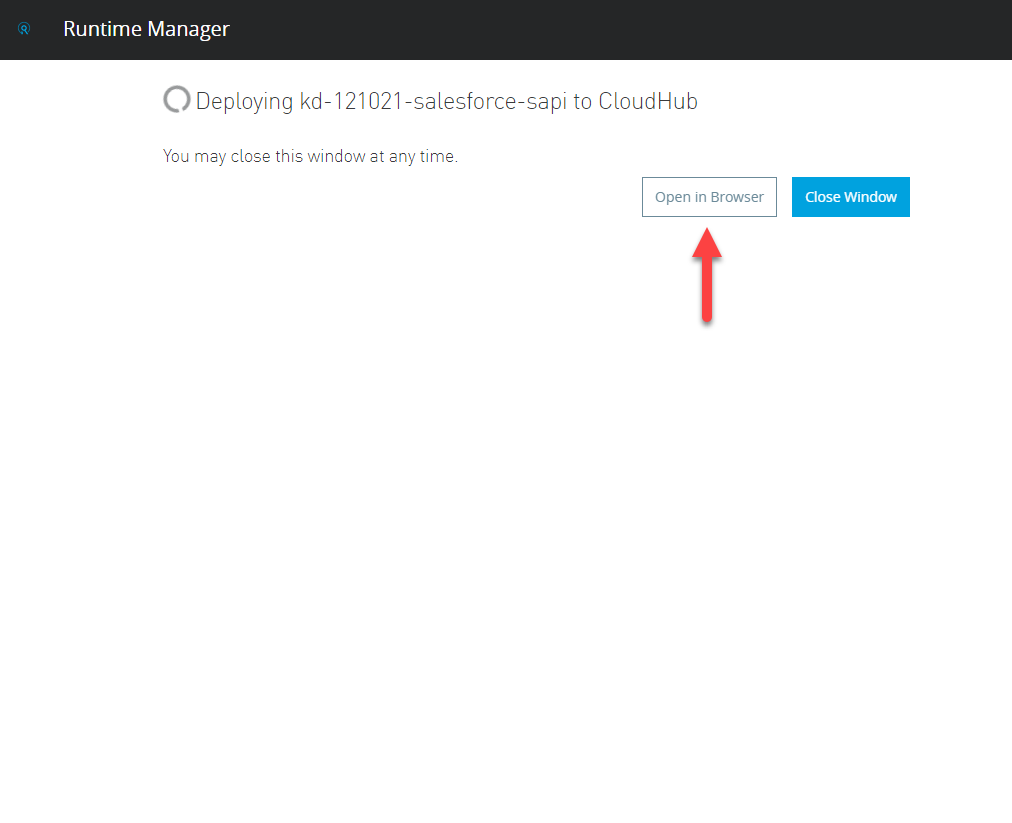
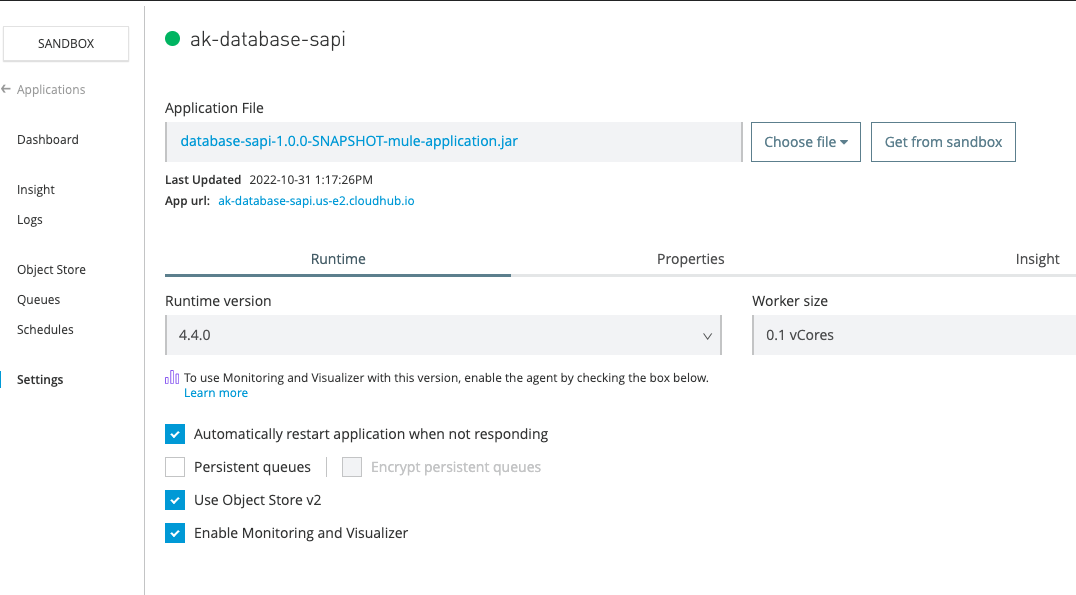
This will navigate to the application being deployed in Runtime Manager inside the Anypoint Platform. Note: If you accidentally closed the deployment window, you can navigate to the same screen inside the Anypoint Platform by navigating to Runtime Manager, then clicking on your <initials>-<date>-database-sapi. Your application will have successfully started when you see a green dot next to the application name. Click on Settings. *Copy the *App url for your deployed api. In this example, the domain name is: ak-database-sapi.us-e2.cloudhub.io
-
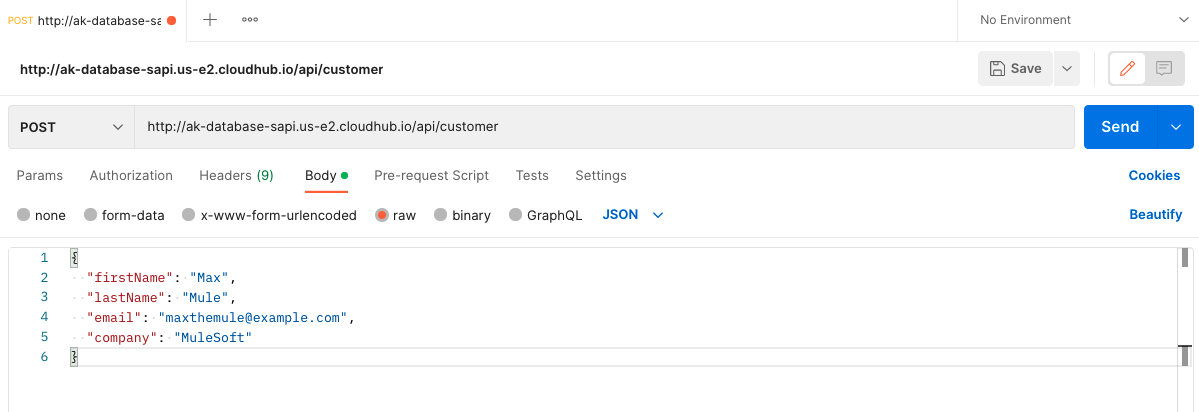
Test your api by opening postman and pasting: http://<domain_name>/api/customer in the address box e.g. http://ak-database-sapi.us-e2.cloudhub.io/api/customer Change the method to POST.
-
Click on Headers, and add this Header for JSON requests:
Content-Type: application/json
+ . Click on Body, select Raw and JSON and add the following example. Click Send.
{
  "firstName": "Max",
  "lastName": "Mule",
  "email": "maxthemule@example.com",
  "company": "MuleSoft"
}
You should see the id being returned being returned from your database instance as when we were locally testing the api in Anypoint Studio, however this time, anyone can access this data from the new publicly available endpoint.
Congratulations! You have successfully designed, built and deployed your first API!
Summary
In this lab, you completed the following steps:
In the next module, we will learn how to build a similar System API, but this time for Salesforce.
Please proceed to Lab 4